You can create a project from multiple places in Avaza. The simplest way is to click the ‘Projects’ to access the drop-down menu and click +icon next to ‘All Projects’. The ‘Add Project’ option can also be quickly accessed using the global quick-access button (the ![]() icon) from any page in Avaza.
icon) from any page in Avaza.
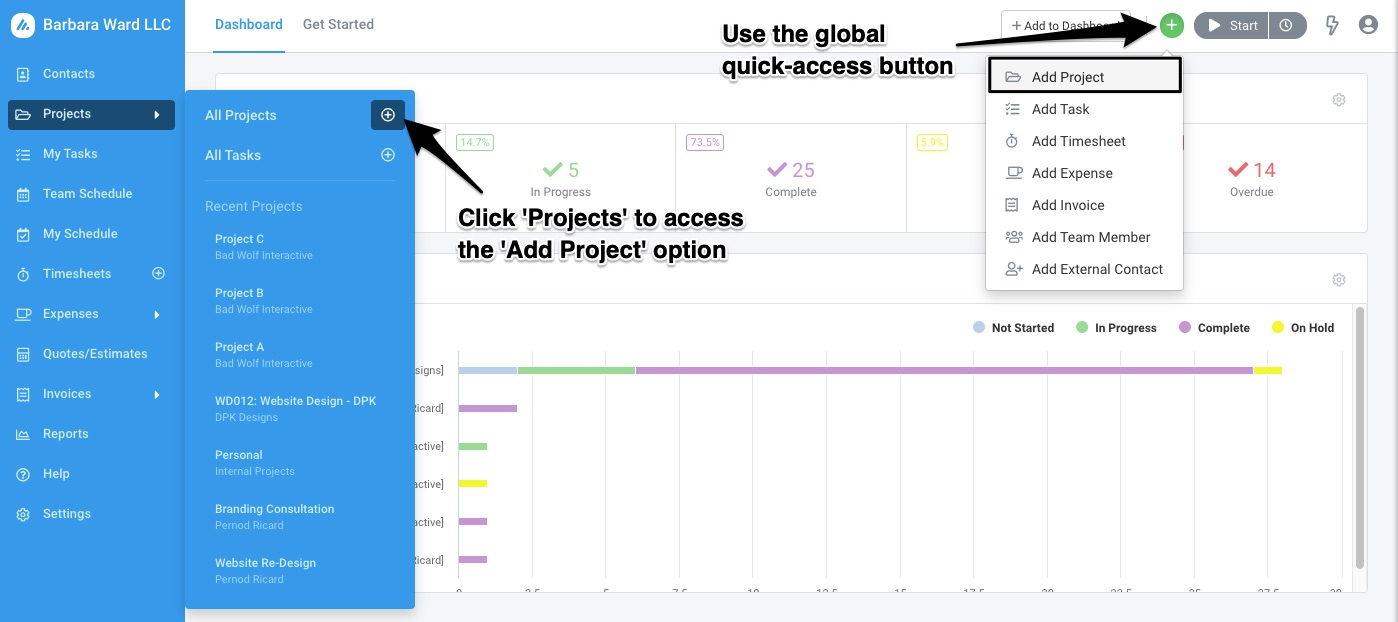 Figure: How to Quickly Add a New Project
Only users with the Admin or Project Manager roles will be able to create projects in Avaza.
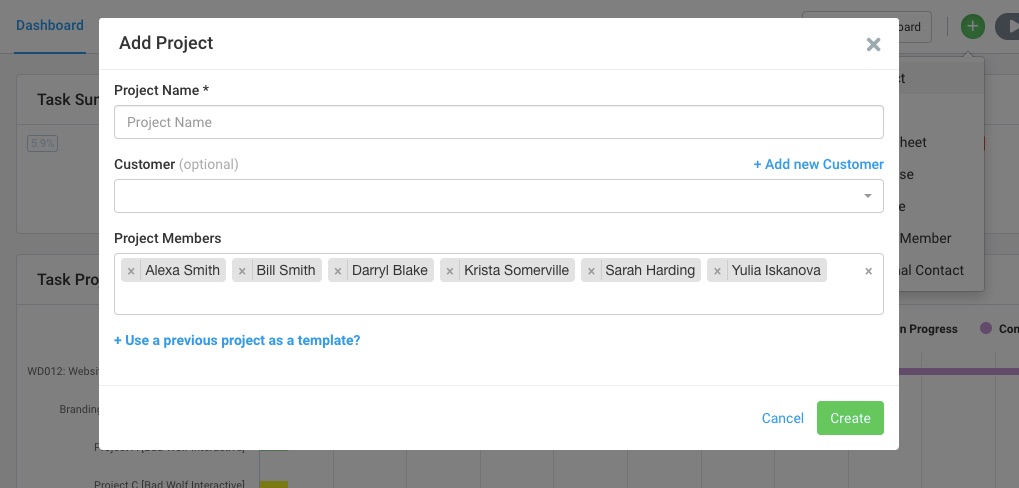 Figure: Add Project popup
On the displayed pop-up, you can enter the Project Title and, if required, assign it to a customer. The Customer field is optional, so for internal projects you may just leave this field empty. You can straightaway add the relevant project members or do it later via the Project Settings page. The ‘Project Members’ field automatically displays internal users that have the “Add to all new projects” option enabled on their contact card, which can be updated via the Contacts page.
The ‘Use a previous project as a template‘ option allows you to copy over tasks with relevant task-related information, project members, and settings from an existing project to the new one.
Once you hit ‘Create’, you will be redirected to your newly added project so you can continue building it.
Projects can also be created from an estimate or invoice with each line item being added as a task and some additional data items, such as budget and fixed amounts, carried over into the project.
Read our Getting Started with Projects Guide for more details.