Avaza’s Auto Charge feature simplifies payment processes by automatically charging customers’ saved payment methods for invoices. Follow this guide to enable and use Auto Charge for your business.
1. Enable Auto Charge for Your Account
To activate Auto Charge, follow these steps:
- Navigate to Settings > Online Payments.
- Add your Stripe account as a payment provider if it’s not already added.
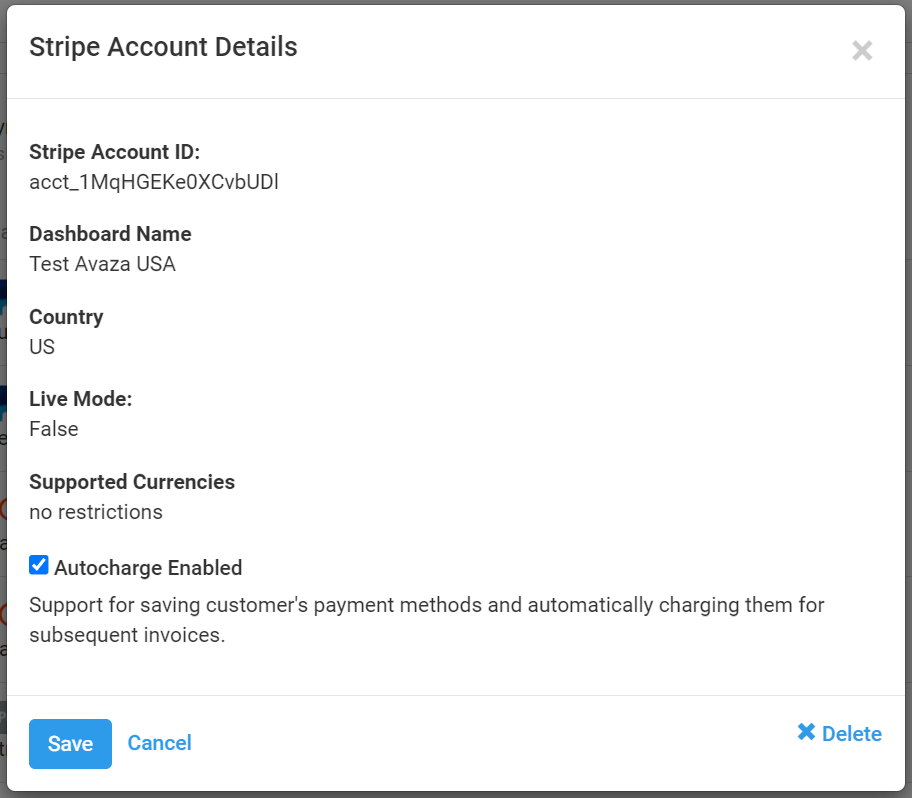
- Open the Stripe Account Details, check the “Autocharge Enabled” checkbox, and click Save.
Note: Auto Charge is only available for paid accounts. Once enabled, this feature will be active for the Stripe payment provider.
2. Save Payment Methods for Customers
After enabling Auto Charge on Stripe, request your customers to save their payment method details by following these steps:

- When customers pay invoices online via the Invoice Web View, they’ll see a new checkbox on the “Pay Now” popup labeled “Save payment details for future purchases”.
- If customers check this option while making a payment, their payment method details will be securely saved with Stripe and available for future transactions.
3. Process One-Off Invoices
To use saved payment methods for one-off invoices, follow these steps:

- Open the Invoice Details page for any unpaid or partially paid invoice belonging to a customer with a saved payment method.
- You’ll see an info message indicating that this customer has a saved payment method.
- Click the Record Payment button to open the payment popup.
- In the Payment Source dropdown, select Stripe.
- Choose the “Initiate Online Payment with Saved Payment Method” radio button.
- From the Saved Payment Method dropdown, select the payment method to charge.
- Click Save Payment.
Payment Outcomes:
- Immediate Payments: For debit/credit cards, a payment record will be created instantly.
- Delayed Payments: For methods like bank charges, an “In Progress” payment record will be visible.
- Failed Payments: No payment record is created, but an activity log will indicate the failure in the invoice and user activity area.
4. Enable Auto Payments for Recurring or Retainer Invoices
Saved payment methods can also be used for automatic payments on recurring and retainer invoices. Here’s how:

- Open an existing Recurring or Retainer profile or create a new one for a customer with saved payment methods.
- On the Create or Edit page, check the Enable Autocharge checkbox.
- Select a saved payment method from the Autocharge Payment Method dropdown.
- Save the profile.
Payment Processing:
- For newly created invoices under this profile, payment collection will be attempted automatically using the saved method.
- Successful Payments: A payment record will be created and applied to the invoice.
- In Progress Payments: A pending payment record will be visible until fully processed.
- Failed Payments: An activity feed record will log the failure for review and resolution.
Tip: Use activity feed filters to view only failed payment attempts.
5. Disable Saved Payment Methods
To manage saved payment methods for a customer:

- Open the Customer Edit page.
- Locate the saved payment methods.
- Click the 3-dot control next to a payment method and select Disable.
Important Notes:
- When disabling a payment method, any active recurring or retainer profiles using it will default to the primary payment method.
- Disabled payment methods cannot be used for future charges.
The Auto Charge feature allows you to securely save customer payment methods and utilize them for both recurring and one-off invoices, simplifying your billing process and ensuring timely payments.