Learn how to set a user profile picture and change notification settings.
 Figure: Click on User Profile Icon on Top-Right
1. Profile Picture for your User Profile
Avaza uses Gravatar, one of the most popular services for managing user profile pictures. It only takes a couple of minutes to sign up and upload your profile picture.
Make sure you sign up with the same email address as you use to log into Avaza. Once you have uploaded a profile pic on Gravatar, we will automatically grab it and display it in Avaza.
2. Personal Details and Timezone Settings
Email address: Account owners or users with Admin permissions can change their own email via the Contacts page, however, all other users on the account, you will need to get in touch with Admin users to update the email address.
Name: You can also update your own First and Last Name to control how it is displayed in Avaza.
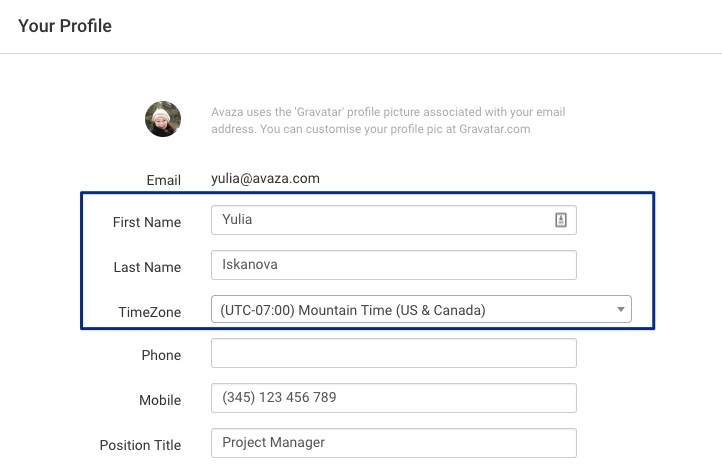 Figure: Update your Personal Details via the User Profile Settings
User timezone: The timezone you work in may be different from your organization’s and you can set it according to your requirements via the User Profile Settings. Please note, your timer (start/end time specifically) is controlled by this setting.
3. Hide Getting Started Screen
By default, users land on the Getting Started screen when they log into Avaza. To hide this screen permanently, you can head over to your User Profile > Hide Getting Started screen.
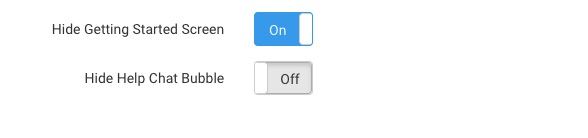 Figure: Update the ‘Hide Getting Started Screen’ Setting via User Profile Settings
When this setting is switched off, we hide the Getting Started screen option in the app. If this setting is switched on, we continue to show the Getting Started screen or Account Dashboard, based on what you were viewing when you were last logged in.
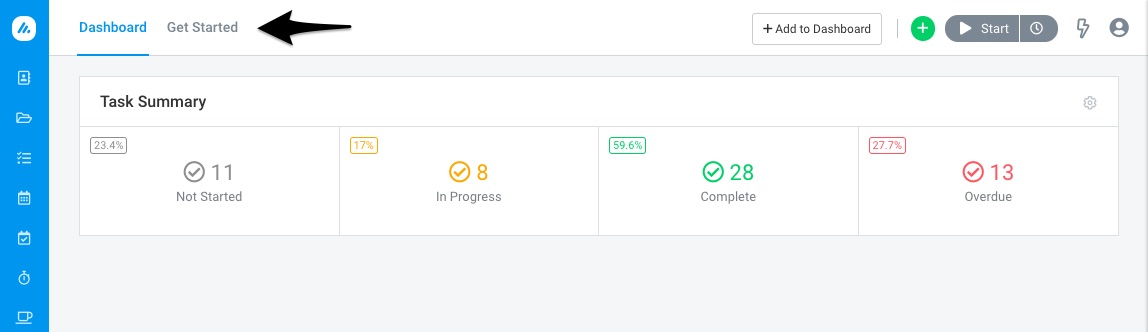 Figure: Default Screen Set to the Account Dashboard
4. Hide Help Chat Bubble
By default, the Chat Bubble is displayed on all screens in your Avaza account allowing you to easily get in touch with our Support Team should any questions arise. You can, however, change the setting via the User Profile.
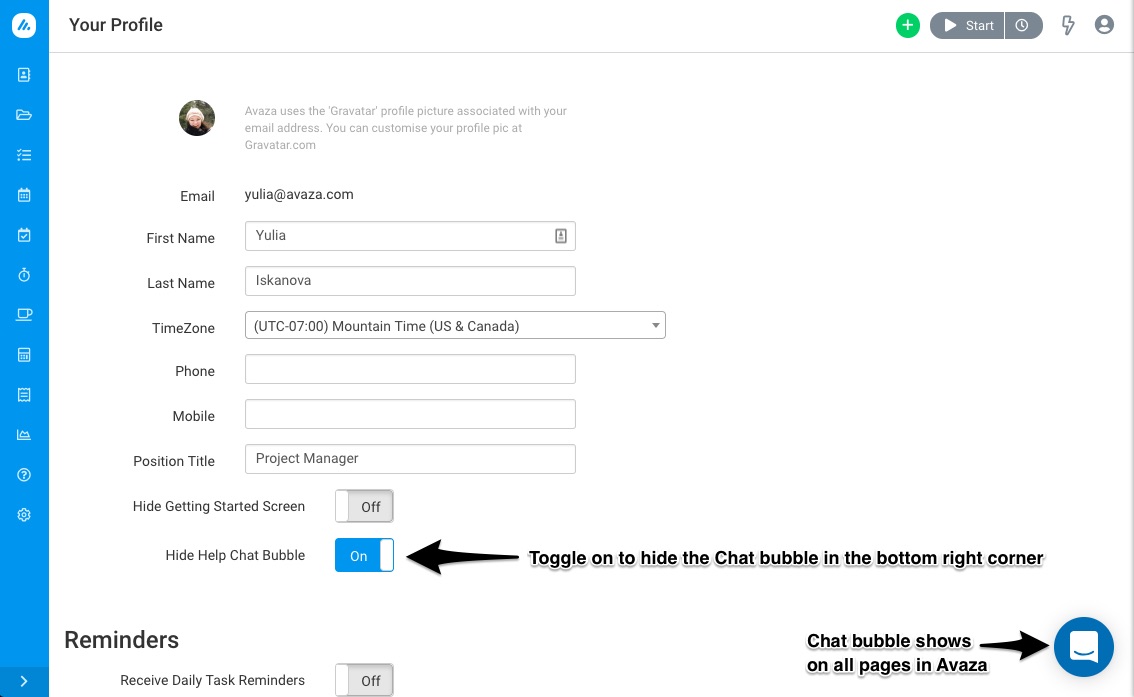 Figure: Toggle on the ‘Hide Chat Bubble’ Setting
You can still get in touch with us via Chat at any time by click on Help from the Side Navigation which will display the options to Use Chat, Book a Demo or access the Articles/Guides.
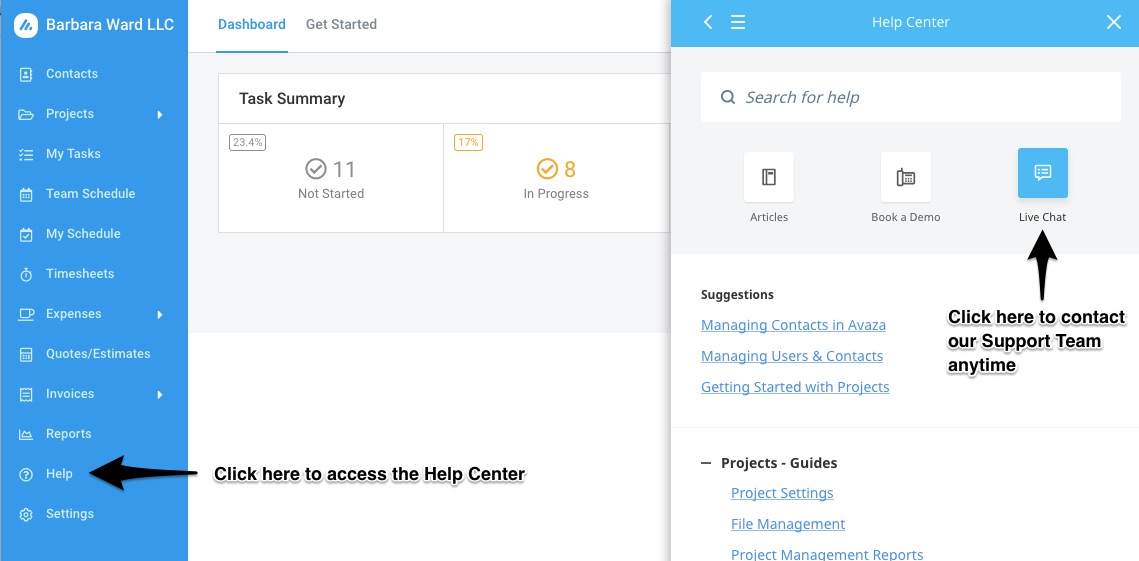 Figure: Click on Help > Use Chat to Contact our Support Staff
5. Reminders
You can control the notifications you receive from Avaza from this section.
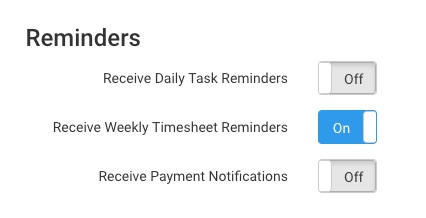 Figure: Toggle Notifications/Reminders On/Off
Daily Task Reminder: You can switch this setting on to receive daily reminders with a summary of tasks that are overdue, due today or upcoming broken down by Project.
Timesheet Reminder: You can enable Weekly Timesheet Reminders to be sent out via email when your total weekly timesheet duration is less than the total working hours per week. Working Hours per week must be entered for each user via the Contacts page before they will receive any timesheet reminders. When an admin sets the reminders to On, all future users will have this setting switched on by default.
Payment notification: As an Admin or an Finance Manager, you can receive an email notification whenever a payment is made by a client against an invoice.
Note: All reminders are currently sent out at a fixed time (8 am EST).
6. External Authentication
We allow you to connect your Avaza account with a Google account. This section displays this connection if it exists. You can revoke this access if you wish to disconnect your Google Account from Avaza.
 Figure: Google Apps Single Sign-On Enabled
7. Notification Settings
The Notification Settings page is your one stop shop for all Avaza notification preferences. Learn more about this in the Notification Settings guide.
Need any help managing your user settings? Feel free to get in touch with our support team via chat or email.