Avaza Account Dashboard is a flexible widget-based design, with a gallery of widgets you can add, remove, resize and rearrange to suit your role and personal workflow.
We have started with few important widgets but over time we intend to expand the gallery to include widgets useful to every user role and area of functionality in Avaza.
All the widgets can be renamed and multiple instances of the same widget can be added to the page. Some of the widgets can be customised via its own settings area, allowing you to group and filter data.
The Account Dashboard is your one-stop shop for all important information. Please feel free to email us at support@avaza.com requesting new widgets that will help you stay on top of your data.

Figure 1 – Account Dashboard
How to access the Widget Library?
When you first open the Dashboard page you will see a few default widgets added to page based on your role. You can remove, rearrange, resize or customize these widgets as per your needs.
In order to add new widgets to the page, click the “Add to Dashboard” button top right of the page. This will open the widget library with the list of widget that can be added to the page. Click the “Add to Dashboard” button on any of the widgets you will like added to the page. The widget will be added to the page and the widget library popup will be closed.

Figure 2 – Account Widget Library Popup
How to customize a widget?
Once a widget is added to a page, it can be further customized. The customization settings are different for each widget but to access the Widget Settings page, click the cog button top right of the individual widget.
The Widget Settings page lets you rename the widget and presents other options for certain widgets such as Default Date Range and Group by fields. Once you have made the required changes, click Save and the widget settings are updated.
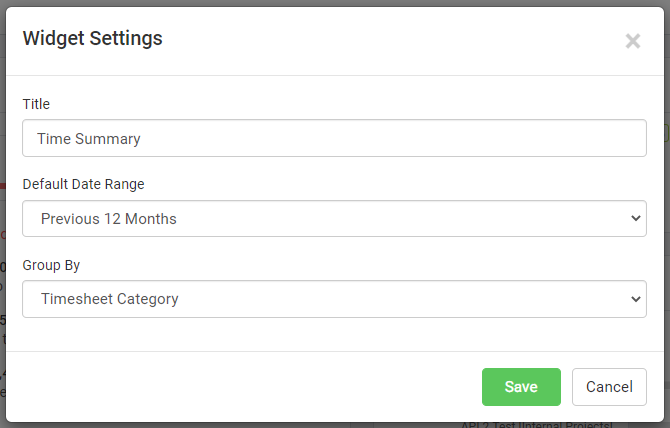
Figure 3 – Widget Settings Popup
Available Widgets
Below is the list of widgets currently available in the widget library.
Unpaid Invoices
Gives an overview of unpaid regular and retainer invoices with the breakdown of current and overdue regular and retainer invoices. The overdue invoice is further broken down into standard ageing buckets. Use this widget to stay on top of cash flow.
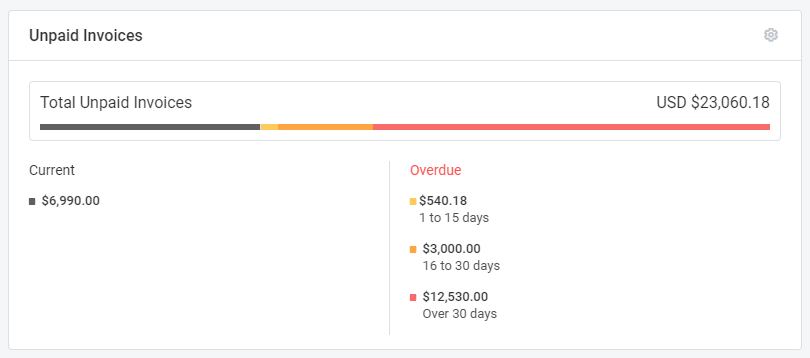
Figure 4 – Unpaid Invoices Widget
Sales & Payments
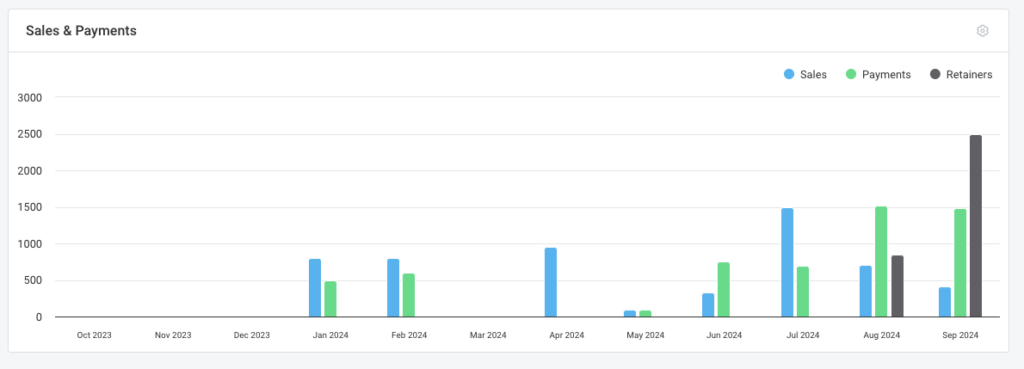
This widget show the Sales, Retainer and Payment amounts per calendar month in account base currency. Use this widget to see the trends over time in sales, retainer and payments.
Task Summary
Count of your tasks grouped by status. Filter the widget for a particular task type. Stay updated on the tasks assigned to you and the status they are in.

Figure 6 – Task Summary Widget
Task Project Breakdown
Total count of tasks for each project grouped by status. Filter the widget for a particular task type. Click the Project Title to open that particular project.
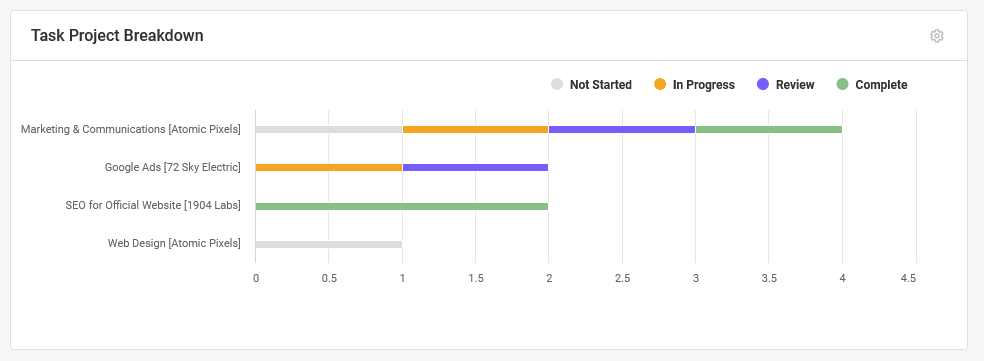
Figure 7 – Task Project Breakdown Widget
Time Summary
A configurable summary of your timesheets. Filter the widget by date range and group the data by one of the available fields. Use this widget to see where you are spending your time grouped by Timesheet Category, Customer, Project and Billable vs Non-Billable time.
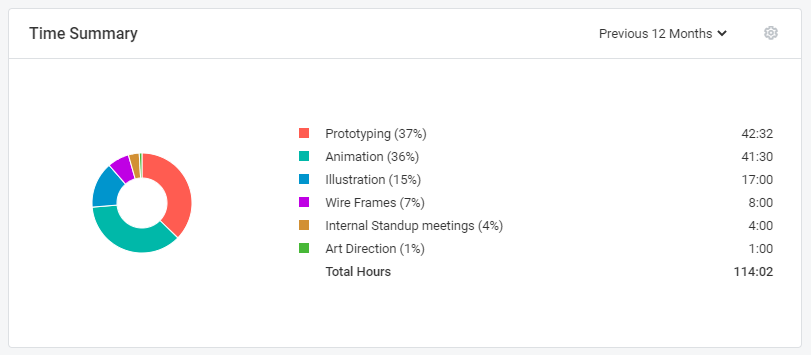
Figure 8 – Timesheet Summary Widget
Expense Summary
A configurable summary of your expenses. Filter the widget by date range and group the data by one of the available fields. Use this widget to see where you incurred expenses grouped by Expense Category, Merchant, Approval and Billable status. All amounts are in account base currency.
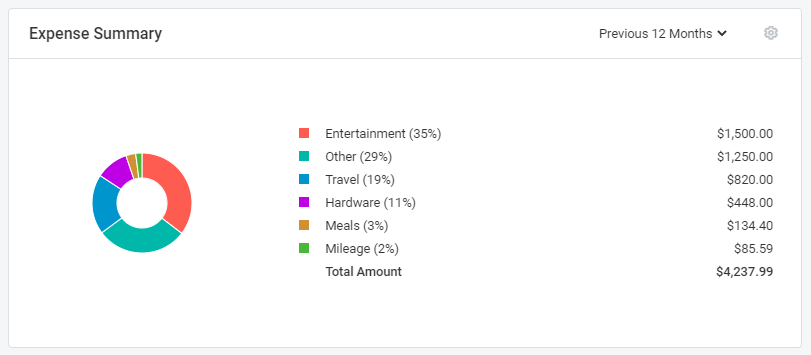
Figue 9 – Expense Summary Widget
