The Avaza Contacts module makes managing contacts, like team members and external contacts, easy. Here you can invite new team members and contacts, add contact information or business details, set up daily availability & user tags, and assign them appropriate roles so they can access the relevant functions in Avaza.
To access this functionality, click Contacts on the Side Navigation.
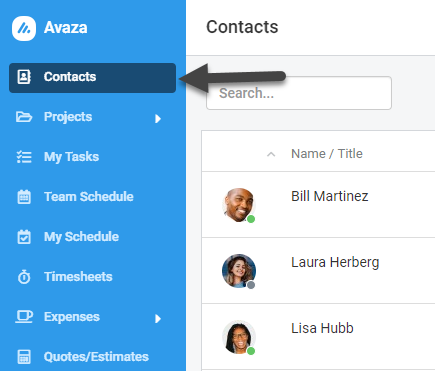 Figure: Click Contacts on the Side Navigation
Team Members vs. External Contacts
Avaza allows you to add two types of contacts:
- Team Members
Team members are people who work for your business, like your employees, freelancers or contractors. - External Contacts
External contacts are your clients. They can have limited access to your Avaza account (they cannot be project managers, or approve expenses, etc.).
Under the Contacts module, you will notice tabs for Team, External Contacts, and Archived. Each tab displays all the people already added under each type, as well as their email address, contact information and the status of their Avaza invite. You can also search through Contacts by any of the visible text fields (for example by invitation status, email, user role, user tag, etc).
1. Team Members Tab
To add a new team member to your account, navigate to the Contacts page and click ‘+Add Team Member” on the Team tab.
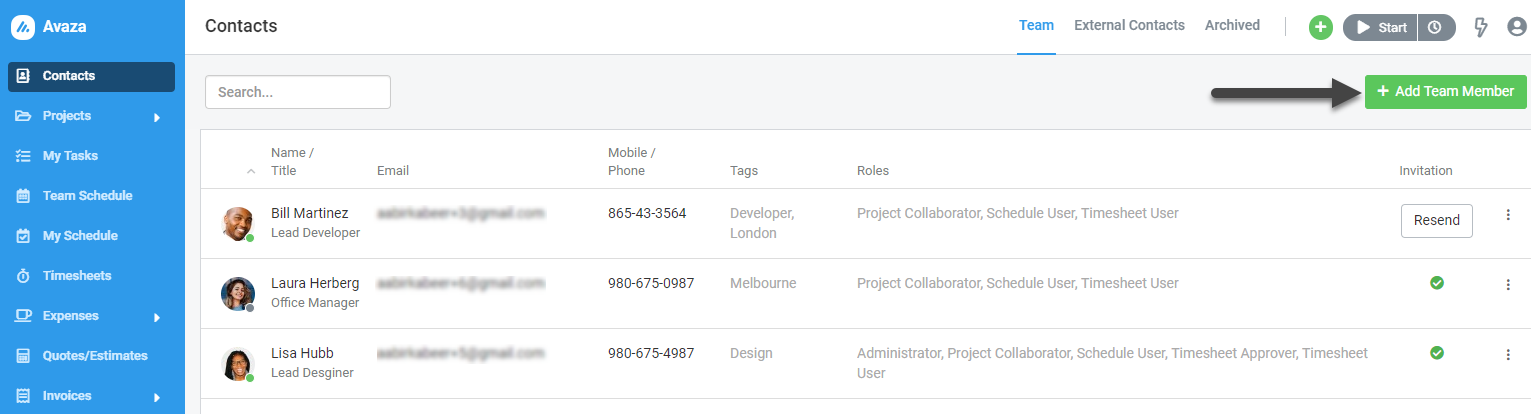 Figure: Click +Add Team Contact to Invite Team Members to Your Account
An email invite is sent by default, but you can uncheck the box if you do not wish to send one. If left unchecked, you can send out the invitation via the Contacts page at a later point.
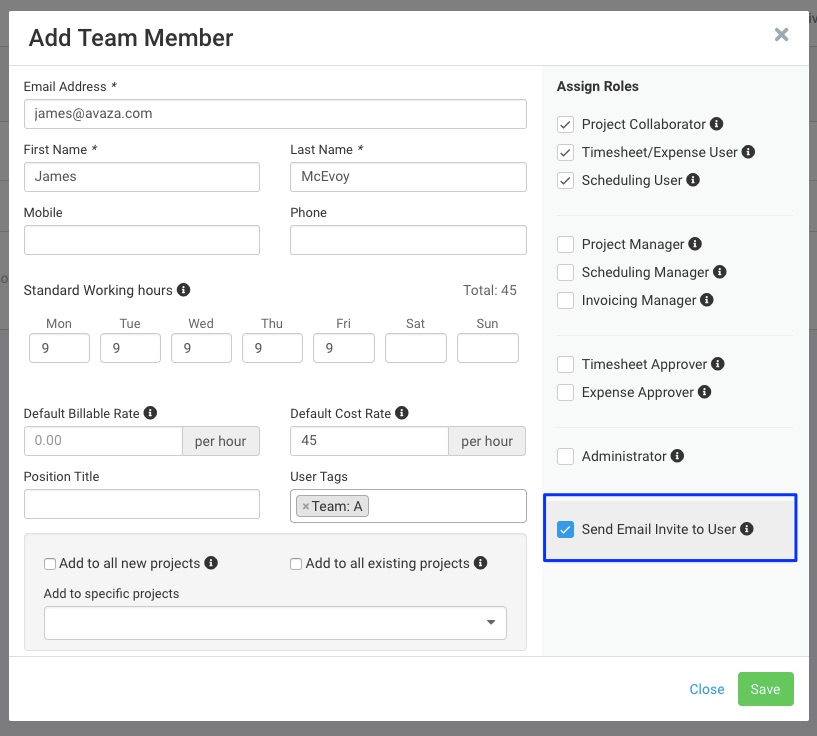 Figure: Add Relevant Information about Team Members, Including Billable Rates
Invitees will need to click on the invite link they receive in their email and set up their Avaza preferences (password, time zone, etc). Only the email address and name fields are mandatory when adding a team member to your account.
Other fields you can fill out include:
- Position Title, Mobile and Phone Number.
- Default Billable Rate: The default hourly rate you charge for their work.
- Default Cost Rate: What their work costs you per hour.
- Working Hours Per Week: Number of hours you expect them to work. Timesheet Reminders go out to users who have a value entered in working hours per week and have tracked less time than that. You can set a default availability via Scheduling Settings and override the hours when adding a new contact if need be. The availability is also displayed on the Team Schedule page.
- User Tags: Tags can be used to highlight user skills, domain, location, etc. You can set these up via Settings > Scheduling Settings before you can assign them to a user. Tags are displayed on the Contacts and Team Schedule pages for reference and can be used to search for specific users.
When adding a new team member, you can automatically add them to new and existing projects.
The “Add to New Projects” and “Add to Existing Projects” checkboxes allow you to add new team members to projects automatically, so you don’t have to go in and add them manually when you set each project up (or to projects that already exist). Please note the “Add to Existing Projects” checkbox is a one-time action.
You can also add users to specific projects if they only need access to a few existing projects.
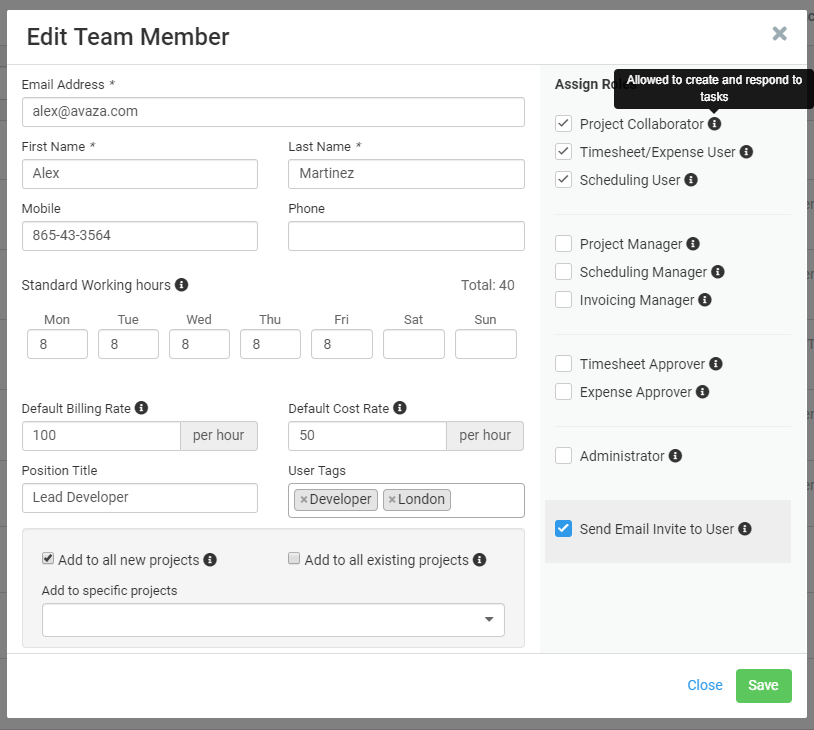 Figure: Assign Team Members Appropriate Roles
You can also assign team members various roles within Avaza. Unless you assign them a role, they will not receive an Avaza invite to join your account. Here is a guide on User Roles.
Timesheet/Expense users, Scheduling users, Admins & Finance Managers are the only roles that count towards your Avaza Subscription quota.
2. External Contacts Tab
Similarly to the Team tab, you can view the customer contacts, grouped by company, as well as contact information, role and the status of their invitation. If you assign a role to an external contact, you will see the option to send the invite to them and the last column will show the status of the Invitation. Please note, if no role is assigned to an external contact, no invitation or any other notifications are sent out to the client.
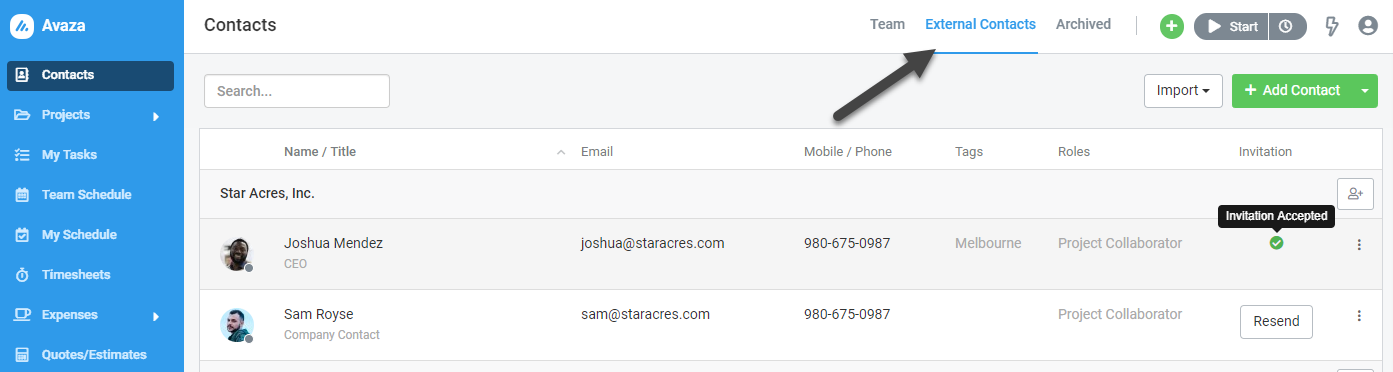 Figure: Navigate to External Contacts Tab
Creating a New Company
All external contacts must belong to a company and you need to set up a company while adding a new customer contact.
Click the “Add External Contact” button to get started. When adding a new contact, you can add a new company and fill out the remaining details at a later stage.
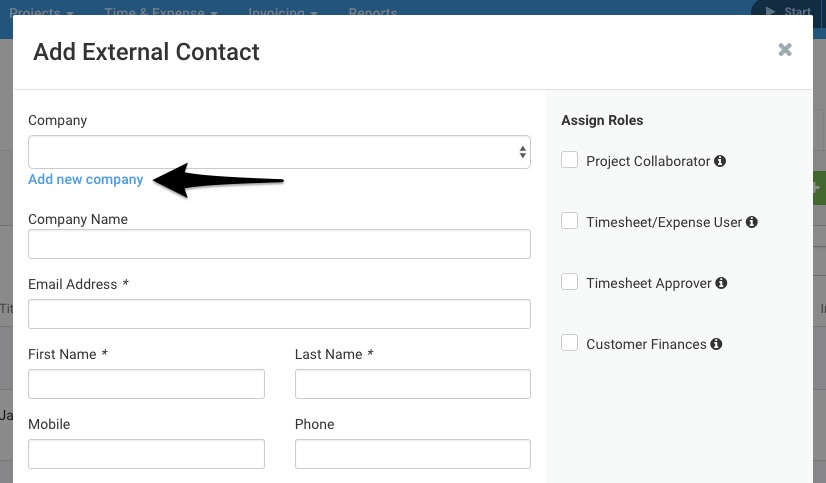 Figure: Click Add New Company to Add a New External Company
To update company details, click on the company name directly from the Contacts page.
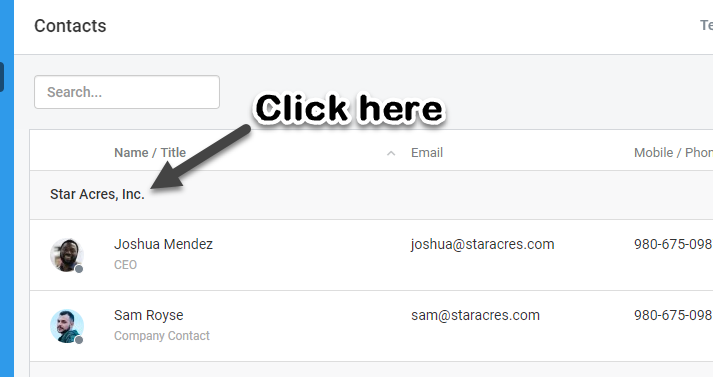 Figure: Click on the Company Name to Update Details
This will redirect you to a new page, where you can configure the default currency for the customer, add billing-related details and more.
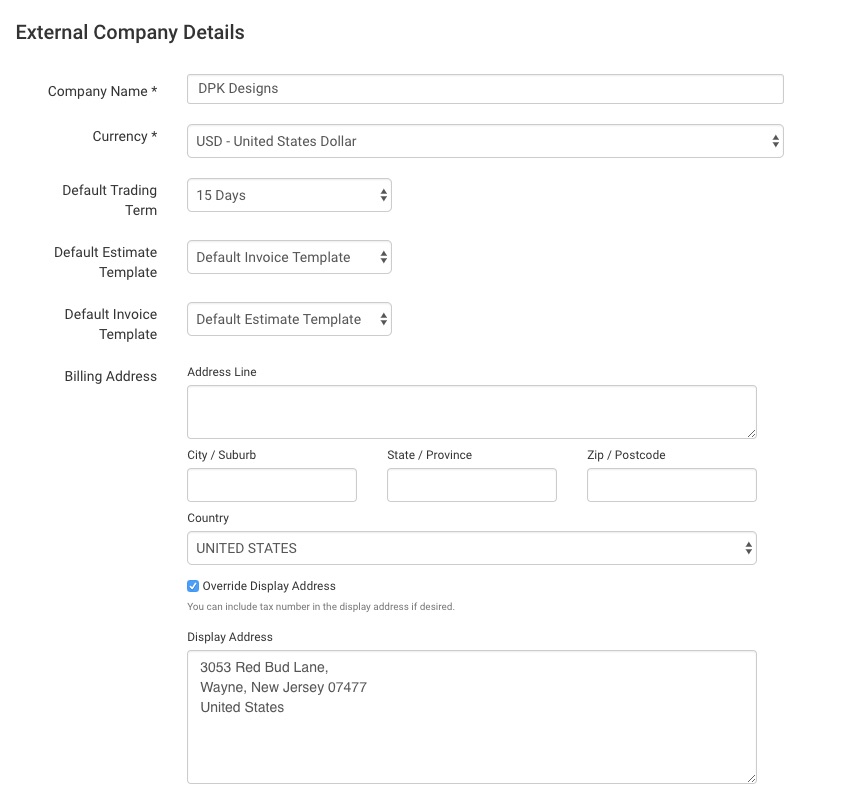 Figure: Add External Company Details
The fields available to you are:
- Default Trading Terms: This setting is used to set the Invoice Due Date.
- Default Estimate/Invoice Template: By default, these templates will be used when creating estimates or invoices for this company. (Read more about invoice/estimate templates here)
- Billing Address: This address is used on the Estimate & Invoice.
- Phone
- Fax
- Website
- Tax Number
- Comments
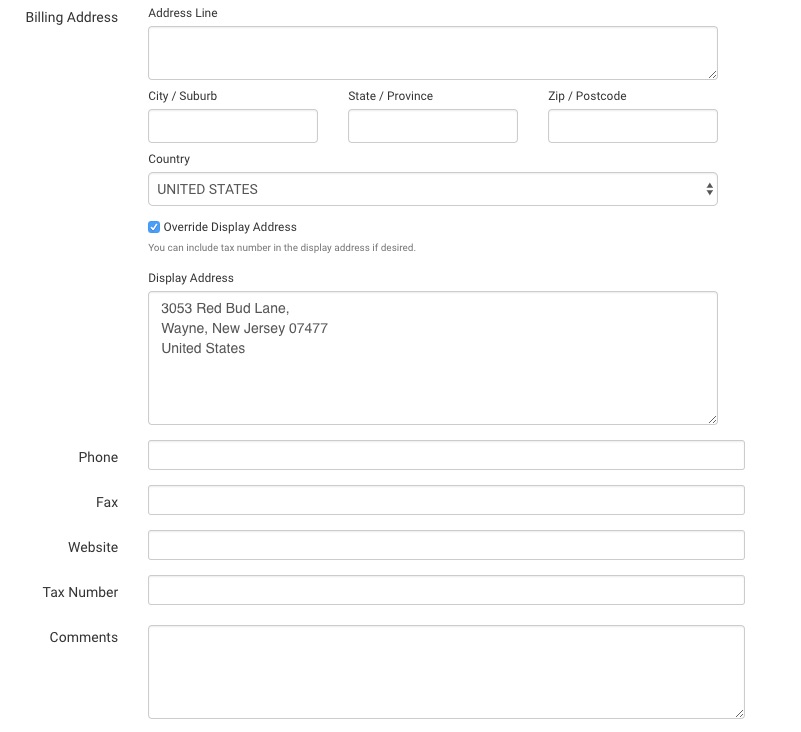 Figure: Edit External Company Details
Creating a New Company Without a Contact
If you want to add a customer company without adding the name and email of a specific contact/user, you can simply add a new external company. You can add external contacts to an existing company later by clicking the ![]() icon.
icon.
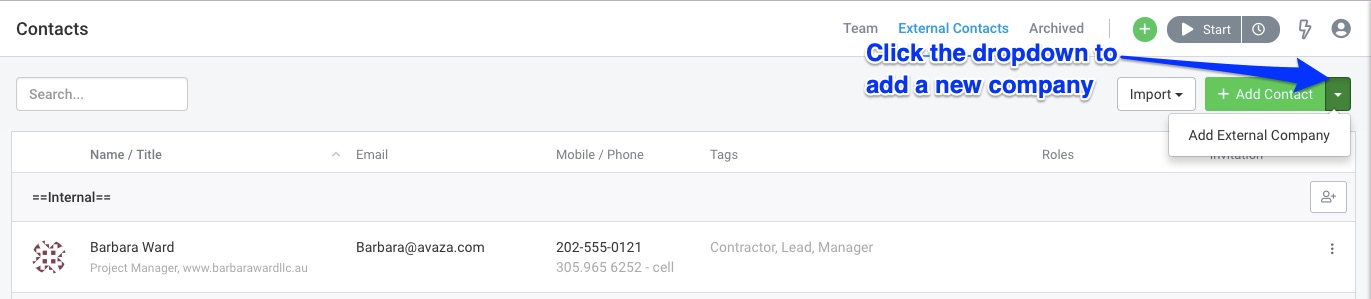 Figure: Add New External Company Without a Company Contact
Creating a New Customer Contact
Customer contacts exist under companies, which is why when you click “Create Contact” you will first need to provide a company to add that contact under.
 Figure: Add External Contact Details
Mandatory fields include company, email address, and full name. Each external contact can also be added to specific projects as long as they are assigned the Project Collaborator role, Timesheet/Expense user or Timesheet Approver.
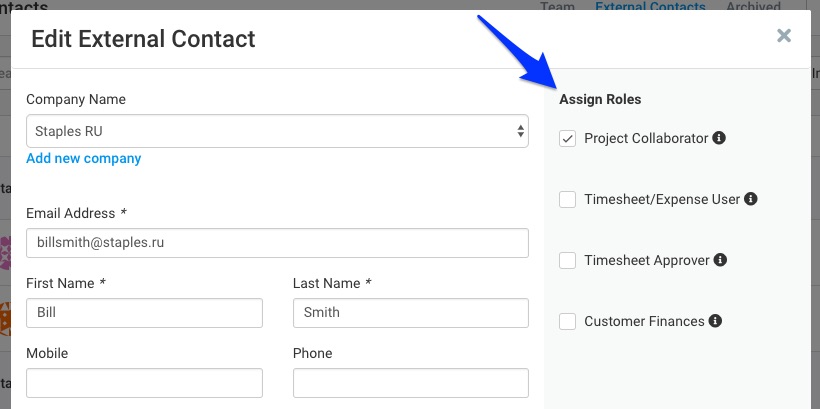 Figure: Provide External Contact with Roles
External contacts can be assigned the following roles:
- Project collaborator: can create and respond to tasks on projects they are members of.
- Timesheet/Expense User: can create and submit timesheets/expense entries for projects where they have timesheet access.
- Timesheet Approver: Can access/approve timesheets for projects where they are assigned timesheet approver permissions.
- Customer Finances: View quotes/invoices that have been created by you for their company. They cannot see Draft Estimates/Invoices.
Assigning any of these roles to an External Contact will expose the “Send Email Invite to User” checkbox, which you can use to select whether an email invite should be sent to the contact or not. If you choose not to send an invite, the customer contact will not be able to collaborate with you in Avaza.
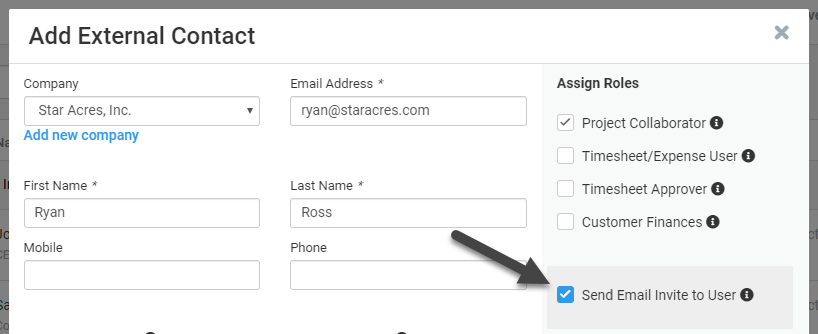 Figure: Optionally send an email invite to External Contacts
Bulk Import Contacts
You can easily bulk import CSV files. Here is a FAQ on importing data into Avaza.