Here is a field-by-field guide on how you can fill out an Invoice for your client in Avaza. See an explanation of the available fields below.
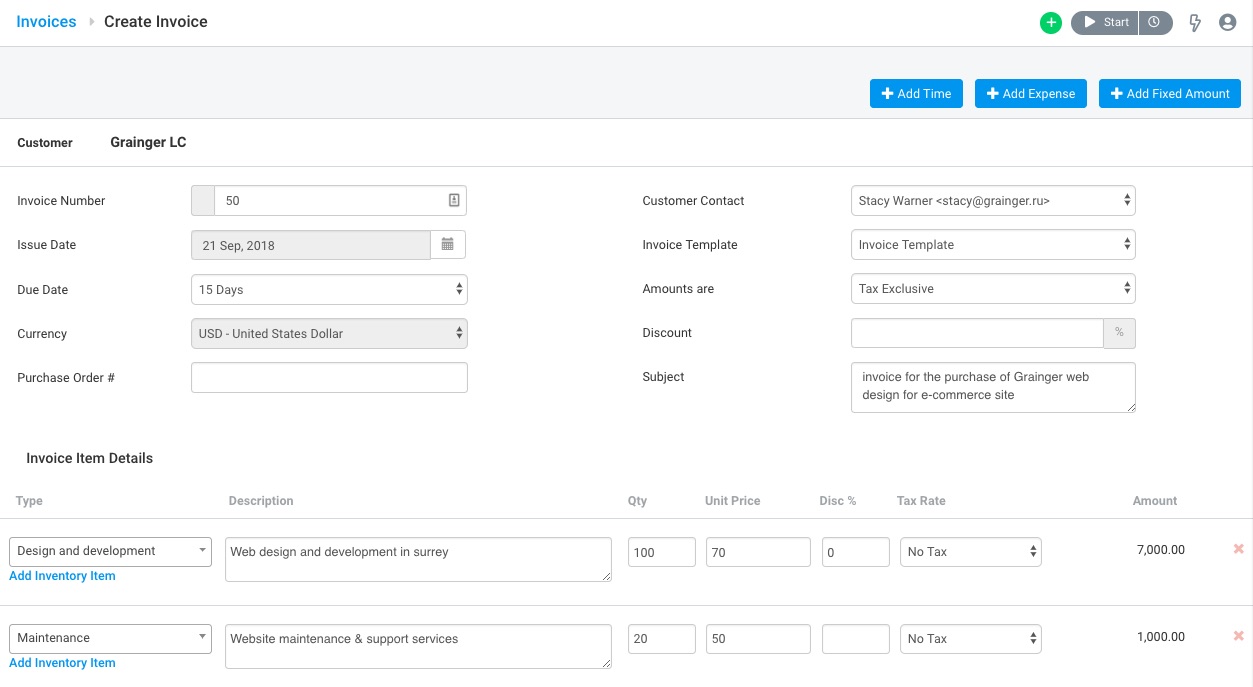 Figure: A Guide to Filling An Avaza Invoice
- Invoice#: By default, Avaza generates sequential numbers for your Invoices, based on the last highest number. You can remove/update the default Invoice Prefix via Settings > Invoice Settings. To reset the Invoice Number back to 1, you can simply assign a new Invoice Prefix. The next Invoice number will automatically be set to 1 and then sequentially get higher from there.
- Issue Date: By Default, this is the date you created the Invoice.
- Due Date: If you wish, you can choose a due date for the Invoice. If you have set Trading Terms in Invoice Settings, you will already see a pre-populated date based on that setting, or you can choose a custom date.
- Currency: This is based on the currency of the customer you are creating the Invoice for. This can be changed by going to Contacts > External Contacts > Clicking on Customer Company name but only if no transactions have been created for this customer.
- Purchase Order #: You can enter a Purchase Order # here if required.
- Customer Contact: You can nominate a contact within the client company to address the invoice to. You can switch this feature on by editing the relevant Invoice Template and enabling the “Show Customer Contact” option on the Layout tab. Learn more here.
- Invoice Template: By default, this is the template selected at the External Company level. Templates allow you to create a different layout and look for Invoices based on your requirements (for example, show/hide columns, change language or requirement to display taxes or discounts a certain way). This can be changed by navigating to Settings > Invoice Settings > Add Template, or you can click Edit while viewing the Invoice after you hit save to make edits on the fly.
- Amounts Are: If the Unit Price you are charging is exclusive of Tax, then choose Tax Exclusive. If it includes Tax, then choose Tax Inclusive.
- Discount: This is a default discount you can apply to the Invoice, which will pre-populate the line item discount field for you. This needs to be entered before any line items are added to apply it to them by default.
- Subject: This is used as the Email subject and as the Project Title (if you convert the Invoice into a Project).
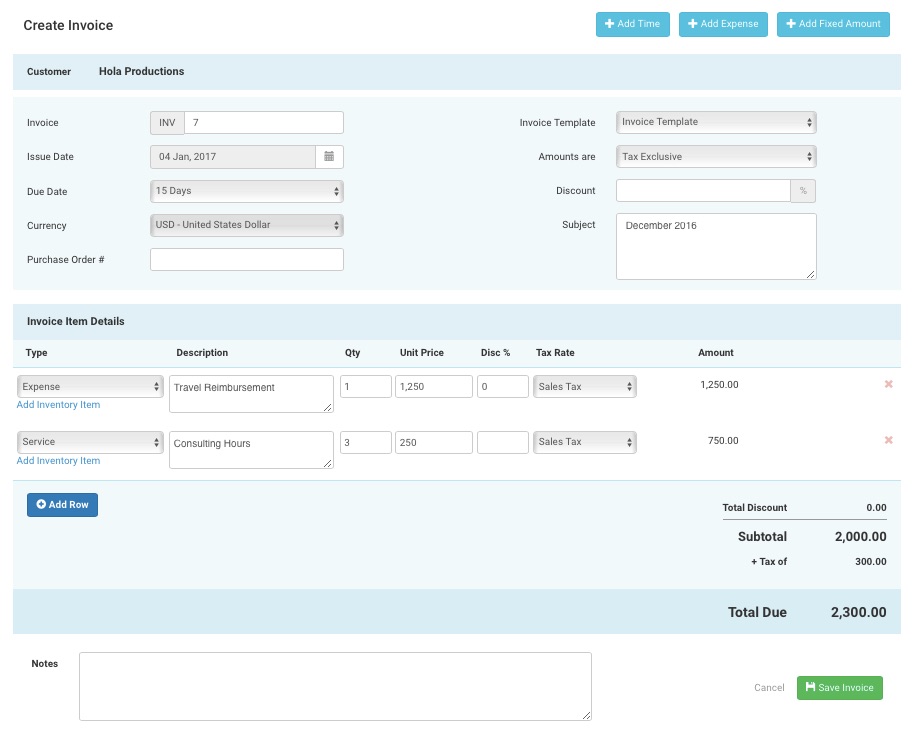
Add individual line items in the Item Details section. You can use the Add Time, Add Expense and Add Fixed Amount buttons to import bulk entries or enter free-form line items. You can remove line items by clicking the ‘x’ at the end of each row.
- Type: This is your Inventory Item List. Inventory items are the things you bill your customers for. These items allow you to quickly bill your customers by pre-filling most of the fields. Read more about Inventory Items here.
- Description: Enter a description that explains to your customer what the line item refers to.
- Qty: Choose a Quantity if needed. By default, this is set to 1.
- Unit Price: Enter a per unit price.
- Discount: If you haven’t applied a default discount rate at the top, you can do so per line item.
- Tax Rate: Select a Tax Rate from the Drop-down. Read more about configuring Taxes.
- Amount: This is calculated based on the Unit Price, Qty and Discount and Tax Rate information entered.
You can also enable the project/invoice link to be able to link each line item to a specific project. To do this, go to Settings > Invoice Settings > Enable Project Invoice Link.
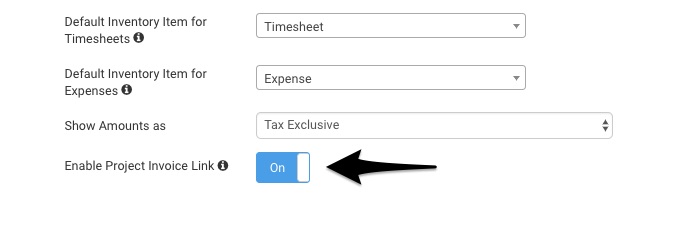 Figure: Enable the Project/Invoice link
The bottom of the Invoice displays the Total Discount, followed by Subtotal, Tax Amount, and the Total Amount. You can add Notes as needed. Click Save to Save the Invoice as a draft, or Cancel if you wish to start over.
You also have the option of customizing the Invoice and Quote templates as per your requirements as well as overriding header labels, hiding/showing columns, grouping item categories separately and more. You can read more about this here.
Do you need further assistance with this? Feel free to email support@avaza.com or contact our support team via chat.