Avaza allows you to create multiple invoice and estimate templates, as well as assign default templates for your account and each customer. To work with Invoice & Estimate templates, head over to Settings > Invoice Settings
Setting up a New Invoice & Estimate Template
To set up a new Invoice & Estimate template, navigate to Settings > Invoice Settings.
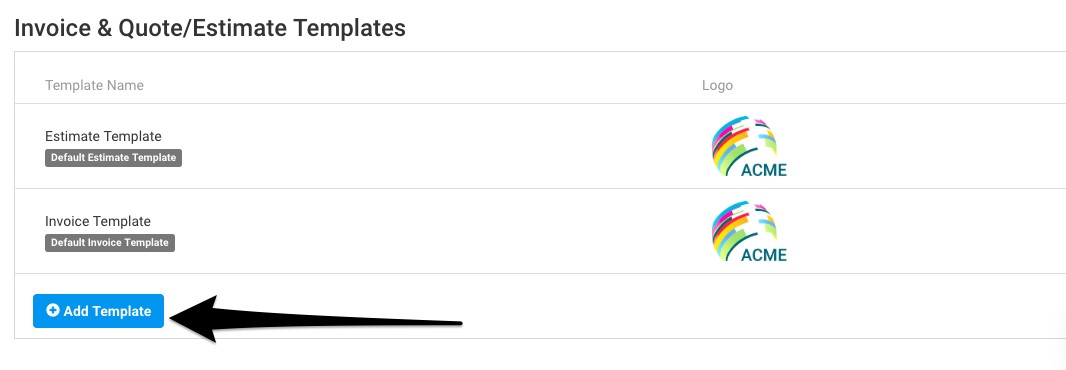
Under the Invoice & Quote/Estimate Templates section, you will see two templates set up by default. You can edit these, or create a new template using the Add Template button.
 Figure: Invoice & Quote/Estimate Templates
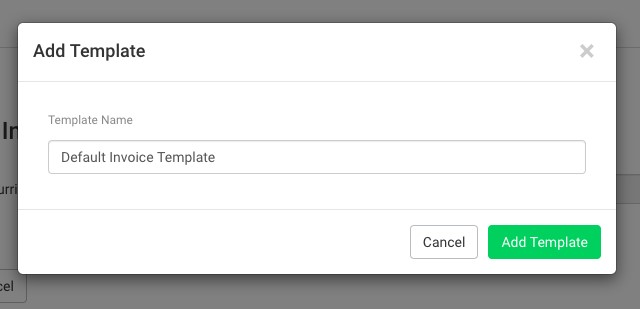
Choose a name for the Invoice (or Estimate) template.
 Figure: Add Invoice & Quote/Estimate Template
The template popup is split into three tabs: General, Layout and Payments.
1. General
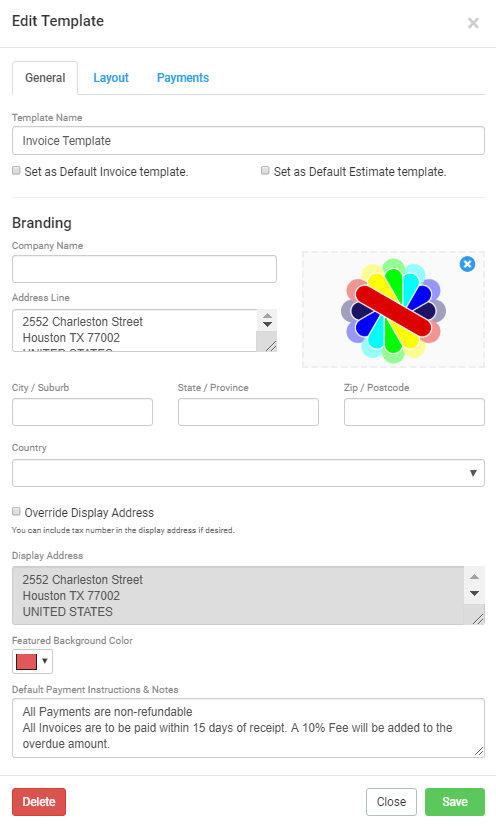
 Figure: Edit Template > General
Under this tab you can add your company information and logo, as well as a few other things.
- Template Name
- Set as Default Invoice Template / Set as Default Estimate Template: Choose whether this template should be the default template for invoices or estimates in your account unless a default template is assigned for the customer.
- Company Name: By default we pick this information from your Settings > General Settings page, but you can send invoices/estimates under a different business name by updating this information.
- Address Line: By default, we will use the address provided under Settings > Invoice Settings > Default Billing Address. You can update this address if needed.
- City/Suburb
- State/Province
- Zip/Postcode
- Country
- Override Display Address: Choose to edit the display address in the Display Address field.
- Display Address: The full address as taken from Settings > Invoice Settings > Default Billing Address or as updated on the template.
- Featured Background Color: Choose a background color for your invoice/estimate template.
- Default Payment Instructions and Notes: Enter default payment notes that should be added to every invoice/estimate using this template.
- Upload Company Logo: Read more about best case practices for uploading a company logo.
2. Layout
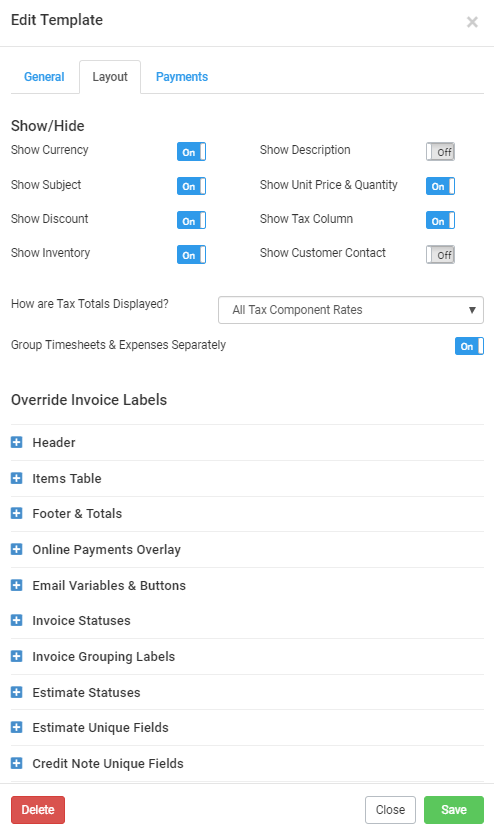
 Figure: Edit Template > Layout
This tab allows you to adjust the columns and fields on the template.
You can choose to show/hide:
- Currency: Display the currency on the invoice header.
- Subject: Show or hide the subject field on the invoice header.
- Discount: Show or hide the discount field on the invoice header.
- Inventory: Show or hide the Inventory Type column on the invoice line-item table.
- Description: Show or hide the Description column on the invoice line-item table.
- Unit Price & Quantity: Show or hide the Unit Price and Quantity columns on the invoice line-item table.
- Tax: Show or hide the Tax column on the invoice line-item table.
- Customer Contact: Show or hide the customer contact nominated on the invoice. Read more about this here.
How are tax totals displayed? Choose between 6 different ways for displaying taxes:
- Single Tax Subtotal: All your taxes combined in a single row.
- All Tax Rates: Each tax rate is displayed as a separate row.
- All Tax Component Rates: Each tax component rate is displayed on a separate row.
- Don’t Display Tax: No tax rate is displayed.
- Non 0% Tax Rates: Only tax rates with non-zero amounts are displayed.
- Non 0% Tax Components: Only tax components with non-zero amounts are displayed.
Group Timesheets & Expense Separately:
With this setting switched on, Expenses and Timesheets will be grouped under an Expenses and Timesheets header, respectively, and all other line items will be included in the General header. Fixed Billable Amounts will also be included in this grouping.
Override Invoice Labels
Every piece of text that appears on Avaza Quotes & Invoices can be overridden. This allows you to comply with local regulations, as well as send invoices in multiple languages.
3. Payments
 Figure: Edit Template > Payments
The third tab on the template popup allows you to enable/disable available online payment methods for the invoice. This list of online payment methods is populated from the Settings > Online Payments page. You can select to show or hide one or more payment methods as needed.
Updating an Existing Invoice & Estimate Template
Invoice/Estimate templates can be edited by going to Settings > Invoice Settings > Invoice & Quote/Estimate Templates. You can quickly edit a template on an existing Invoice/Estimate by using the Edit option in the page header.
Read more about which changes are applied to existing invoices/estimates when you update an existing template.
Assigning Default Templates for Customers
To assign a default invoice and estimate template for a customer, head over to Contacts > External Contacts and click on client company name. Here you can select the default invoice and estimate template you’d like to use for the customer.
Do you need further help with this? Feel free to contact our support team via chat or email.
