Simplify expense creation by setting up Recurring Expenses for fixed expenses that are incurred on a schedule.
Account Settings
Recurring Expense profiles use the same Expense Categories and Expense Payment Methods as Expenses created manually. To adjust this, head over to Settings > Expense Settings and add any additional categories and payment methods you may need.
 Figure: Choose the Time Recurring Expenses Should be Generated
On the same page, you can choose the time at which Expenses are generated by this profile. By default this value is set to 10:00 am local time for your account’s time zone.
Viewing Recurring Expenses
To create and manage Recurring Expense Profiles, navigate to the Expense tab > Recurring Expenses.
 Figure: Navigate to Time & Expense > Recurring Expenses
The Recurring Expense screen is where you can view all existing Recurring Expense profiles or create a new profile.
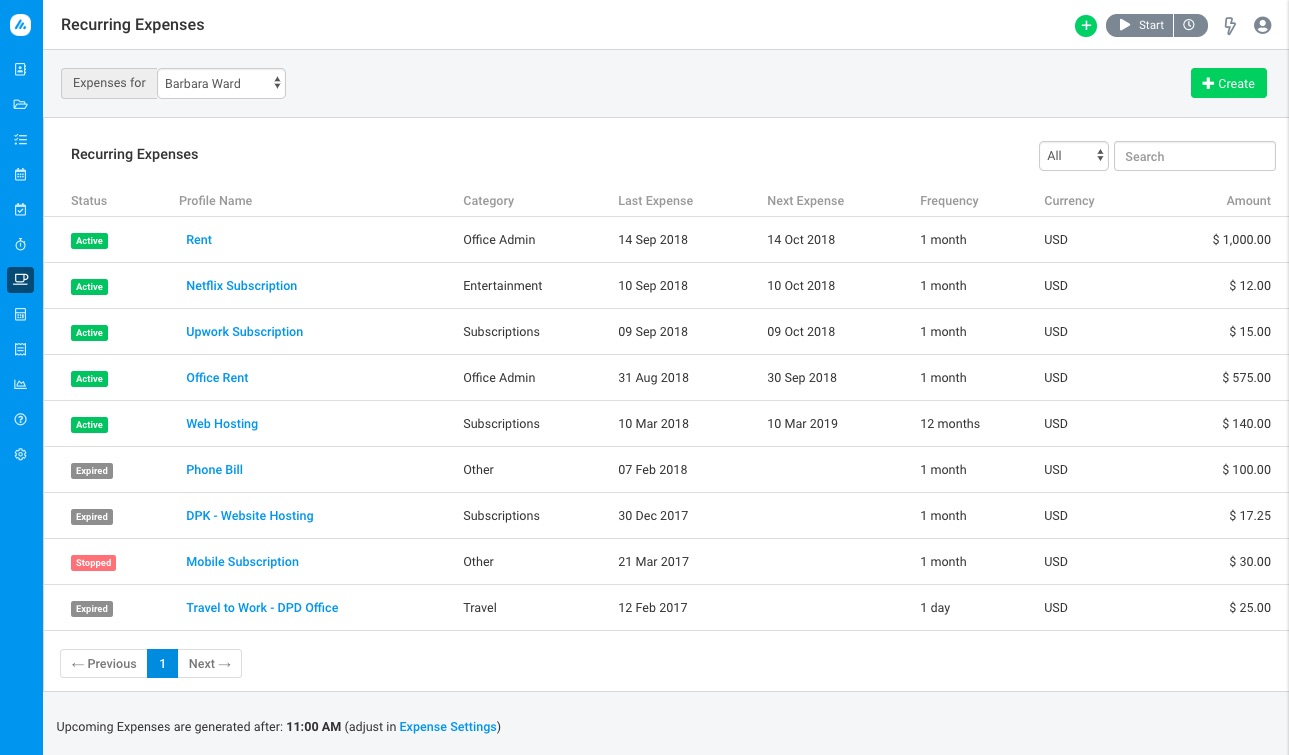 Figure: Recurring Expenses Screen Displays all Profiles and Their Status
Admin users can use the drop-down to view Recurring Expense profiles created by other users. You can also view the time at which upcoming Recurring Expenses are generated at the bottom of the screen.
Recurring Expenses can have one of three statuses:
- Active – The profile is scheduled to generate at least one or more expense entries.
- Stopped – The profile has been stopped. It will not generate any further expenses.
- Expired – The profile has zero remaining expenses. No further expenses will be generated.
Recurring Expense profiles can be filtered based on their status (Active, Stopped and Expired), or quickly searched for using the Search box.
Creating a Recurring Expense Profile
Click on the “Create” button on the top-right to create a new Recurring Expense Profile.
 Figure: Click +Create to Add a New Recurring Expense Profile
Fill out the Recurring Expense Profile form.
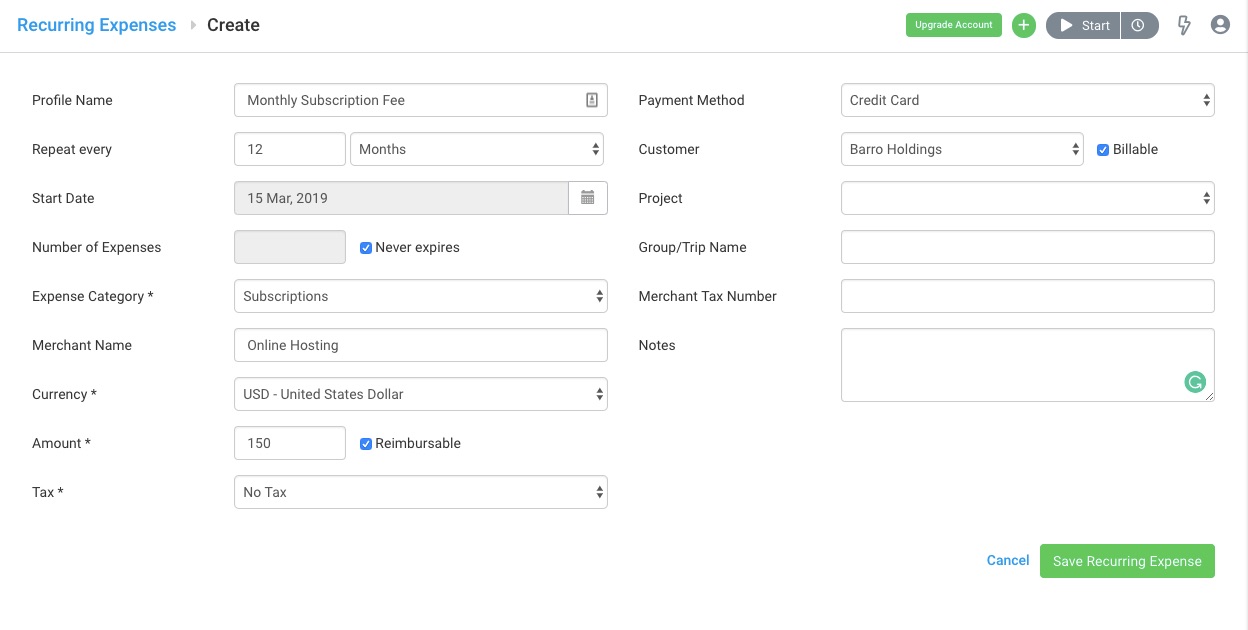 Figure: Fill Out the Recurring Expense Profile Fields
- Profile Name: Enter a name that will assist you in identifying a particular recurring expense. For example Monthly Avaza Subscription.
- Repeat Every: Select at what frequency the expense should be generated. For a monthly subscription, you can select every 1 month however you can also define the frequency in terms of days.
- Start Date: Select the date when the first expense will be generated. This date must be today or in the future.
- Number of Expenses: Enter the number of expenses that you want this profile to create. For example, if you have a 12-month contract you can set the number of expenses to 12. If the expense has no fixed term then you can select the “Never expires” checkbox.
- Expense Category: Some default categories are already set up, but you can add more on the Expense Settings page. These categories are used for expense reporting, as well as charging clients a markup or setting a unit price.
- Expense Currency: Choose the currency the expense was incurred in. System defaults to your account currency. For expenses entered in a different currency than the account default, Avaza will pull a relevant exchange rate. You can change this as needed.
- Amount: Enter expense amount.
- Tax: Enter any applicable sales tax. (Read more about Tax Settings here).
- Amount is: Choose whether the entered amount is inclusive or exclusive of chosen tax. This field is visible if a tax rate is selected.
Other fields you can fill out include:
- Reimbursable: Check the box if this expense is reimbursable.
- Merchant Name: Enter Merchant Name
- Payment Method: Choose how the payment method used to pay this expense from the dropdown.
- Customer: Select an existing customer you want to link this expense to. You can only choose customers whose projects you are a member of.
- Billable/Non-Billable: Check the box if this is an expense profile you have to invoice a client for.
- Project: Select an existing project you want to link this expense to. You can only choose Projects you are a Project Member on.
- Group/Trip Name: This field is useful for reporting total expenses for specific work trips. A drop-down is available when a value already exists for this field (for example, November Team Meetup), or you can enter a new value to create it.
- Merchant Tax Number: Enter Merchant Tax Number
- Notes: Add any relevant notes. These can be imported to your client Invoice as well.
Click Save and the Recurring Expense Profile will go live.
Reviewing Current Recurring Expenses
The Recurring Expense detail page gives you the following information.
- Frequency & Number of remaining expenses
- Number of associated expenses
- Start on: The date the profile started
- Last created: The date when the last expense was created by this recurring profile
- Next expense: The date the next expense will be created.
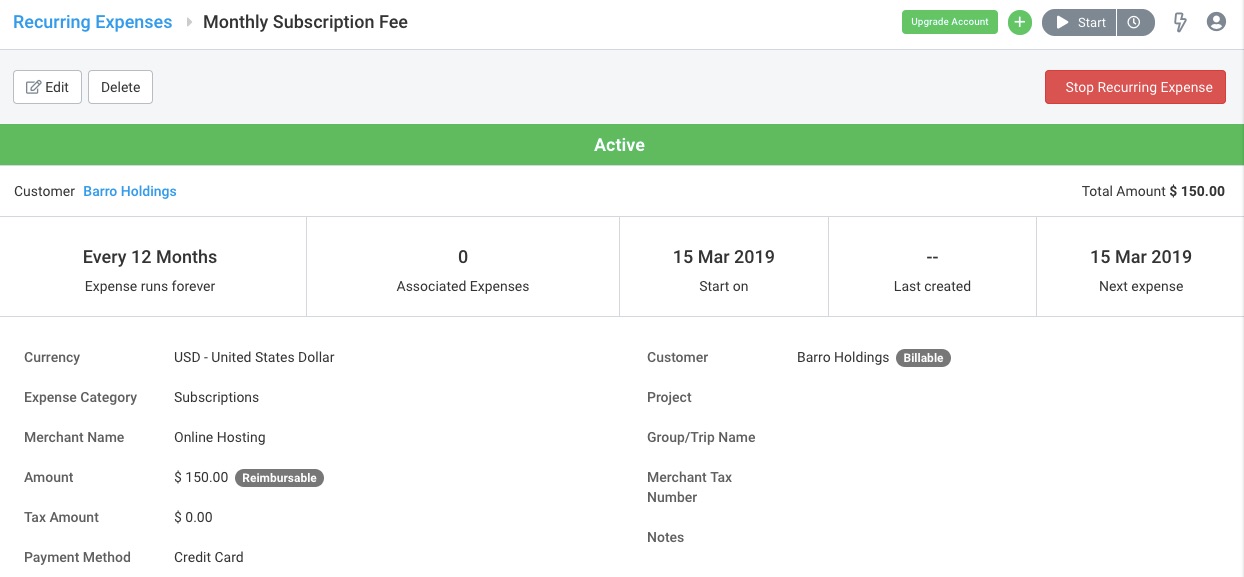 Figure: Recurring Expense Profile Displays All Generated Expenses
You can Stop the Recurring Expense profile from creating any further expenses if needed, or make any edits to it as per your requirement.
Do you need any further help with recurring expenses? Reach out to our support team via chat or email.