Expense users can mark expenses as Reimbursable while creating or editing them. This guide takes you through the reimbursement workflow in Avaza.
Submitting a Reimbursable Expense
When creating an expense, the user can mark it as Reimbursable. This enters the expense into the Reimbursement workflow.
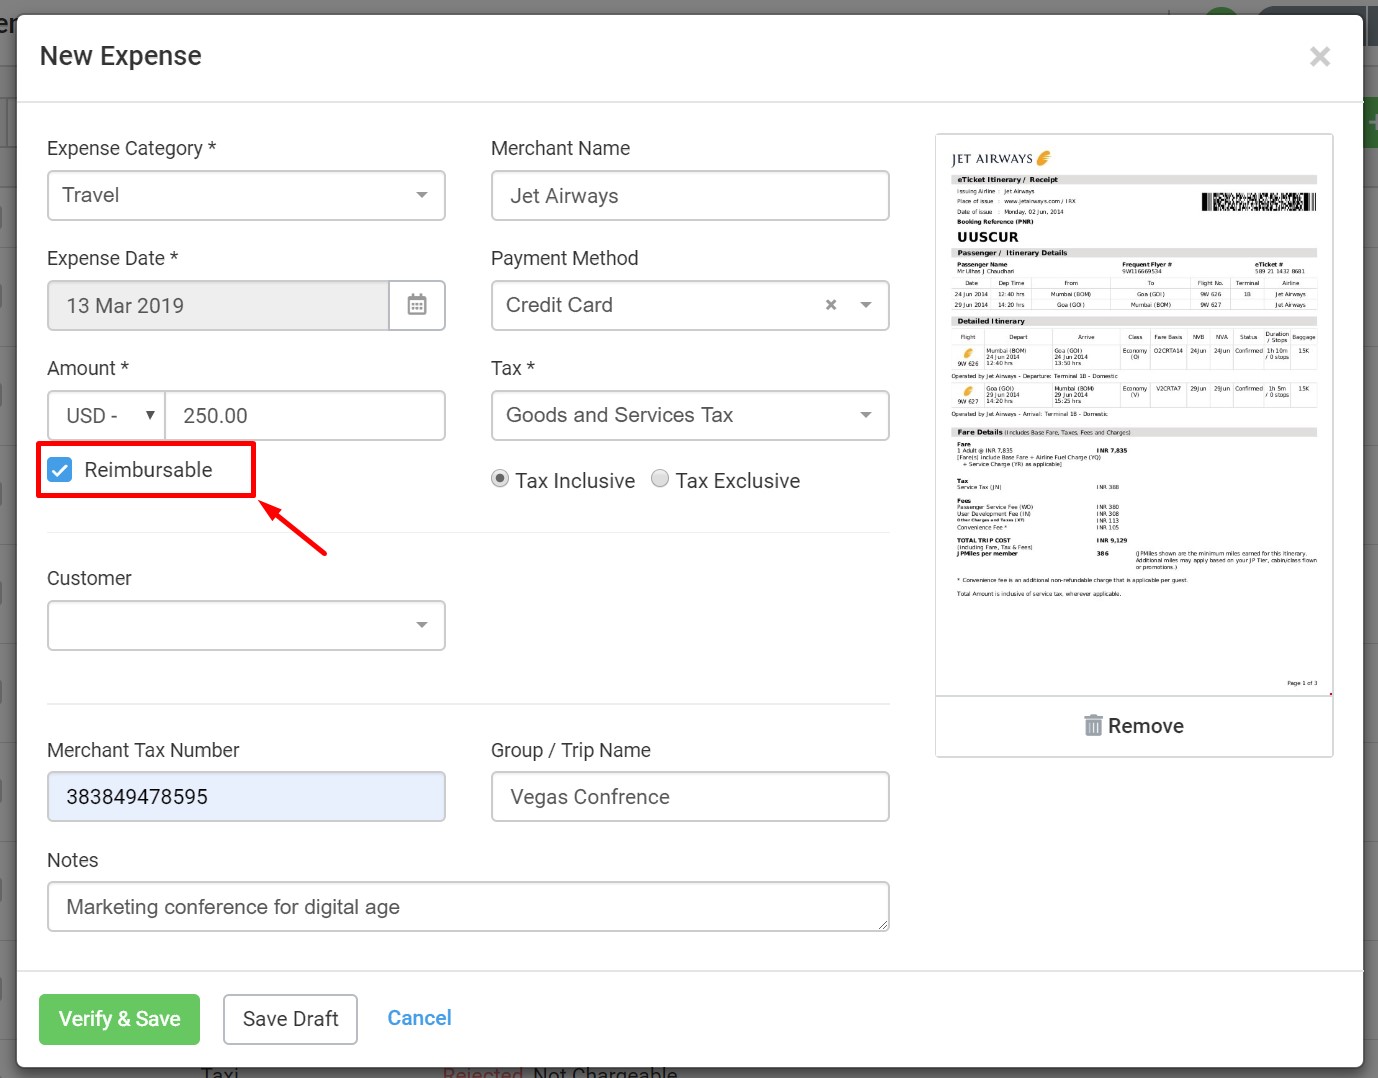 Figure: Create Reimbursable Expense with Reimbursable flag checked
Note: If your account has Expense Approvals switched on then these expenses must be approved before they are available for Reimbursement.
Managing Reimbursements
The Reimbursements tab is only visible to users with the Administrator role. This tab contains three sub-tabs that are explained below.
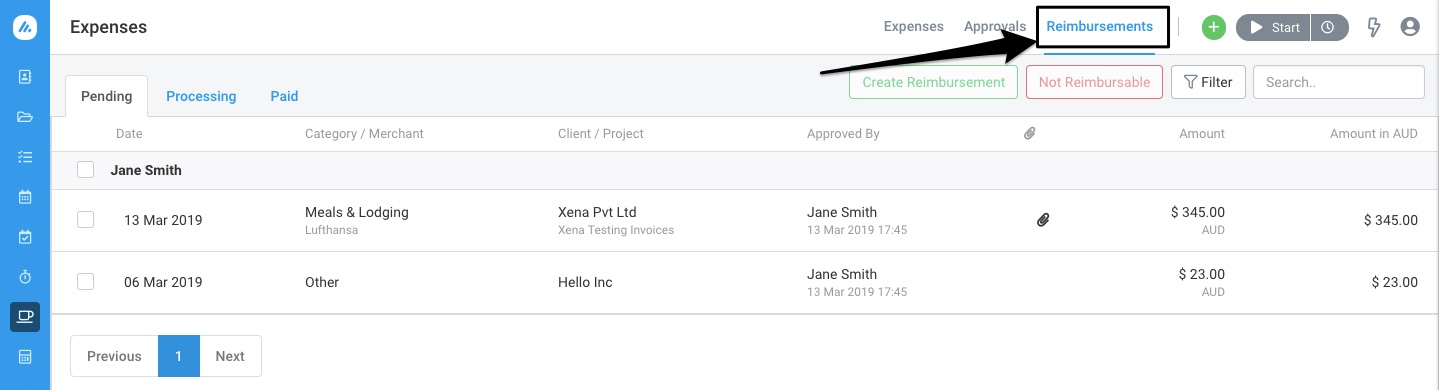 Figure: Admin Users can Open the Reimbursements Tab to Manage Reimbursable Expenses
1. Pending
The Pending lists all expenses that fulfill the expense reimbursement criteria. This includes expenses that have “Reimbursable” checkbox selected and have expense approval status equal to Approved or Automatically Approved.
The expenses are grouped by Expense user (sorted by First Name ascending). The expenses for each user are sorted by Expense Date from latest to earliest.
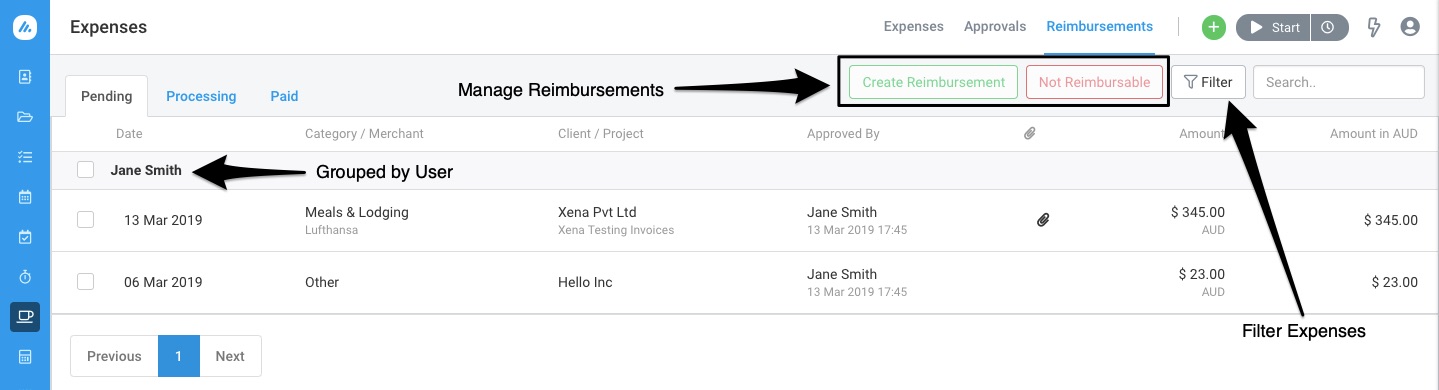 Figure: Expense Reimbursements > Pending Tab
The expense list can be filtered by
- Expense Date range (handy if you process expenses by month or week etc)
- Category (filter for one or more expense categories. This is handy if you want to only reimburse certain types of expenses)
- Billable Status (filter expenses based on billable status. E.g. only reimburse Invoiced expenses)
- Customers (filter for one or more customers)
Reimbursing Expenses
One of the following two actions can be performed on expenses that are selected using the selection checkboxes.
1. Create Reimbursement
Clicking the Create Reimbursement button after selecting one or more expenses displays the “Create Reimbursement Payment” popup. This includes summary information about the selected expenses such as Totals by each Currency and Total Amount in base currency.
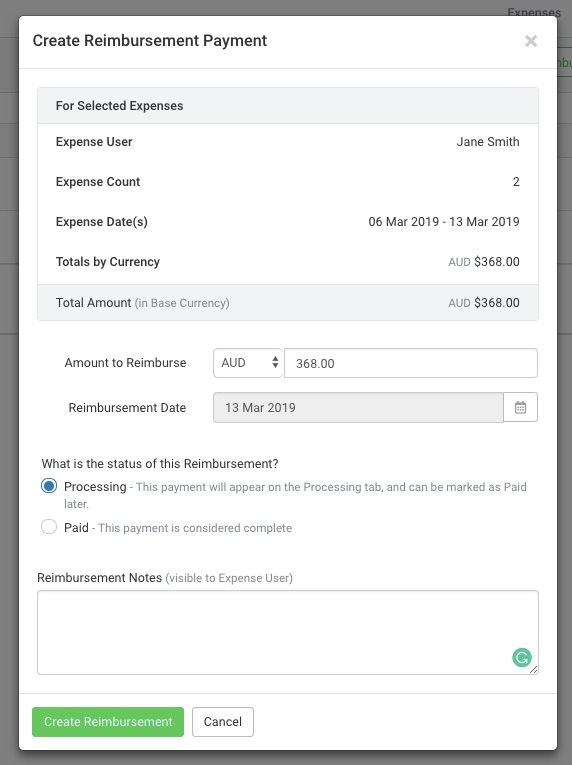 Figure: Create Reimbursement Payment
- Amount to Reimburse: This defaults to the total expense amount for all the selected expenses in the base currency, however, it can be updated to a different currency and amount.
- Reimbursement Date: The date defaults to today’s date, however, it can be changed to a different date.
The user can choose from one of the following two reimbursement statuses.
- Processing (The reimbursement will be created but not marked as paid. This is really useful if the user wants to create all the reimbursements first and pay them at a later stage. All expenses will have their Reimbursement Status updated to Processing Reimbursement)
- Paid (The reimbursement will be created and marked as paid. All linked expenses will have their Reimbursement Status updated to Reimbursed. The user will be able to optionally enter Payment Reference details and Notify the expense user via email)
You can also optionally enter Reimbursement Notes. These notes will be included in the email notification to the expense user.
2. Mark Expense as Not Reimbursable
Enter a note with details of why the selected expenses are not reimbursable.
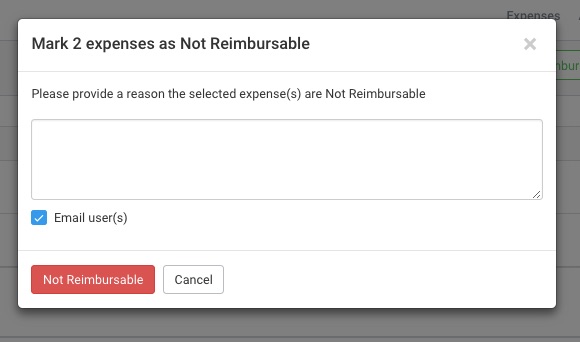 Figure: Mark Expenses as Not Reimbursable
The expense user will be notified via email with a list of expenses that were not reimbursed. The expenses will have the Reimbursable checkbox unchecked and the Expense Reimbursement Status will be updated to “Not Reimbursable”
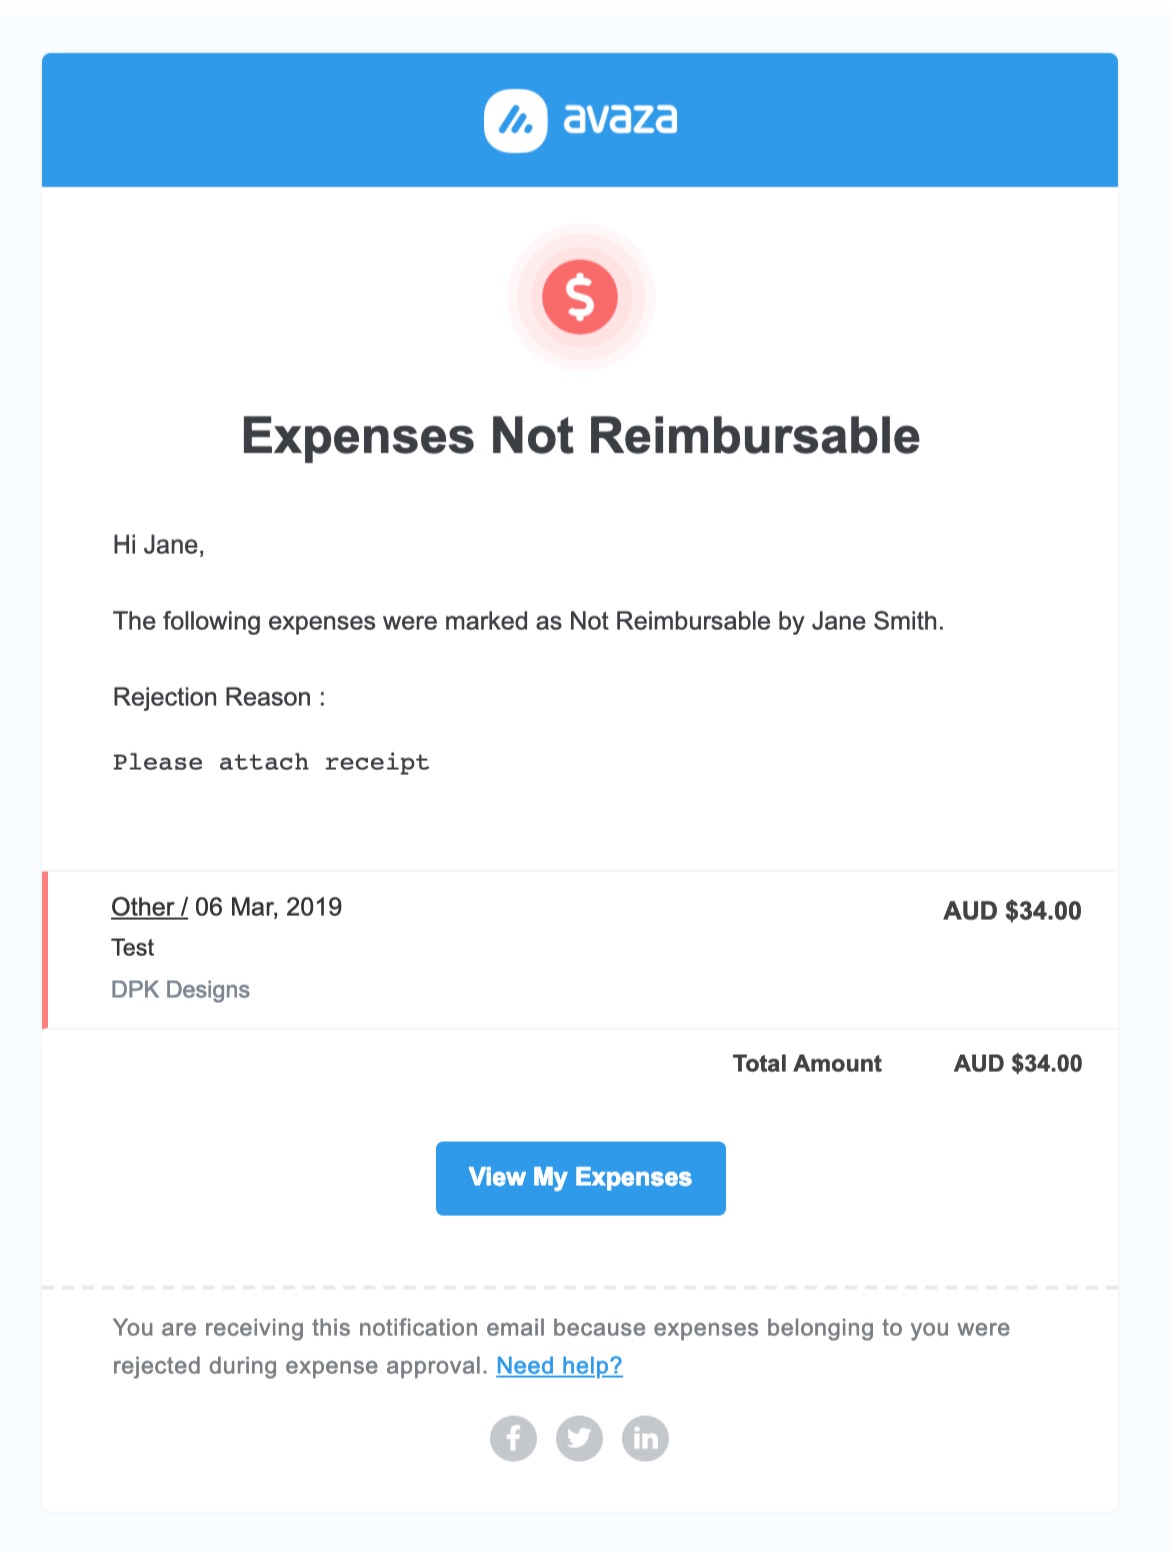 Figure: The User will be Notified if the Expense is Marked Non-Reimbursable
2. Processing
 Figure: Expense Reimbursements > Processing Tab
This Processing tab lists all reimbursements that have not yet been paid. The list provides useful information about the reimbursements, such as:
- Reimbursement Date: The date selected while creating the reimbursement
- Expense User: Name of the user who the reimbursement is for
- Expense Count: Count of expenses included in the reimbursement
- Reimbursed By: The user who created the reimbursement
- Amount: The amount and currency entered by the user who created the reimbursement
The user can:
- Filter the list based on Reimbursement date range using the filter button.
- Click the row to view the details of the reimbursement and linked expenses. The Reimbursement Payment Details popup displays a summary of the Reimbursement and Expenses tab listing all the linked expenses.
 Figure: Reimbursement Payment Details
The User can click the “Delete” button to delete the reimbursement or click “Mark as Paid” to open the Mark Reimbursement as Paid popup.
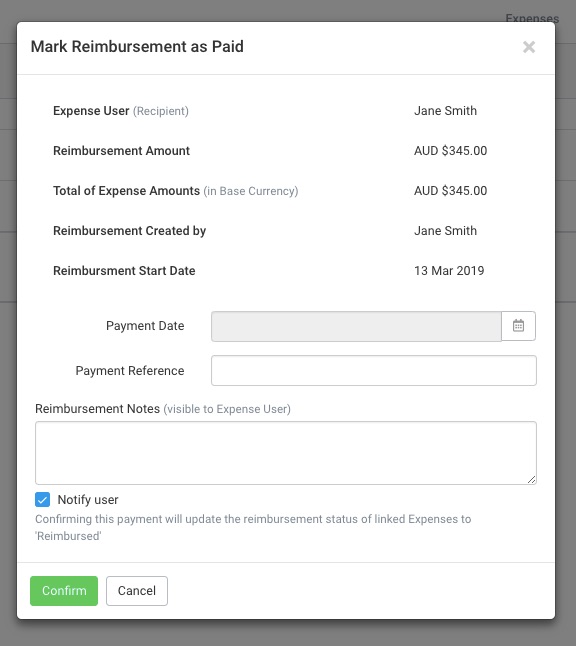 Figure: Mark a Reimbursement as Paid
On the Mark Reimbursement as Paid popup, you can:
- Payment Date: Enter the Payment Date. This is the date the expense users reimbursement payment was processed.
- Payment Reference: Enter Payment Reference details as needed.
- Notes: Add any notes before confirming the payment.
The “Confirm” button will mark the reimbursement as Paid and update the reimbursement status of all linked expenses to Reimbursed. The Expense user will also be notified if the “Notify User” checkbox is selected.
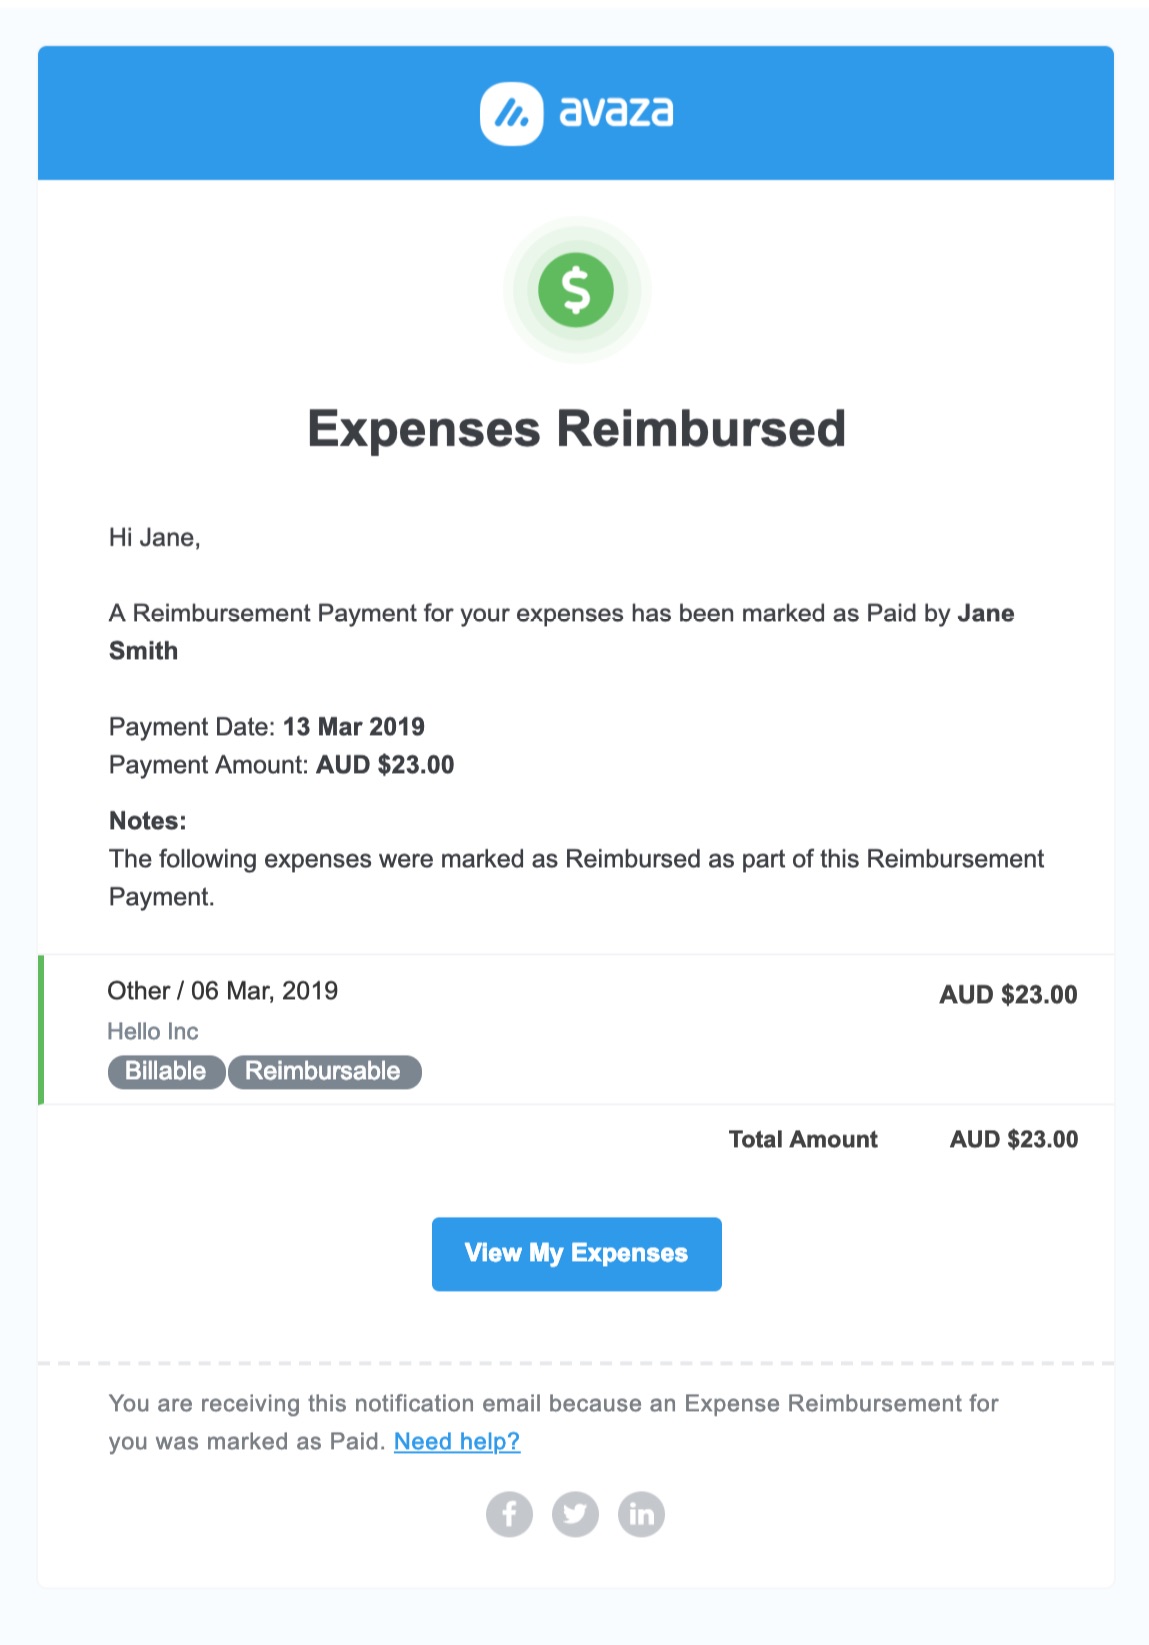 Figure: Expense User will Receive an Email Notifying them of the Reimbursement
Click the “Delete” button to delete the reimbursement. This will revert all expenses linked to the reimbursement from “Processing Reimbursement” to “Reimbursable” status
3. Paid
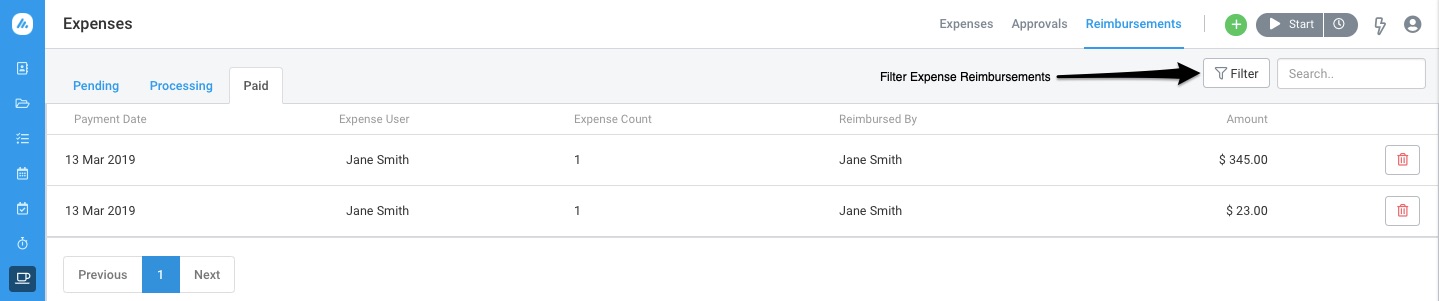 Figure: Expense Reimbursements > Paid Tab
This tab lists all paid reimbursements. Users can view key reimbursement details, such as:
- Payment Date: The payment date selected while marking the reimbursement as paid.
- Expense User: Name of the user who the reimbursement is for.
- Expense Count: Count of expenses included in the reimbursement.
- Reimbursed By: The user who paid the reimbursement.
- Amount: The amount and currency entered by the user who created the reimbursement.
The user can:
- Filter the list based on Reimbursement Payment date range using the filter button.
- Click the row to view the details of the reimbursement and linked expenses. Reimbursement Payment Details popup displays a summary of the Reimbursement and Expenses tab list all the linked expenses. The user can click the “Delete” button to delete the reimbursement.
- Click the Delete icon on any of the rows to Delete the reimbursement. This will revert all expenses linked to the reimbursement from “Processing Reimbursement” to “Reimbursable” status
Reimbursement Status
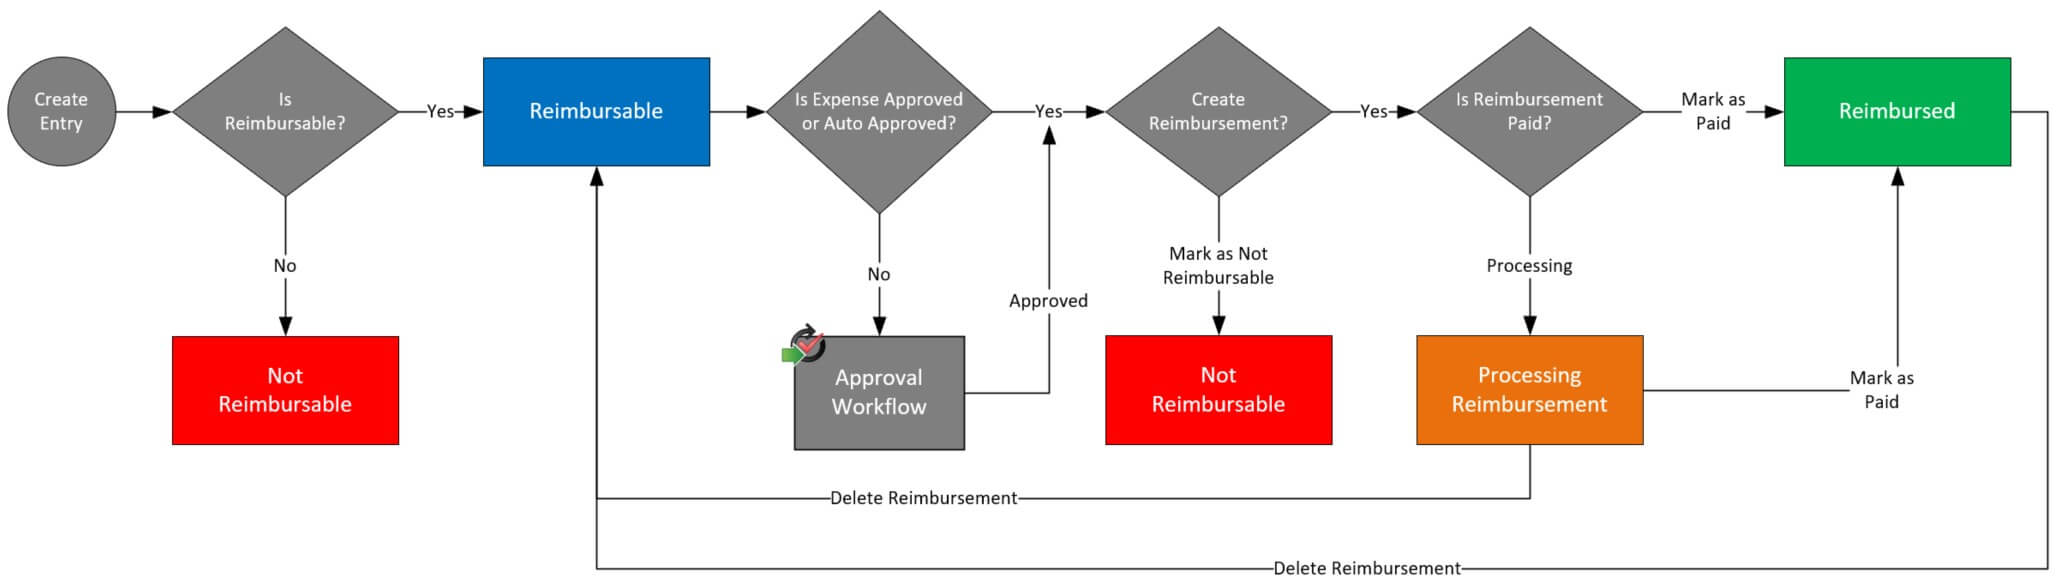 Figure: Expense Reimbursement Workflow
Here is a list of all possible expense reimbursement statuses for an expense.
- Not Reimbursable – Expenses that don’t have the Reimbursable flag checked are in this status.
- Reimbursable – Expenses that have the Reimbursable flag checked, but have not yet been processed are in this status.
- Processing Reimbursement – Reimbursable expenses that are part of an expense reimbursement being processed.
- Reimbursed – Reimbursable expenses that are part of expense reimbursements that are paid.
Do you need any further help with Expense Reimbursements? Feel free to contact our support team via chat, or email.