Avaza officially doesn’t support a feature to track day rates, however, you can use a workaround. It’s easy to track day rates using one of the following methods.
Expense Categories
You can use expense categories to keep track of your business expenses, for example, travel and mileage. However, they can also be used for bonuses, commissions, and daily and flat rates. Any user with timesheet/expense access can create new expenses and apply the corresponding expense category.
Note: The rates will be viewable when the Expense Category is selected while adding a new Expense, regardless of the permissions.
1. To create a new expense category for day rates, go to Settings > Expense Settings > Expense Categories.
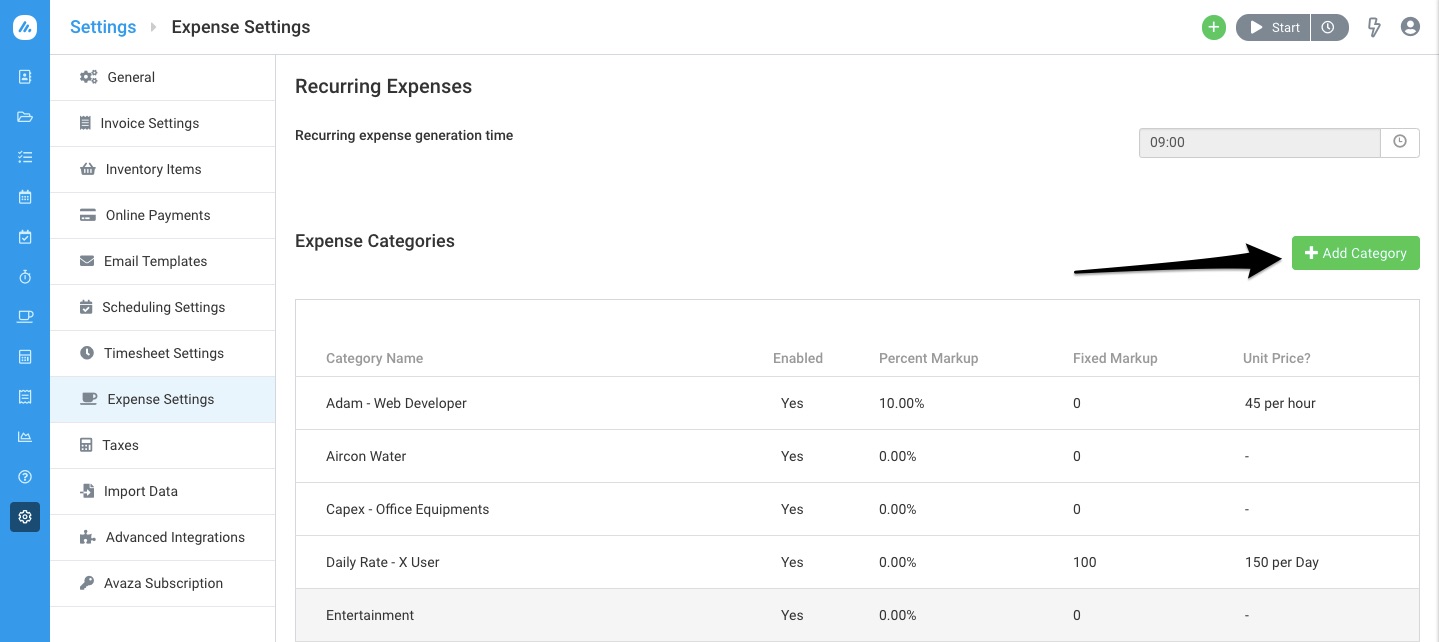 Figure: Navigate to Expense Settings to Add a New Category
2. Create a new category called “Daily Rates”. You can also add the name of the user to be able to easily identify it. Check the box “Set a Unit Price” and define a price per day. See example below:
 Figure: Create a New Expense Category for Day Rates
3. Next, you can add a new expense entry for each day you work by navigating to Expenses > Create Expense.
Choose the customer and project you worked on, enter the number of days you’ve worked and any necessary notes. Once you apply the corresponding Day Rate, it will automatically calculate the total.
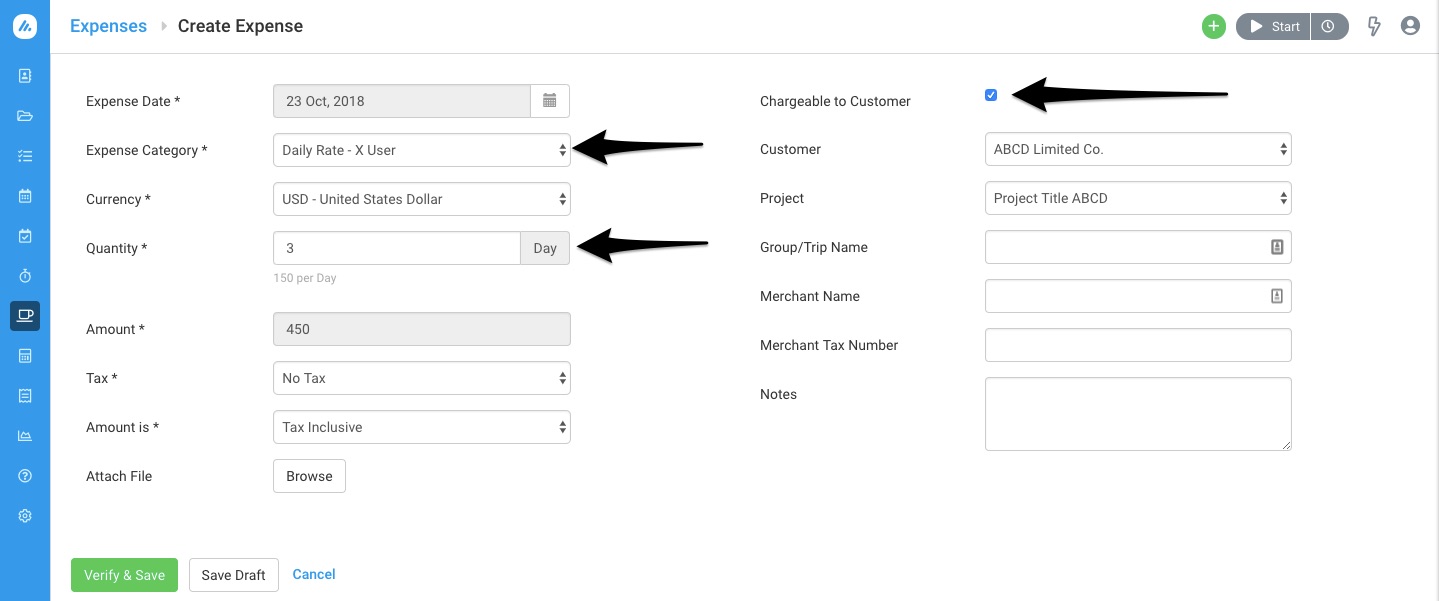 Figure: Add a New Expense Entry to Track Day Rates
This way, you’ll be able to track your time on a project using both hourly and daily rates. Billable expenses can be added to an invoice in just a couple of clicks.
Timesheet Categories
Another approach to tracking day rates is using timesheet categories.
1. Go to Project Settings and change your Project billing method to Category Hourly Rate.
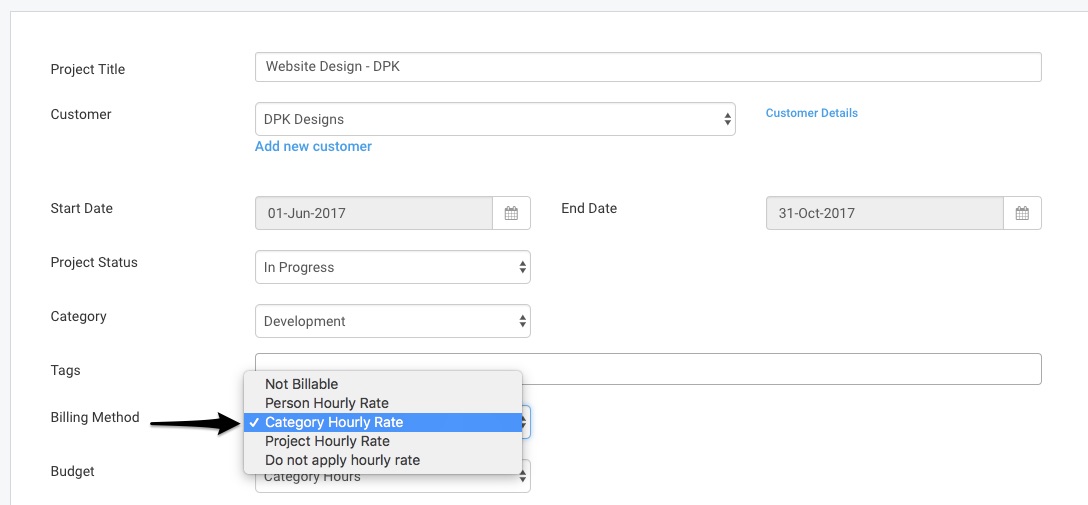 Figure: Change Project Billing Rate to Category Hourly Rate
2. Now you must add the Daily Rate in Timesheet Settings. Navigate to Settings > Timesheet Settings. Click Add Category.
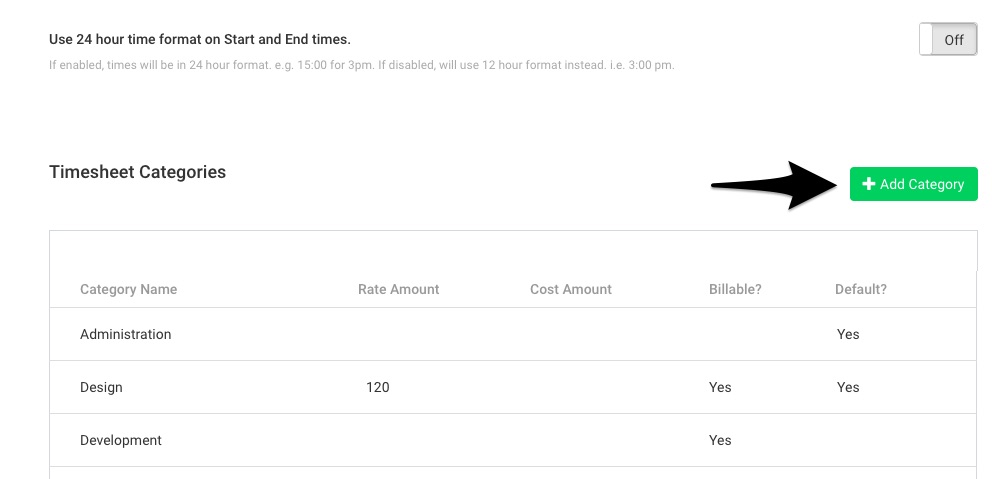 Figure: Click Add Category in Timesheet Settings
4. Create a new category called “Daily Rates” or something similar, and enter the daily billable rates.
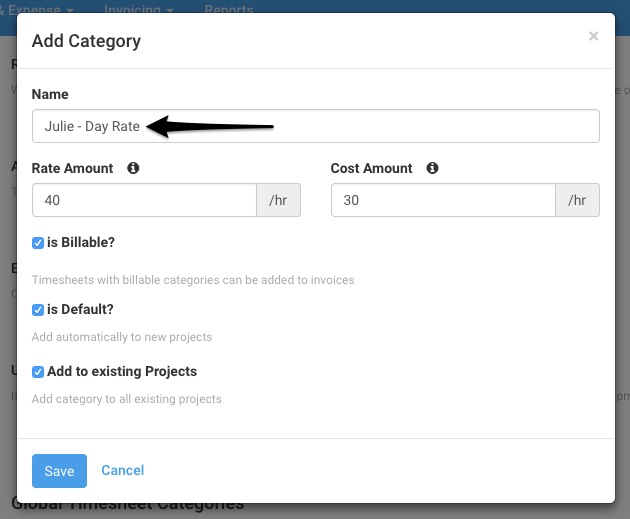 Figure: Create New Category Called Daily Rates
Once this category is added, any time you create a new timesheet entry, you can use the appropriate Day Rates category and enter the duration as needed. For example, 1 for a full-day, and 0.5 for a half-day.
 Figure: Choose this Category and Enter Time Duration as 1 to Track Daily Rates
When you import this timesheet entry into an invoice, it will add the daily rates based on your settings.
Do you need further help with this? Please contact our support team via chat or email support@avaza.com.