Avaza Mobile Time Tracking app allows you to track time on your mobile. The app is fully optimized for mobile devices making the experience of tracking time on the go easy and fun
Before we get started, please be aware of the following prerequisites.
- The mobile device must be connected to the internet.
- The user logging in must have Timesheet / Expense User or Administrator role assigned to them
- The logged in user must be a member of one or more projects with timesheet entry allowed.
- There must be one or more timesheet categories configured for the projects user has timesheet entry access for.
Now that we have this out of the way, let’s jump in and explore the features of the mobile app.
Navigation
You will notice 3 tabs located at the bottom of the app.
- Time – the logged in user can view the list of time entries for the selected day.
- Dashboard – displays summary for the time tracked for the selected date range.
- Settings – app related settings.
Lets walk through the features available on each of these tabs in details.
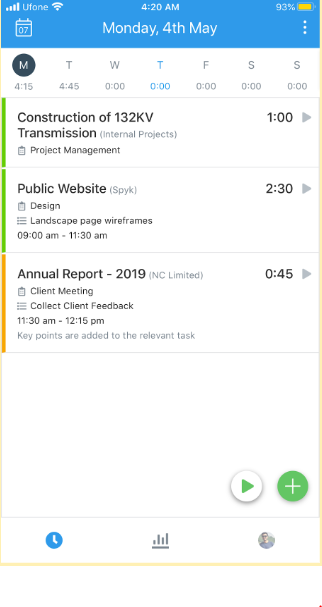
Time Tab
Time Tab is where you can quickly create, update and view timesheets. Its user friendly design makes time management a breeze. Click the clock icon from the navigation bar to access this tab. Lets walk through some of the notable features.
Timesheets List
- When you tap the Clock menu item, by default you are taken to the current day with list of existing timesheet entries
- You can move to the next or previous day by swiping left or right respectively.
- Timesheet entry could consist of the following fields
- Project
- Timesheet Category
- Task
- Start Time
- End Time
- Duration
- Notes
- Timesheet Status (indicated by the colored thin vertical line to the left of the timesheet entry)
Week Bar
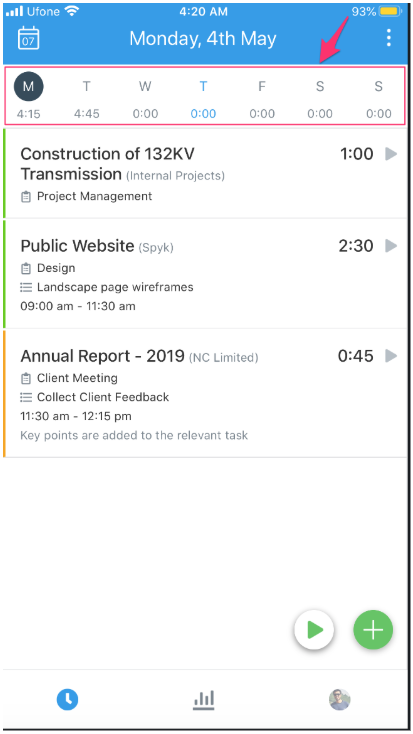
- Right above the timesheets is the week bar where all the days of the week are listed.
- The first day of the week is configured by your account admin and is used here.
- The total duration of timesheets for each day is displayed under the day label.
- You can also tap any of the day labels to jump to that day or swipe left or right to jump to previous or next week.
The Header
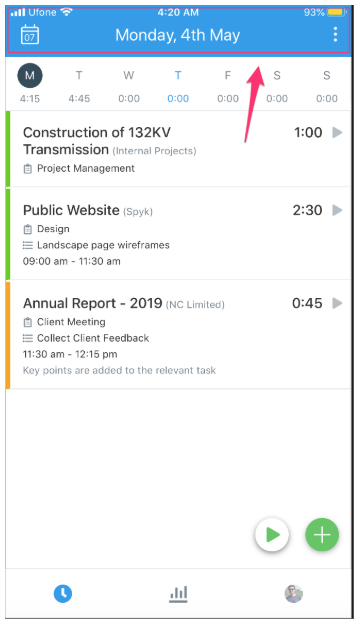
The blue bar at the top of this tab has the following elements.
- Date picker – tap on this icon to select the date you want to jump to. This is handy to jump back to Today quickly.
- Three dot control. This three dot control has the following options.
- Submit for Approval: this option will submit draft timesheets for approval
- Refresh: Tap this button to refresh the entire app. Alternatively, pull the screen down to refresh.
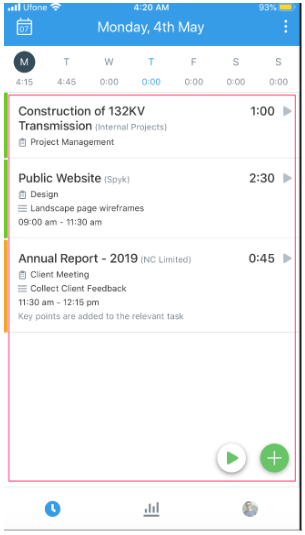
Global ‘Play’ Button
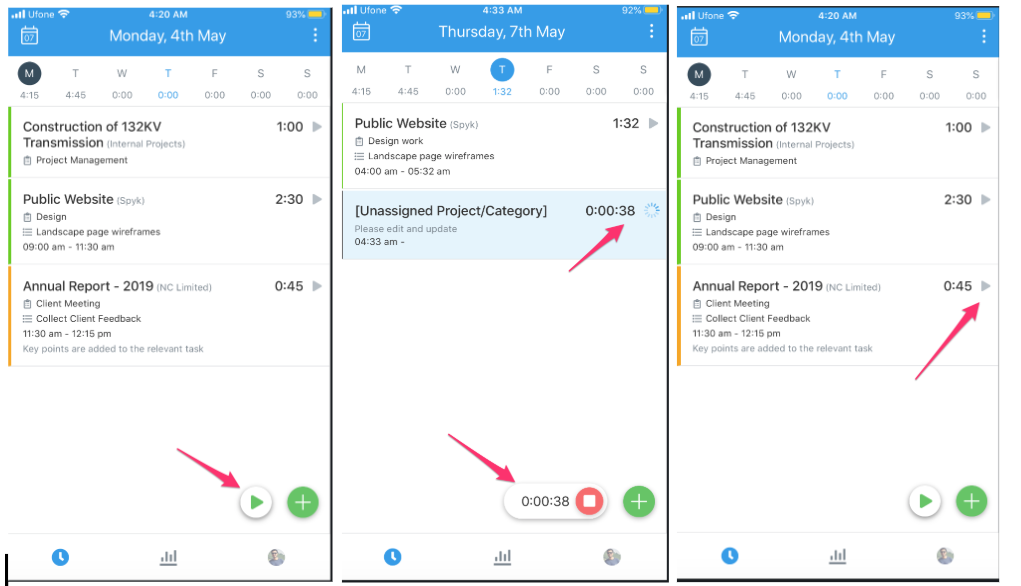
- You will notice a “Play” button bottom right of the app.
- Tap it to instantly start a timer.
- A new draft entry will be created. Mandatory details such as Project & Category still need to be filled in. You will see the timer running on this draft timesheet.
- Start button will toggle to Stop and the timer details will be visible here as well. Just like a stopwatch.
- You can add the Project, Category and other details to the entry while the timer is running by simply tapping on the entry.
- Tap the global Stop button or Stop button on the timesheet when done.
- You can also tap the “Play” button on an existing timesheet.
- Tapping the play button on Duration only timesheets (without Start and End Times) increments duration to the existing entry
- For timesheets with start and end times tapping the Play button will start a new timesheet entry with Project, Category and Task details copied across.
Global Add Entry button
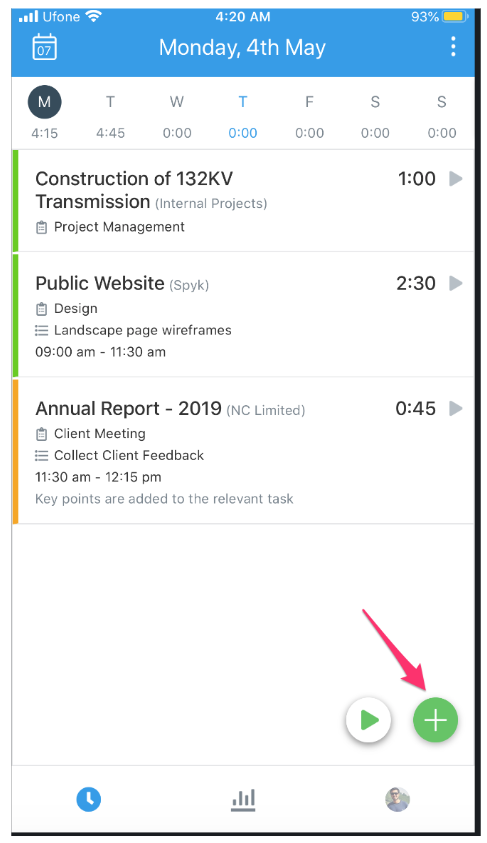
- Tap the “Green Plus” button to create a timesheet manually.
- Select the Project and Timesheet Category. If you haven’t created any projects yet, please refer to our Getting Started with Project guide for more details on how to create your first project.
- You can also optionally select a Task, enter Start Time, End Time and Notes.
- Start Time, End Time and Duration are interlinked. If two of the three are provided then the third is calculated.
- If all three are left blank then you can click Start Timer to start a timer on the newly created timesheet.
Edit Timesheet
- Tap an existing entry to open the timesheet edit popup
- You can also long press an existing entry and click the Edit option from the context menu.
- Update the required details and tap Save.
Delete Timesheet
- Long press on an entry and from the context menu select Delete.
OR - ap on an entry to open the Edit Timesheet Popup. At the bottom left, click on the Delete button and then confirm your action.
Dashboard
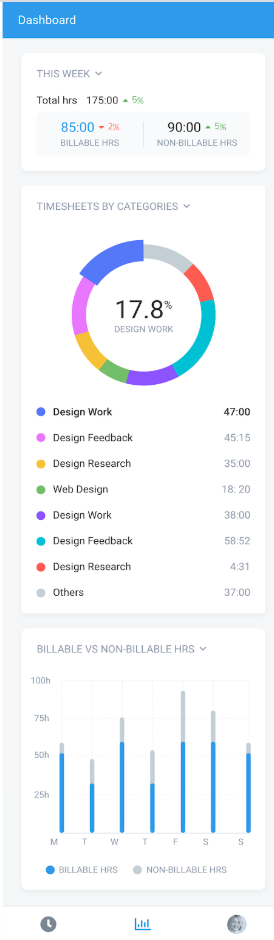
You can access the Dashboard by tapping the chart icon on the navigation bar.
Dashboard is ideal to learn where you have been spending time. Breakdown of billable vs non billable, Projects, Categories, Tasks and more for the selected time period.
The Dashboard comprises of the following components.
- Date range dropdown
- Total Hours
- Billable vs Non Billable donut graph
- Hours breakdown by Project, Category & Tasks
- Bar Chart per period
Date Range dropdown
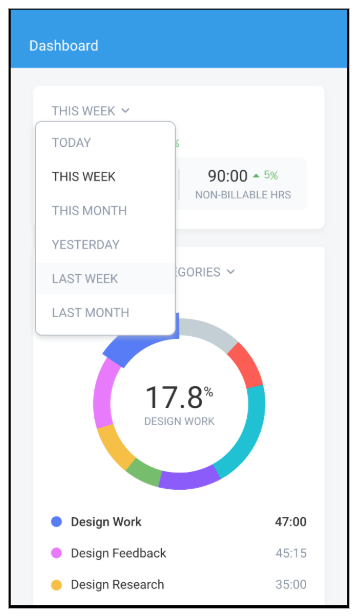
This dropdown allows you to filter the graphs for a set period from the following list of predefined filters.
- Last Month
- Last Week
- Yesterday
- Today
- This Week (default)
- This month
By default, it displays the data for the This Week. Click on ‘This Week’ to select one of the other options.
Total Hours
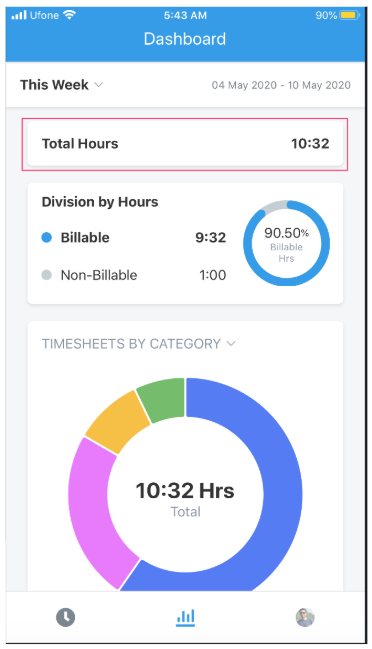
It displays the total hours tracked during the selected period.
Billable vs Non Billable donut graph

It displays the split between Billable and Non-Billable time. Tap on Billable or Non-Billable hours to see the percentage of respective hours tracked against total hours.
Breakdown of Hours by Project, Category & Tasks

View breakdown of tracked hours by one of the available options. The available options are:
- Customer
- Project
- Task
- Category
Bar Chart Per Period
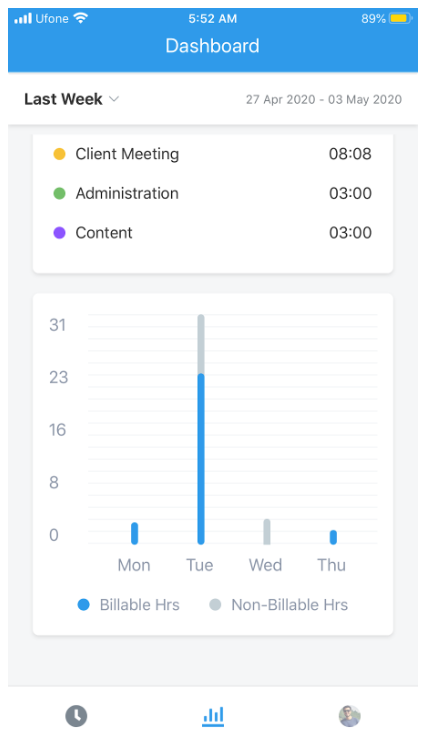
View the tracked hours in a bar chart with split between billable and non billable hours for each period for the given date range. For example, if you select “This Week” as the date range then you will see 7 bars for each day of the week broken down by billable and non billable hours.
Settings
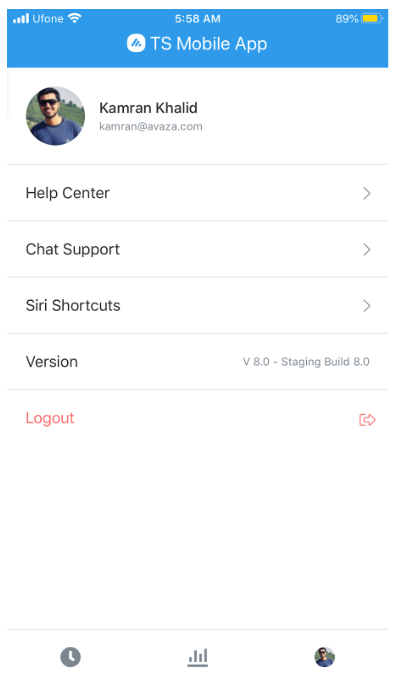
Tap the Profile icon in the navigation bar to access the Settings. The Settings page has the following options.
- Help Center: tap to access our Support page.
- Chat Support: tap to start chat with our Customer Success Team.
- Version: it displays the latest version of the app.
- Logout: Tap to logout of the app.
- Siri Shortcuts: This option is available on iPhone and iPad.
Siri Shortcuts
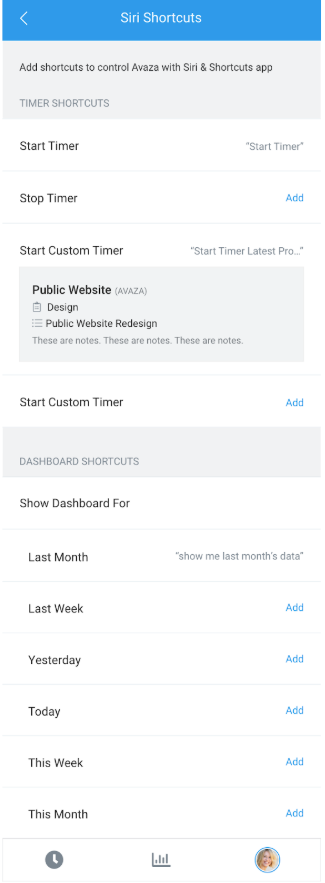
Avaza IOS app allows you to use Siri to control your interactions with the application. Currently, you can create the Siri shortcuts to:
- Control Timer Interactions
- View Dashboard Data
Controlling Timer Interactions
You can save phrases which Siri will recognize as triggers to Start and Stop the timers. To use these triggers, simply say ‘Hey Siri’ and then say your triggering phrase. That’s it. Siri will take care of the rest.
Here are the actions you can currently perform to control timers via Siri:
Start Timer
The Start Timer function will start a new timer without assigning any project and category to it. This shortcut is a global one i.e it is saved in your device and you’ll be able to use this trigger/shortcut across all of your accounts. You don’t need to set up a separate shortcut for starting the timer for each of your accounts.
- Tap on the Add link. It will open the Add to Siri screen where you can set up your trigger.
- ‘When I say’ field represents the phrase that will be used as the trigger to perform this action. It will be prepopulated with the phrase ‘Start Timer’. You can update it.
- The ‘Do’ field represents the action that will be performed when you say the trigger phrase.
- Tap ‘Add to Siri’ and confirm to save the shortcut.
- To use this shortcut, simply say ‘Hey Siri’ and then say this phrase. The timer will start.
- To edit or delete the shortcut, tap on the shortcut name. From here you can choose to edit or delete the shortcut.
Stop Timer
Invoking this shortcut via Siri will stop any timer currently running on your app. Same as the Start Timer shortcut, this one is also a global one and will work across all of your accounts.
Resume Timer
Sometimes you may want to resume tracking time on your work without the hassle of assigning the project and category. Just like Start and Stop timer shortcuts, this one will also work across all of your accounts. When you call this shortcut, it will:
- Continue the timer on a duration only timesheet that was created for today.
- Create a new entry with the same project and category as the last created entry if the last entry has Start and End Time on it OR it exists on a day other than Today.
Custom Timer
Use this feature to run a timer with predefined settings i.e Project, Category, Task, and Notes. Unlike the rest of the timer shortcuts, the custom timers are account specific since the project, categories etc are unique to an account. When you call a custom shortcut, it will start the timer only if the user is logged in to the account the shortcut is configured for.
Shortcuts for Dashboard
With Siri, it is now possible to see your dashboard data for the selected period of time with simple voice commands. You can say phrases like ‘Hey siri, show me the time for last month’ to view last month’s data. You can set up a personalized phrase for the following date ranges.
- Last Month
- Last Week
- Yesterday
- Today
- This Week
- This Month
Update or Delete a shortcut
- Click on any of the existing shortcuts
- This will open the Edit Shortcut screen.
- You can update the shortcut details or press “Delete Shortcut” to delete.