Enable powerful Expense approvals for your business with Avaza. Team members can create and submit expenses on the go, and managers can approve them for your whole account.
 Figure: Expense Approval Workflow
To get started with Expense approvals, you first need to enable some account-level settings.
Expense Approval Settings
Navigate to Settings > Expense Settings.
- Switch on Expense Approvals: Toggle the switch to turn Expense approvals on or off.
- Lock Approved Expenses: Lock approved Expenses from further editing by toggling this switch on or off.
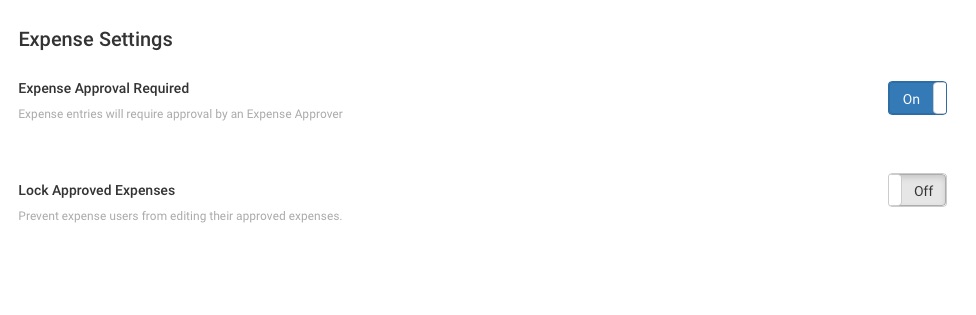 Figure: Navigate to Settings > Expense Settings for Account-Level Settings
Navigate to Contacts > Team Members. Only users with the Timesheet/Expense user role or Admin role can enter expenses in your Avaza account. To assign Expense Approvers, provide the relevant users with the Expense Approver role.
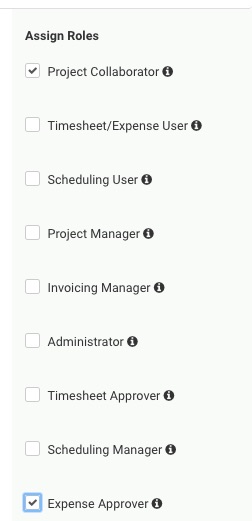 Figure: Assign Users Approving Expenses with Expense Approver Role
Submitting Expenses for Approval
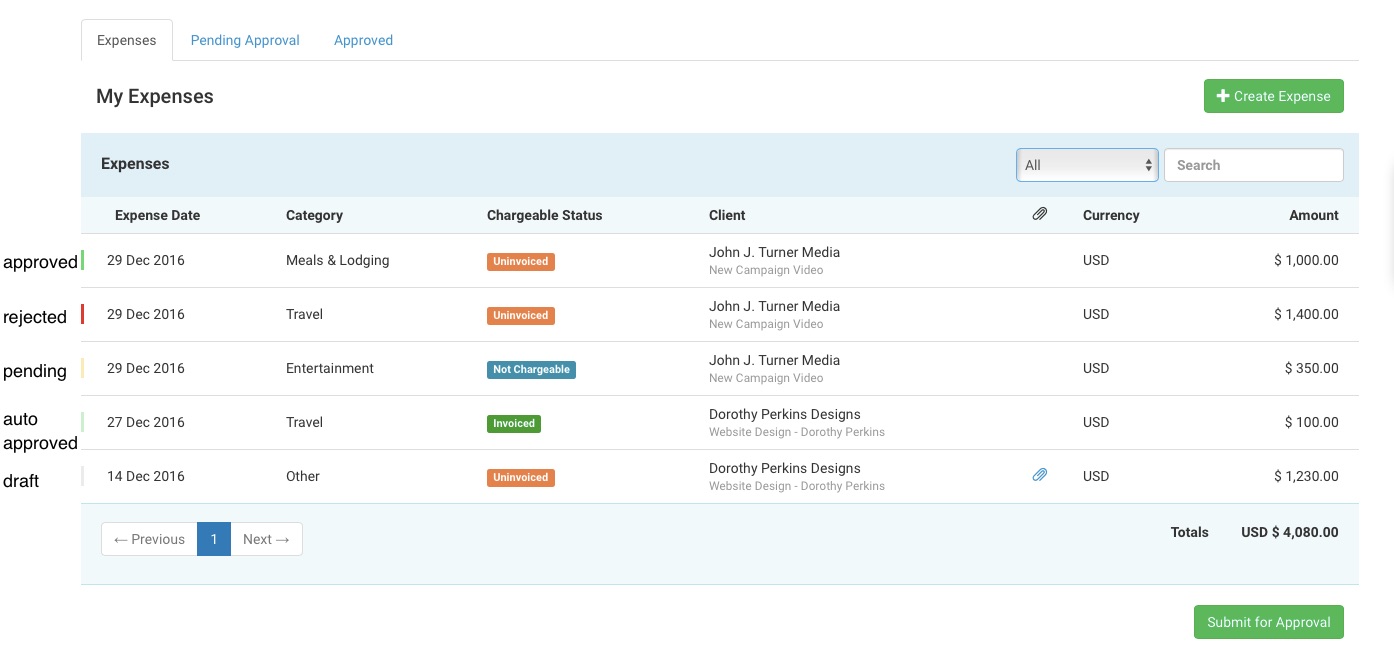
The Expense Approval workflow is very simple. The “Submit All for Approval” button at the top and bottom of the Expense Overview screen submits all Verified (color-coded Blue) expenses on the current page for approval.
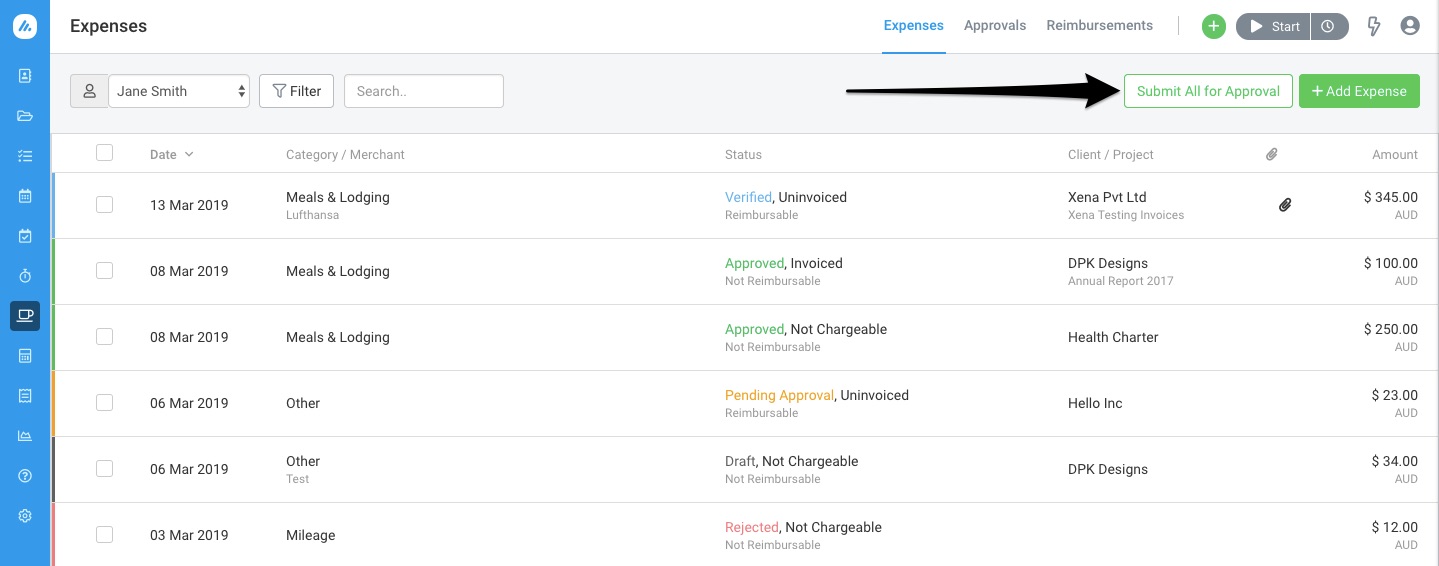 Figure: Submit Expenses for Approval
Users can also select specific expenses to submit for approval or submit each expense via the Expense Details popup.
Approving Expenses
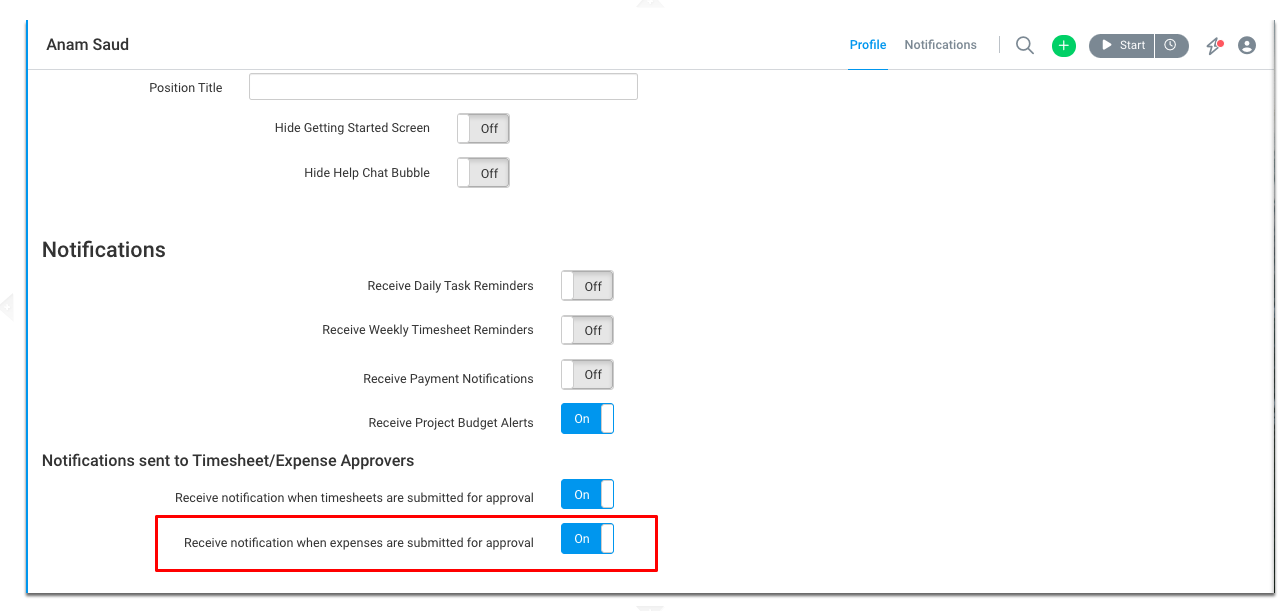
Once submitted, the expenses enter the “Pending Approval” status, and all Expense Approvers receive an email notification. They can then review and selectively Approve or Reject expenses on the Expenses > Approvals > Pending screen.
Expense Approvers also have the option to enable/disable these email notifications. This setting is available in the User Profile setting.
To ensure the approval process is fast yet flexible, we group expenses by the user. You can then bulk approve expenses for a user or decide to individually approve or reject expense.
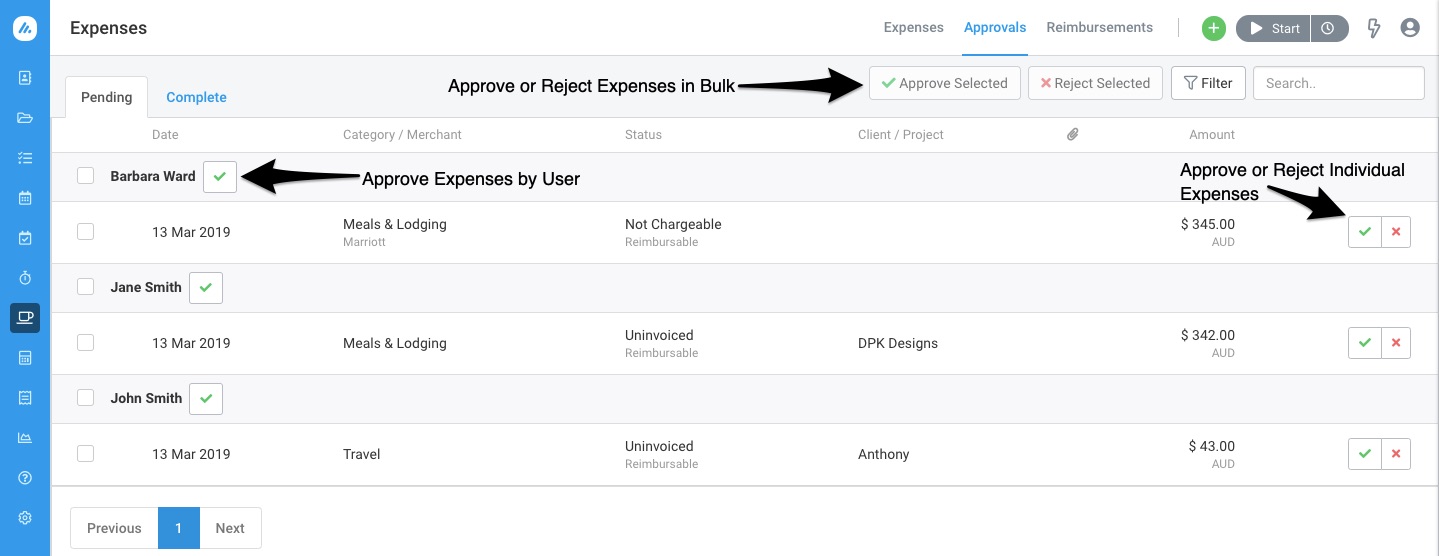 Figure: Approve or Reject Expenses in Pending Tab
When an expense is rejected an email is sent to the expense user with the rejection reason and expense details.
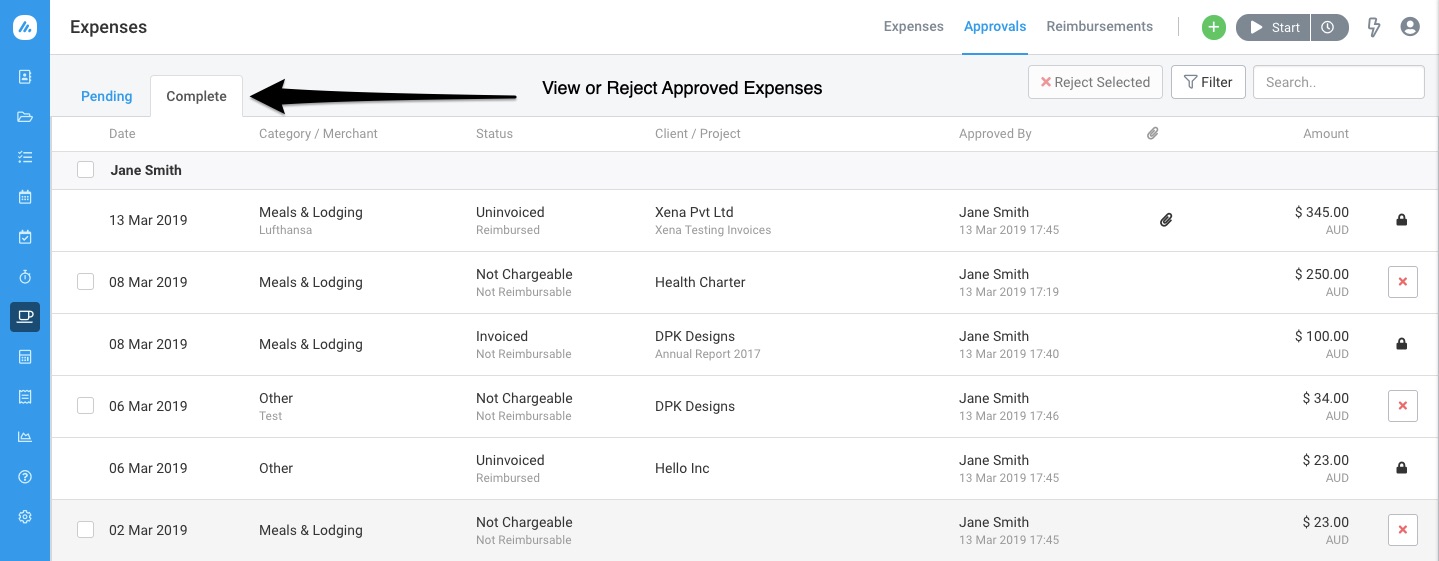 Figure: View or Reject Approved Expenses in Complete Tab
To view all approved expenses grouped by user, Admins and Expense Approvers can navigate to the Expenses > Approval > Complete tab. Approved expenses that have not been invoiced can be rejected here so that they can be edited.
Approval Status
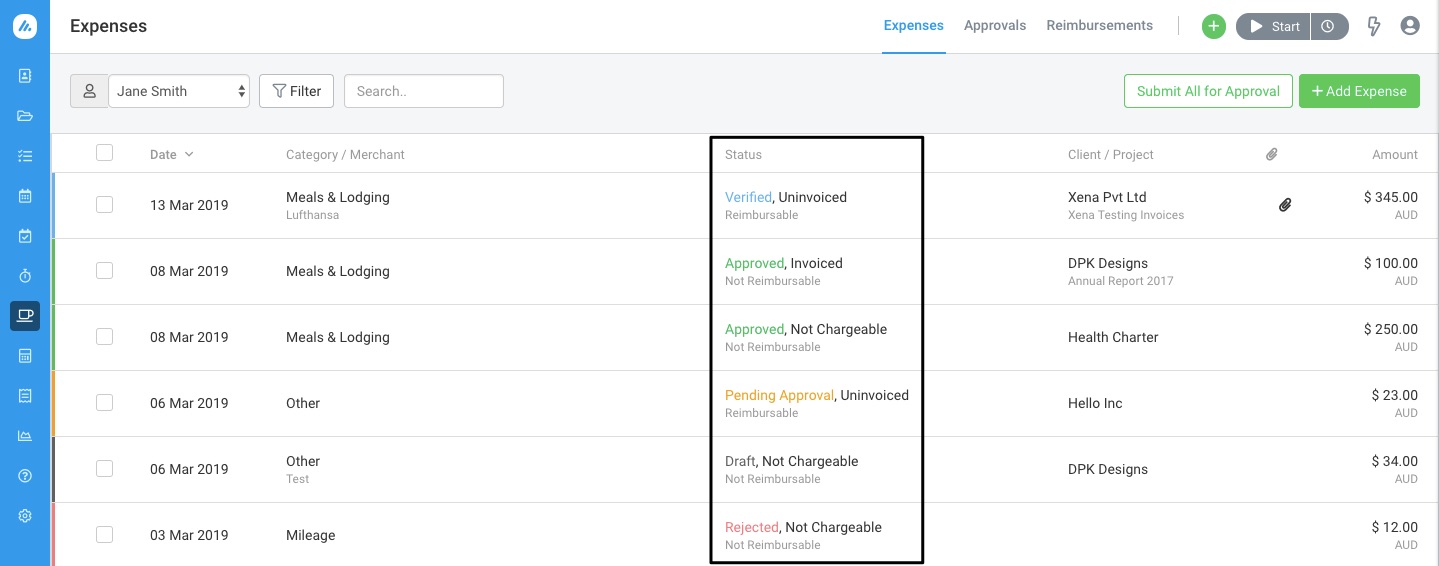 Figure: Expense Overview Page with All Expense Statuses
Timesheet/Expense users can view all Expenses created by them on the Expense Overview page, along with their status. Approval status is shown as a column, as well as visible via a color-code on the left of the Client/Project column.
- Draft: Grey
- Verified: Blue
- Pending: Yellow
- Automatically Approved: Light Green
- Approved: Dark Green
- Rejected: Red
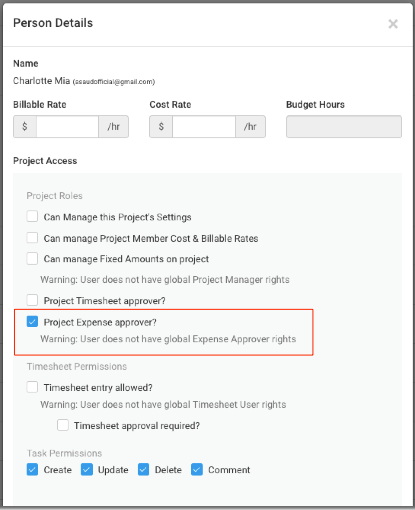
Expense Approver at Project Level:
To enhance flexibility, Avaza allows assigning Expense Approvers at the project level, similar to Timesheet Approvals. This means you can designate specific approvers for each project, ensuring that expenses are reviewed by the most appropriate personnel.
Setting Up Project-Level Expense Approvers:
-
- Navigate to the specific project’s settings.
- Assign the Expense Approver role to team members who should approve expenses for that project.
Hope this guide helps you understand how to submit and approve expenses in Avaza. If you need further help, feel free to contact our support team via chat or by emailing support@avaza.com.