Avaza’s e-Invoicing feature lets you send compliant digital invoices directly to your customers through supported government and private e-Invoicing networks such as Peppol and DBNAlliance.
Follow the steps below to get set up and start sending e-Invoices seamlessly.
Feature Availability
The e-Invoicing module is available to paid Avaza accounts only. If you’re using Avaza’s free plan, please upgrade to access this feature.
Complete the KYC Verification
Before e-Invoicing can be enabled, you must complete a short Know Your Customer (KYC) verification.
Why is KYC required?
To comply with local and international e-Invoicing regulations, Avaza must verify your business identity before registering your organization on approved e-Invoicing exchanges such as Peppol and DBNAlliance.
⚠️ Already registered elsewhere?
If your organization is already registered with another e-Invoicing provider, please deregister first before completing this form to avoid conflicts.
Activation & Network Registration
Once your KYC is approved:
- Avaza will register your account with the relevant e-Invoicing network.
- The e-Invoicing feature will be enabled in your Avaza workspace.
- You’ll receive a confirmation email when setup is complete.
Map Tax Codes to e-Invoice Categories
Each tax code in Avaza must be mapped to the correct E-Invoice Category.
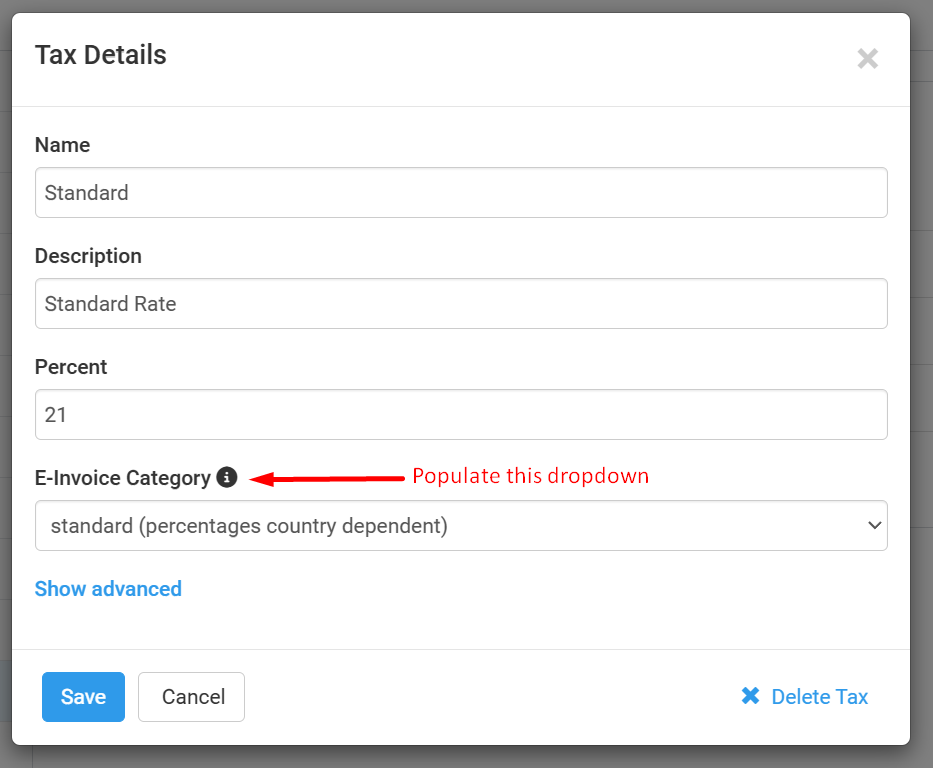
To configure this:
- Go to Settings › Taxes.
- Select each tax code.
- From the E-Invoice Category dropdown, choose the appropriate mapping.
💡 This ensures your e-Invoices are compliant with local tax authority rules.
Verify Your Company’s Billing Address
Your company’s registered address must appear correctly on your e-Invoices.
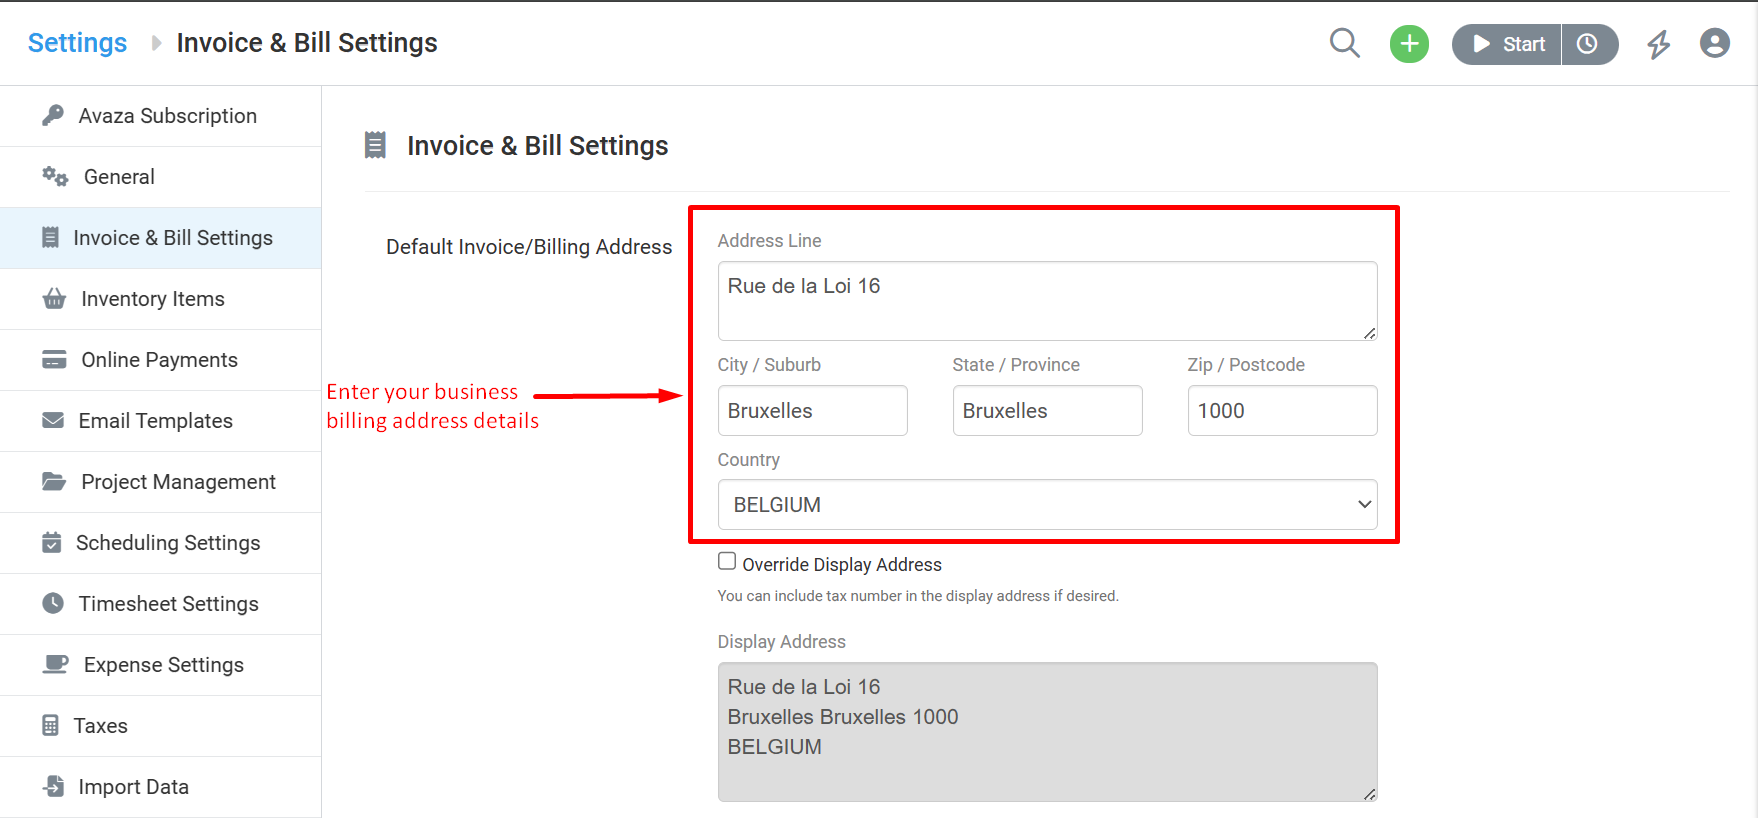
- Navigate to Settings › Invoice & Bill Settings.
- Ensure your Default Invoice/Billing Address reflects your official registered address.
- Double-check that the country is correctly selected.
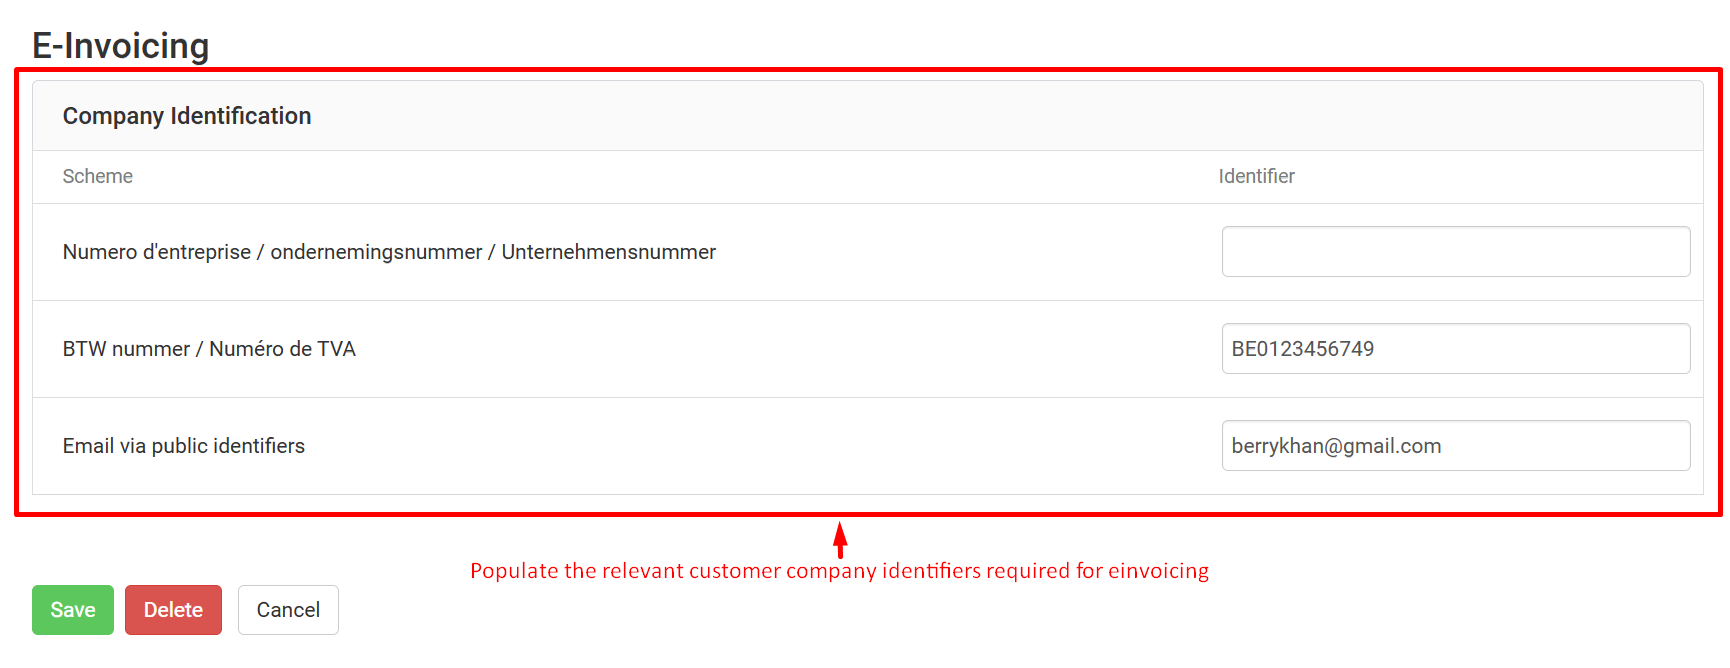
Add e-Invoicing Details for Each Customer
Each customer record must include their valid billing and identification details.
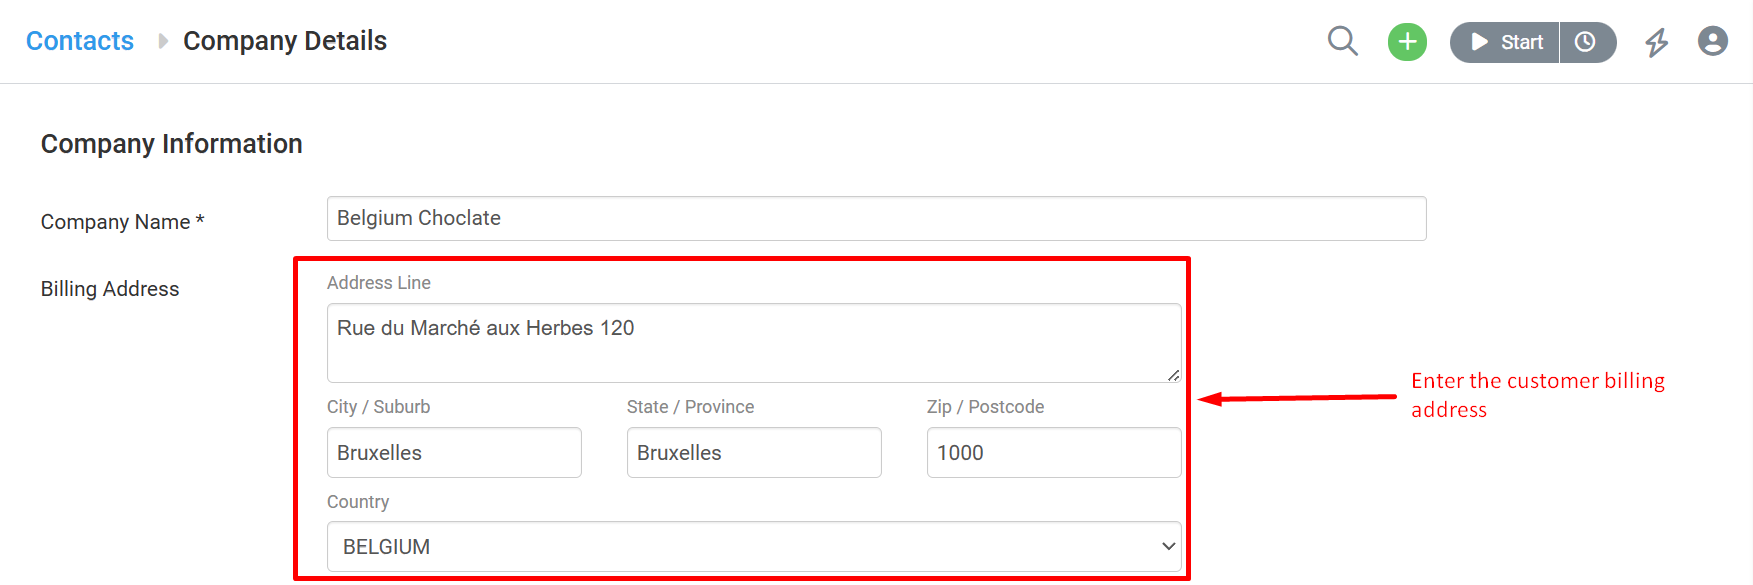
Steps:
- Go to Contacts › External Contacts.
- Edit the customer record and verify:
- Full billing address and correct country code.
- Applicable E-Invoicing Company Identifiers (e.g., VAT, registration, or tax IDs).
- You can skip optional fields not relevant to your customer.
⚠️ Government or Enterprise Customers:
Some countries require a Purchase Order Number for specific customers (e.g., government entities).
To enforce this rule, check “Require Purchase Order Number when sending Invoices to this Customer.”
This ensures the invoice cannot be sent without a PO number.
Configure Payment Instructions (If Required)
Some countries require that payment details be included in the e-Invoice.
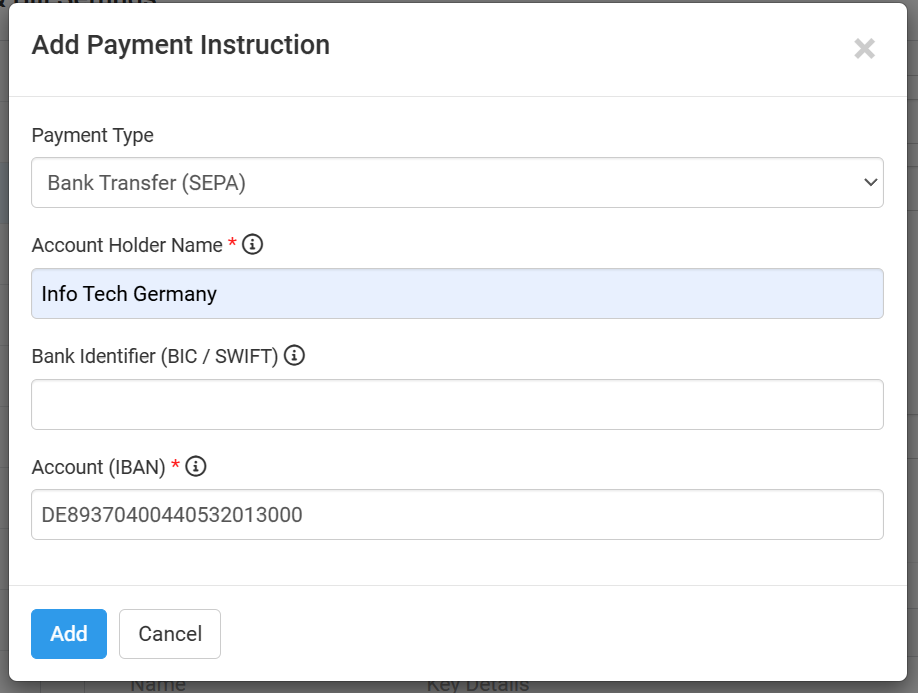
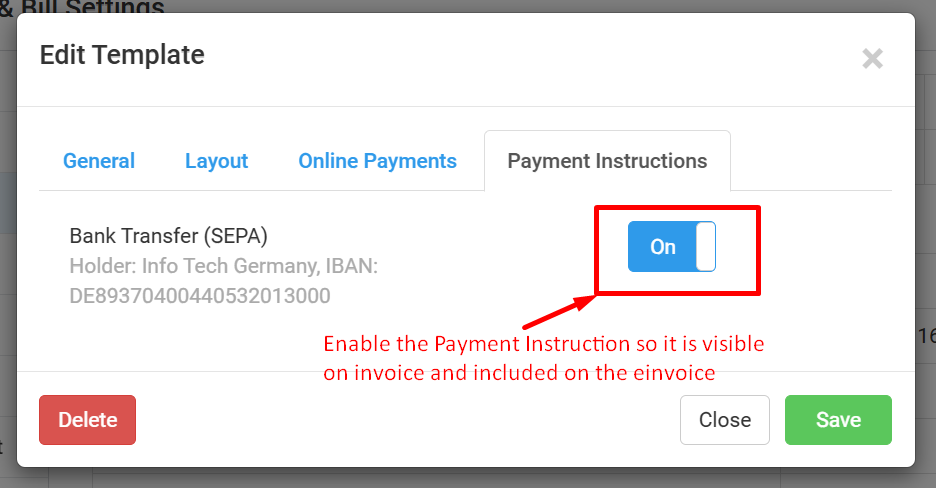
- Go to Settings › Invoice & Bill Settings.
- Under Payment Instructions, add your payment details (e.g., Bank Transfer (SEPA), Bank Transfer, BPAY etc).
- Enable these payment instructions for the invoice template you’ll use for e-Invoicing.
Send Your First e-Invoice
You’re now ready to send e-Invoices!
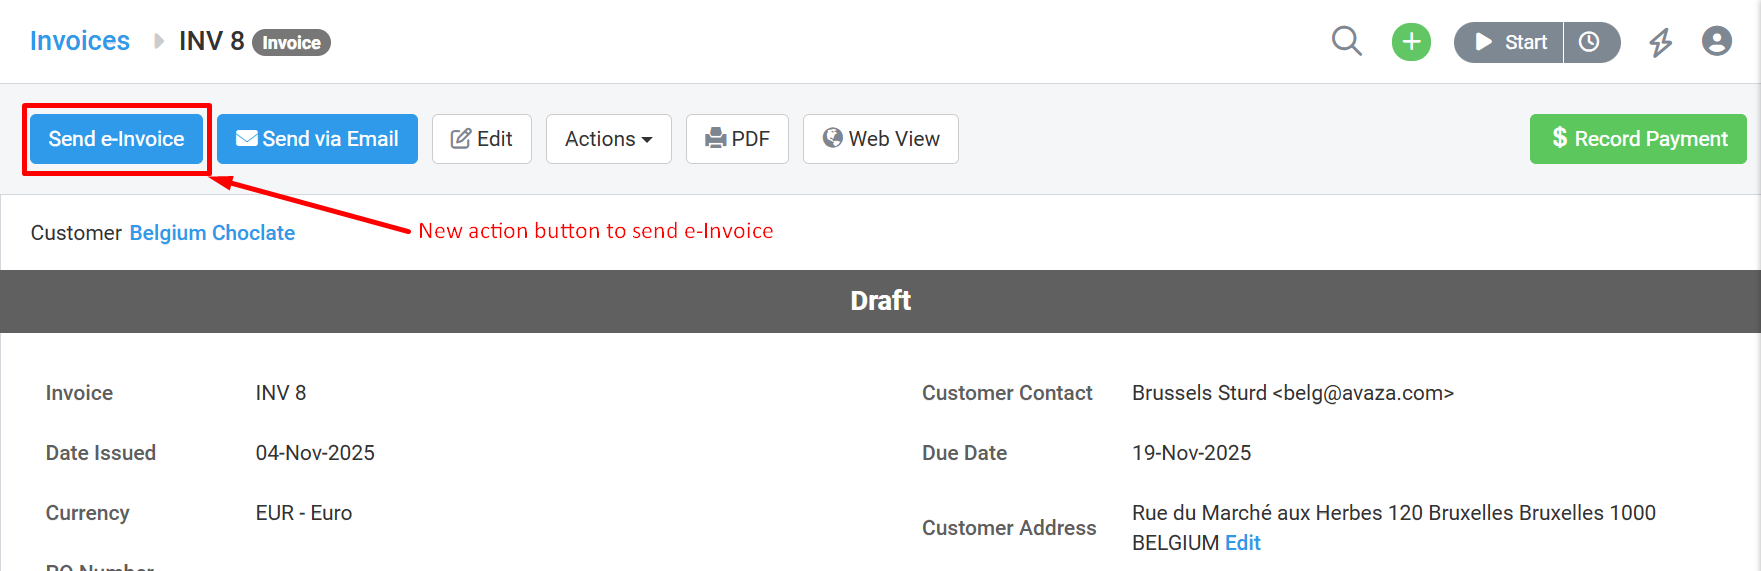
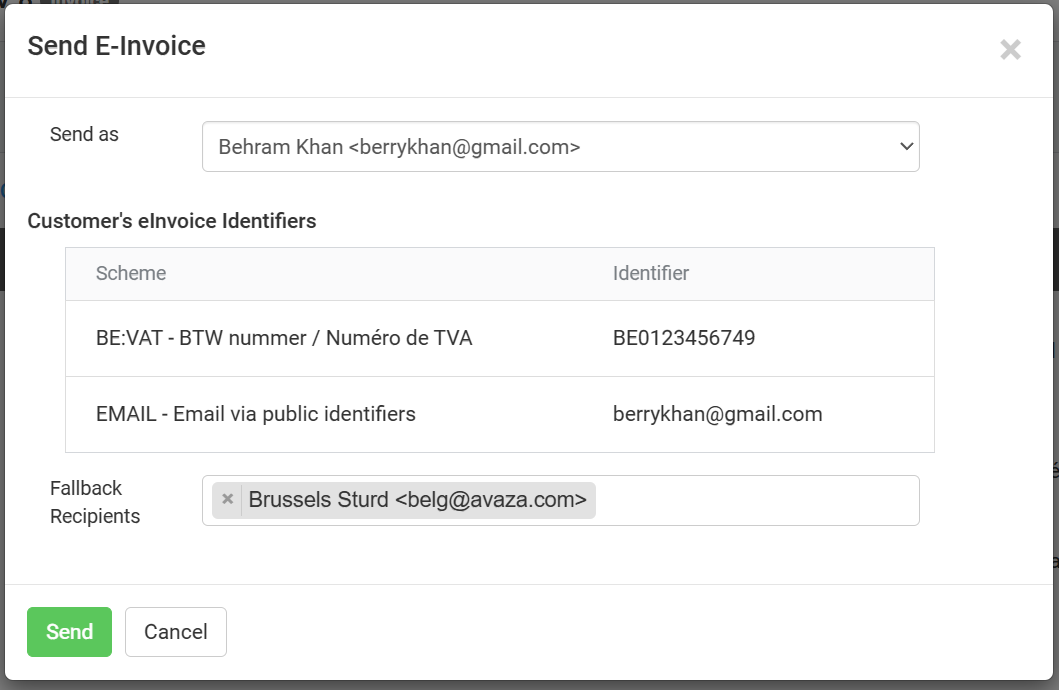
- Create an invoice as usual in Avaza.
- Click the new “Send e-Invoice” button.
- Review the summary popup, confirm the details, and click Send.
- The invoice status will change to Sending.
- Once processed, the e-Invoicing network will return an update, and the invoice status will update automatically.
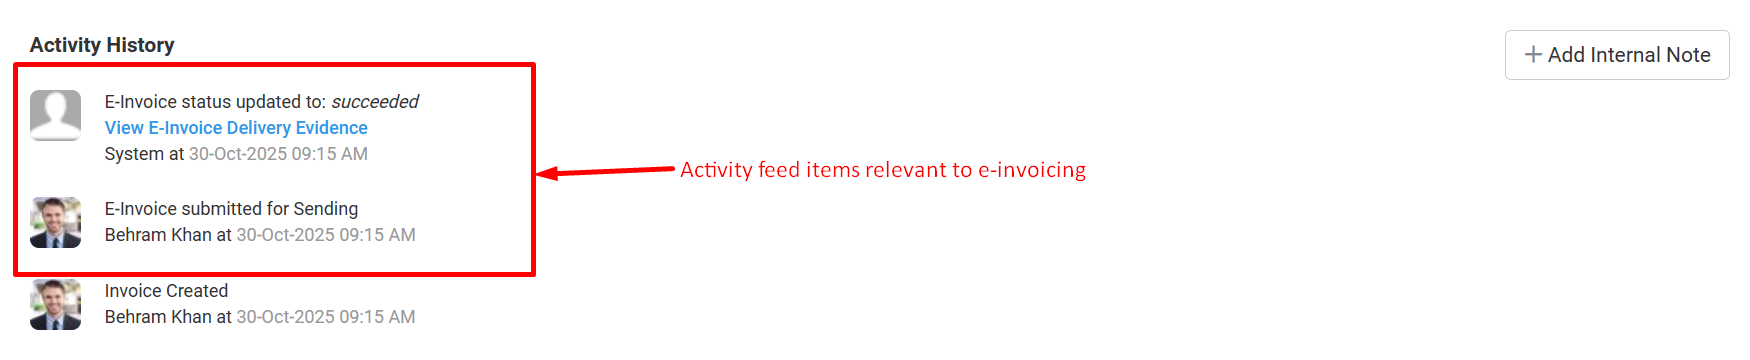
You can track all updates in the Activity History section of the Invoice Details page.
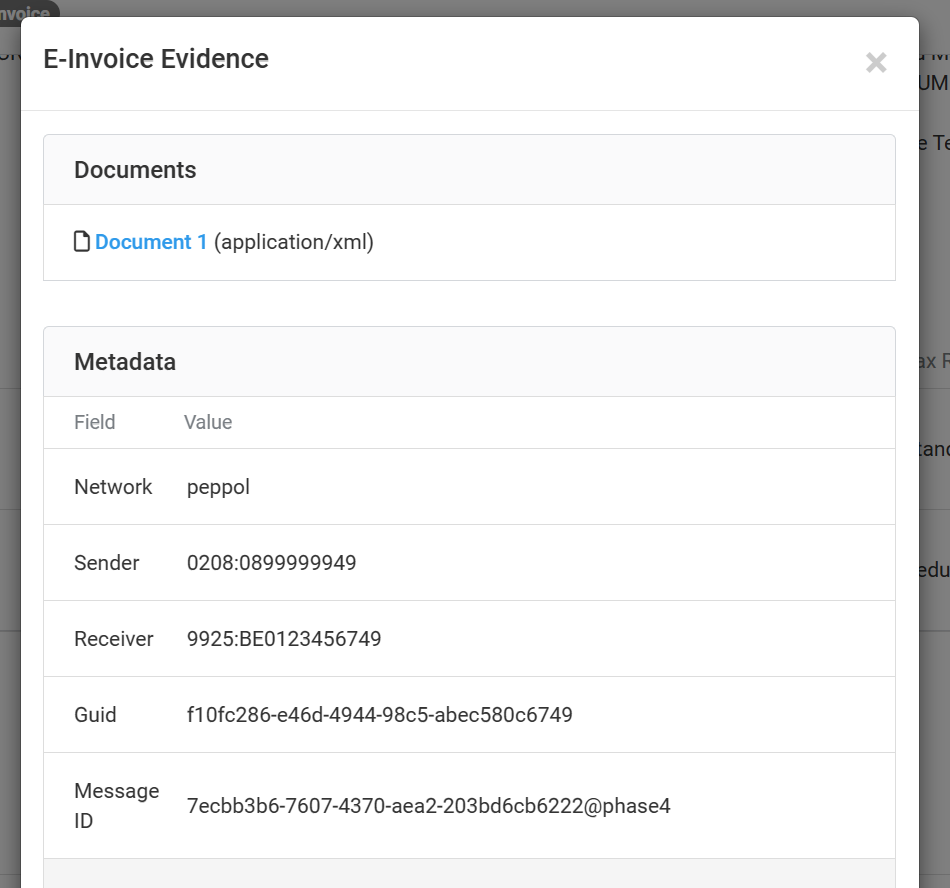
For successfully delivered e-Invoices, click “View e-Invoice Delivery Evidence” to see proof of delivery.
💬 Example status flow:
Draft → Sending → Sent
Supported Countries
Avaza currently supports e-Invoicing for businesses in:
🇦🇺 Australia
🇦🇹 Austria
🇧🇪 Belgium
🇩🇰 Denmark
🇫🇷 France
🇩🇪 Germany
🇮🇸 Iceland
🇮🇪 Ireland
🇱🇺 Luxembourg
🇳🇱 Netherlands
🇳🇿 New Zealand
🇳🇴 Norway
🇸🇪 Sweden
🇬🇧 United Kingdom
🔄 Coming soon: More countries will be added soon — this list will be updated as support expands.
If you run into any issues during setup or while sending e-Invoices, please feel free to reach out to us via direct chat or email to our support team. We’re continuously improving the e-Invoicing module, so your feedback is always welcome!