Sometimes you may need to provide a customer with a credit on their invoice, for example, if you offer them a reimbursement for any reason or if products you sold are returned to you. In this case, you can create Credit Notes in Avaza and apply them towards outstanding invoices. A credit note is essentially a negative Invoice and is a way to show a customer that they don’t have to pay the full amount of an invoice.
Create a New Credit Note
To create a Credit Note, click on Invoices from the side navigation, and click on Credit Notes.
 Figure: Click Invoices > Credit Notes to Access the Credit Notes Screen
Click on Create Credit Note, and choose a customer to assign the Credit Note to from the drop-down. Click Create after choosing the customer.
 Figure: Click Create Credit Note, Choose a Customer and Create a New Credit Note
On the next screen, you can enter the credit note details, and the Inventory item it is relevant to.
Here are all the fields you can fill out:
Header
- Credit Note #: This is pre-populated for you in a sequential manner. You can override this if necessary and we will increment each subsequent number by 1. You can reset the Credit Note number back to 1 by updating the Prefix via Invoice Settings page.
- Issue Date: Pre-populated as the date you create the Credit Note on.
- Amounts Are: If the Unit Price you are entering is exclusive of Tax, then choose Tax Exclusive. If it includes Tax, then choose Tax Inclusive.
- Currency: Is set to the Customer Currency.
- Template: Is set to the Default Invoice template, but can be changed as needed.
 Figure: Enter Credit Note Details and Link Line Items to an Existing Project
Credit Note Item Details
- Inventory Type: Select from the list of available Inventory Types. You can also create a New Inventory item by clicking the “Add Inventory Item” link.
- Description: Add further details for the line item by entering the description. This is an optional field.
- Link Project: If the Project Invoice Link setting is switched on, you will see a drop-down appear under each line item allowing you to link the items to an existing project (for the same customer).
- Qty: Enter the Quantity.
- Unit Price: Enter the Unit Price.
- Tax Rate: Enter the relevant tax rate.
- Amount: Amount is automatically calculated based on Qty and Unit Price.
- Notes: You can also add further details regarding the Credit Note in the Notes field.
When you are done, click Save Credit Note.
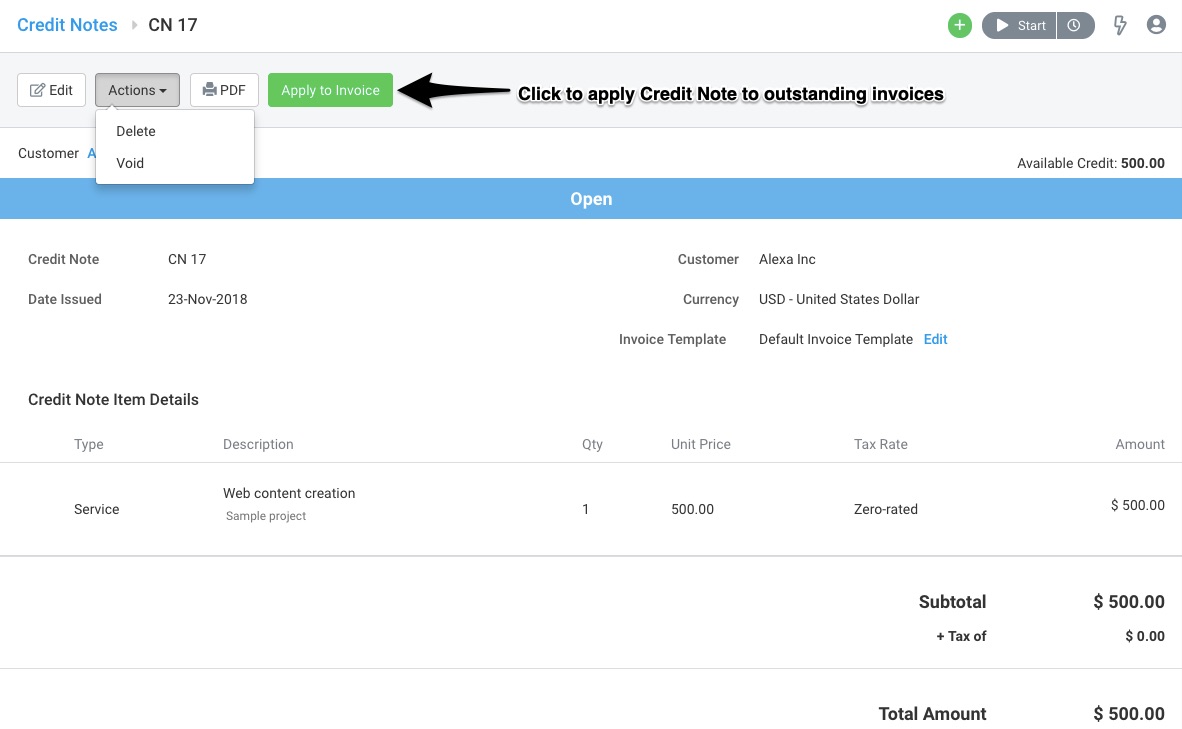 Figure: View Saved Credit Note, Apply to Invoice or Void/Delete
When viewing a Credit Note, you can choose to Edit, Delete or Void it (using the Actions drop-down) or Apply it to an Invoice.
Applying Credit Notes to Invoices
There are two ways to apply a Credit Note to an Invoice.
1. Apply Credit Note via Credit Notes
Open the Credit Note you wish to apply to an Invoice and click “Apply to Invoice.”
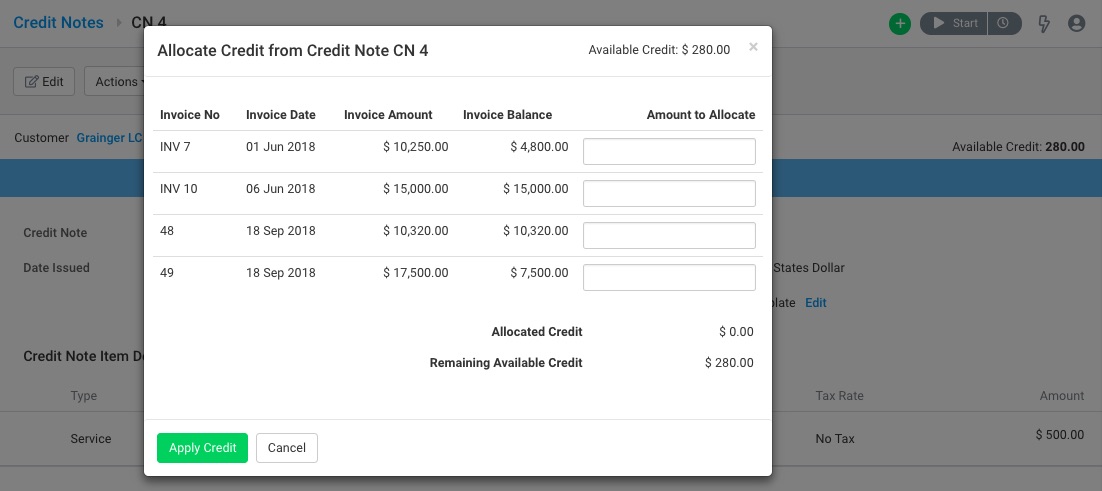 Figure: Click “Apply to Invoice” to Allocate Credit Note Amount to Invoice
In the popup, you can choose to allocate credit from the Credit Note to one or more invoices with an outstanding balance linked to the same customer.
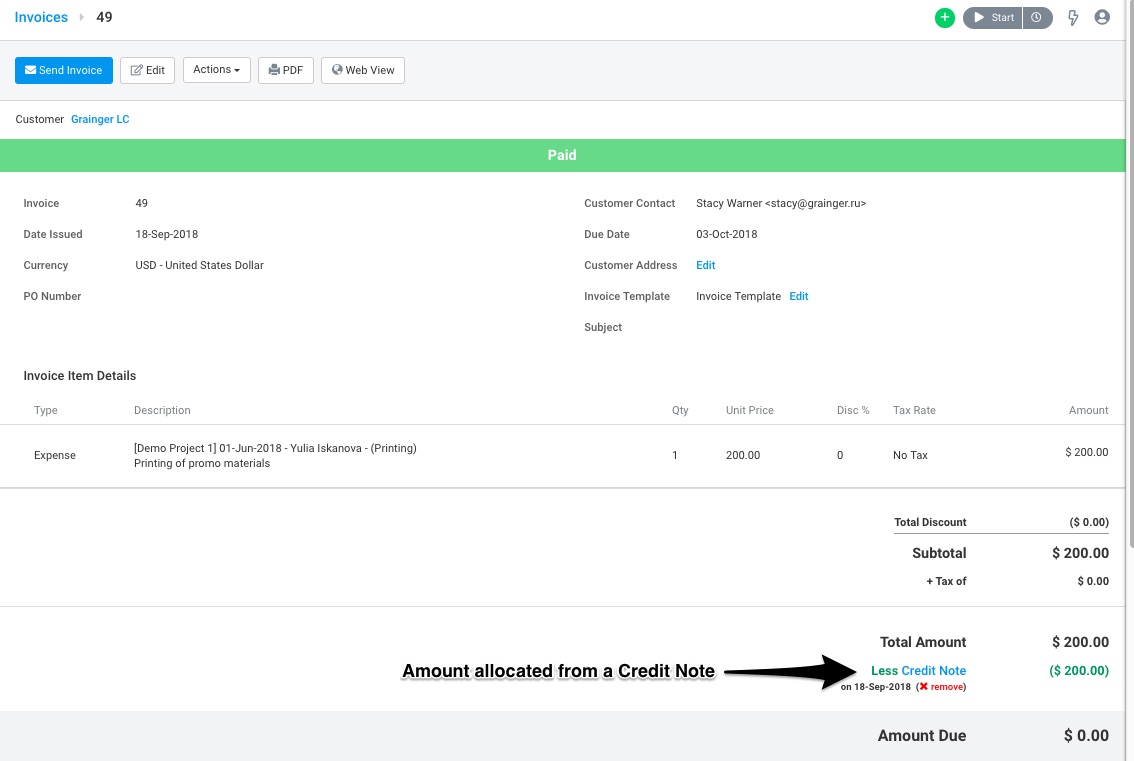 Figure: View Invoices Where Credit has been Applied
Once you have applied the Credit Note, you will be able to see the amount applied at the bottom of your Credit Note. If the Credit Note has been fully applied, it’s status will also change to Closed.
If required, you can view more details by clicking on the “Less Invoice Allocation” link that will take you to the Invoice this credit has been applied to.
2. Apply Credit Note via Invoices
Navigate to Invoices. Open the Invoice you wish to apply to Credit Note to. Using the Actions drop-down, click “Apply Credit Note”.
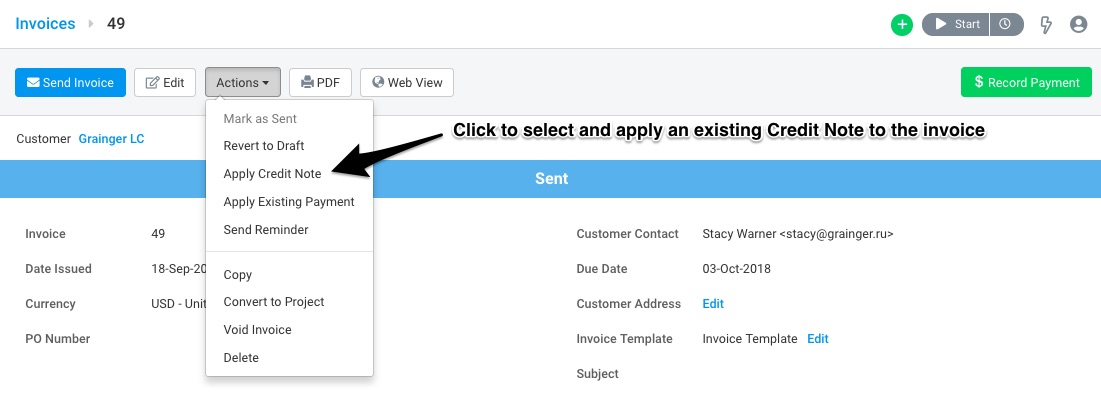 Figure: Use Actions Drop-Down to Apply Credit Note to Invoice
In the popup, you can choose to allocate credit from an existing Credit Note created for the customer to this Invoice.
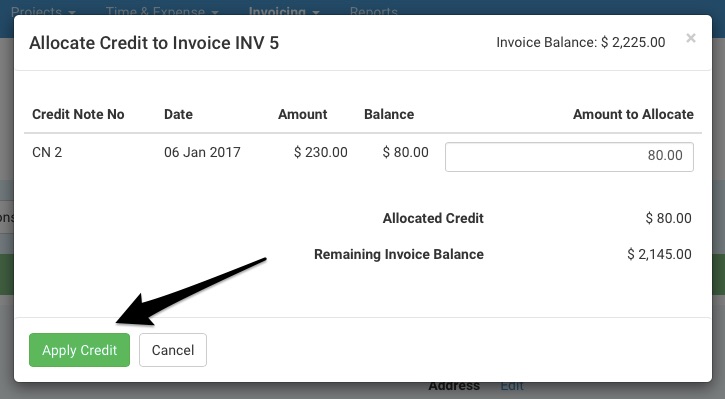 Figure: Enter Amount to Allocate from Credit Note and Click Apply Credit
Once you have applied the credit amount to the Invoice, you will be able to see it at the bottom of your Invoice.
 Figure: View Credit Note Allocations Against an Invoice
If required, you can view more details by clicking on the “Less Credit Note” link that will take you to the linked Credit Note.
Viewing Credit Notes
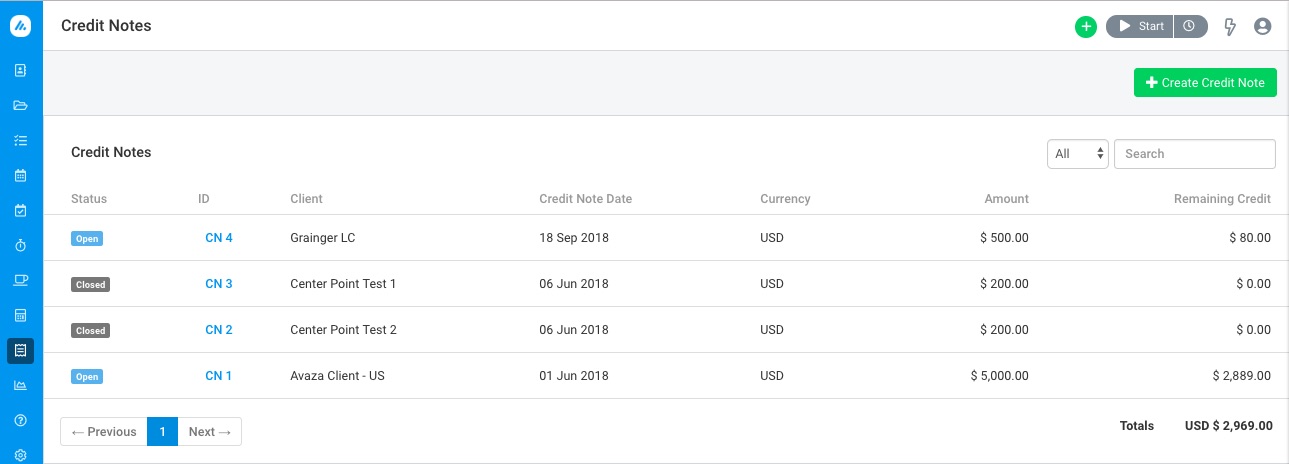 Figure: View All Credit Notes and Statuses
All Credit Notes can be viewed on the Credit Notes Overview screen. They can have the following status:
- Open (Blue): The Credit Note still has remaining credit. You can view the remaining credit and the total amount for the Credit Note.
- Closed (Dark Grey): All of the credit has been applied.
- Void (Light Grey): The Credit Note has been Voided. Credit Notes with credit not allocated anywhere can be voided.
Reports like Project Summary, Customer Statement, and Customer Dashboard show you total Credit Notes issued by customer and project.
Do you need any further help with this? Feel free to contact our support team via chat or email.
