
Avaza Project Resource Scheduling allows you to manage your team capacity efficiently. You can allocate team members to projects, visualize team availability and deliver successful projects.
Avaza Project Resource Scheduling enables your business to answer questions like these more accurately:
- Who is working on what, and when?
- Do we have the capacity to take on a new project?
- Do we need more team members to help complete the projects we have?
- What skills do we have, and what do we need more of?
Accessing Project Resource Scheduling
Like all features in Avaza, Project Resource Scheduling is visible to users with the appropriate roles. In the Schedule Settings Guide, we outlined some of the relevant settings that would assist in getting the most out of the Resource Scheduling module.
Following are the relevant resource scheduling roles that can be assigned to users:
- Schedule Users — assign this role to all users that need to be scheduled. They will be able to access the My Schedule page to view what they are scheduled for.
- Schedule Managers — assign this role to users that need to manage the team’s schedule. They are responsible for creating schedule assignments, resource levelling and more. They can access the Scheduling page.
- Schedule Viewers — assign this role to users who should be able to view their team’s schedule in addition to their own schedule on the Scheduling page. Schedule Viewers cannot make changes to the schedule.
Two menu items will be visible to users with the appropriate roles:
- Team Schedule
- My Schedule
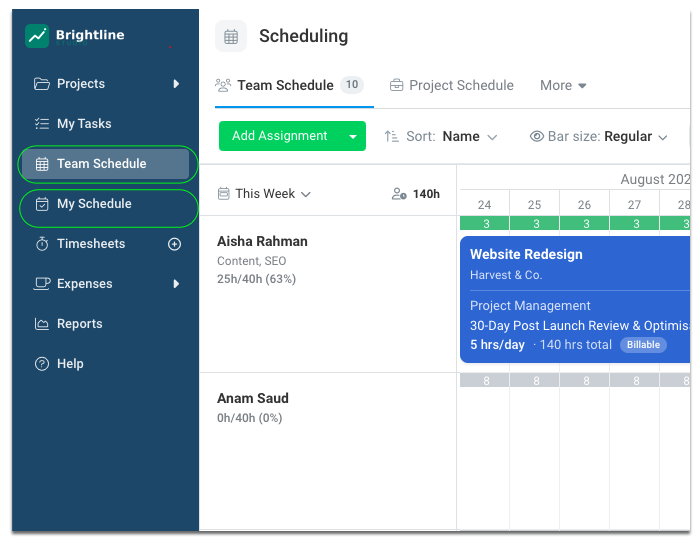
Figure: Resource Schedule Menu Items
The Scheduling Page
Clicking Team Schedule opens the Scheduling page. The page is organized into tabs — Team and Project are the two built-in views, and any custom views you or your team create appear as additional tabs alongside them. Below the tabs sits the toolbar, with the Add Assignment button, sort, bar size, zoom, date navigation, search and filter controls.
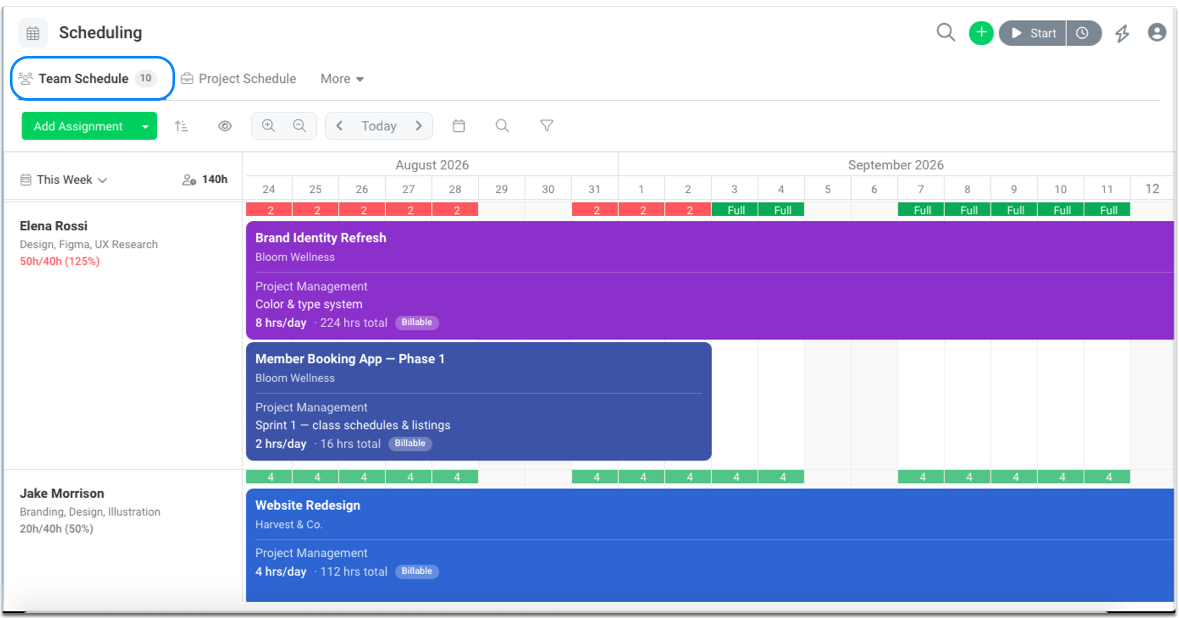
Figure: Schedule by Team Member
Team view
The Team view shows a row for each team member. Under each person’s name you’ll see their scheduled hours, standard working hours, and utilisation for the selected date range — for example “31h/40h (78%)”. If someone is booked beyond their standard hours, the percentage displays in red so overallocation is easy to spot. Hover over the numbers for a detailed breakdown including their remaining available hours.
Schedule Managers can create and edit project and leave assignments, and drag & drop existing assignments to change the user or project on the assignment, as well as adjust its start and end date.
Project view
The Project view shows a row for each project, with the scheduling users assigned to them over time. Use it to understand allocation from the project’s perspective.
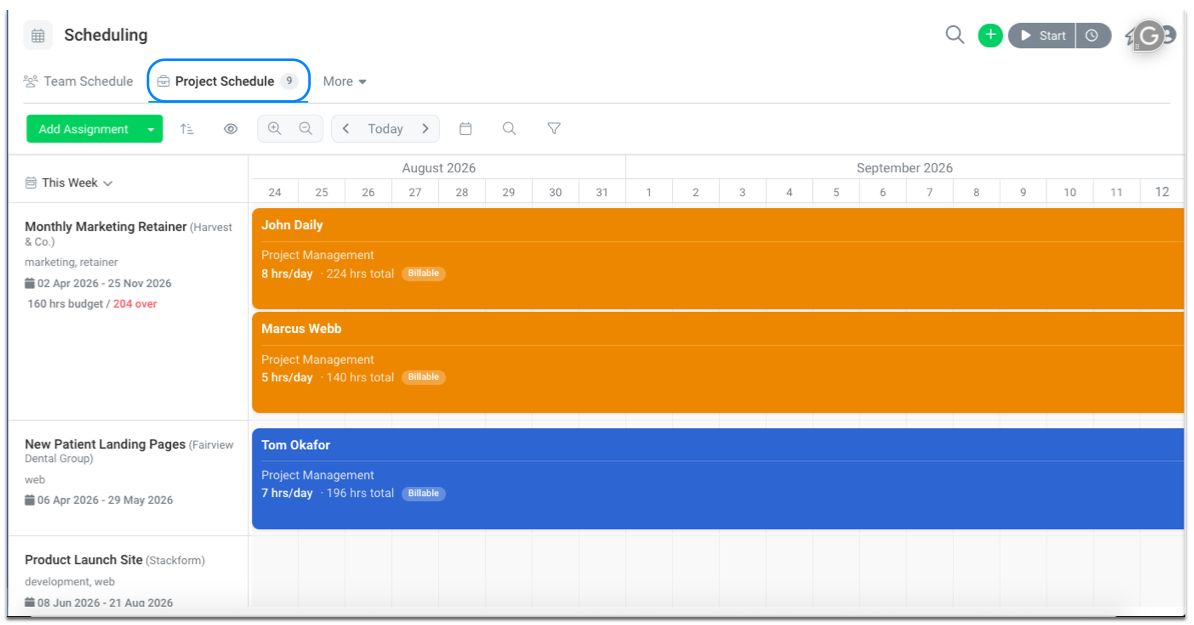
Figure: Schedule by Project
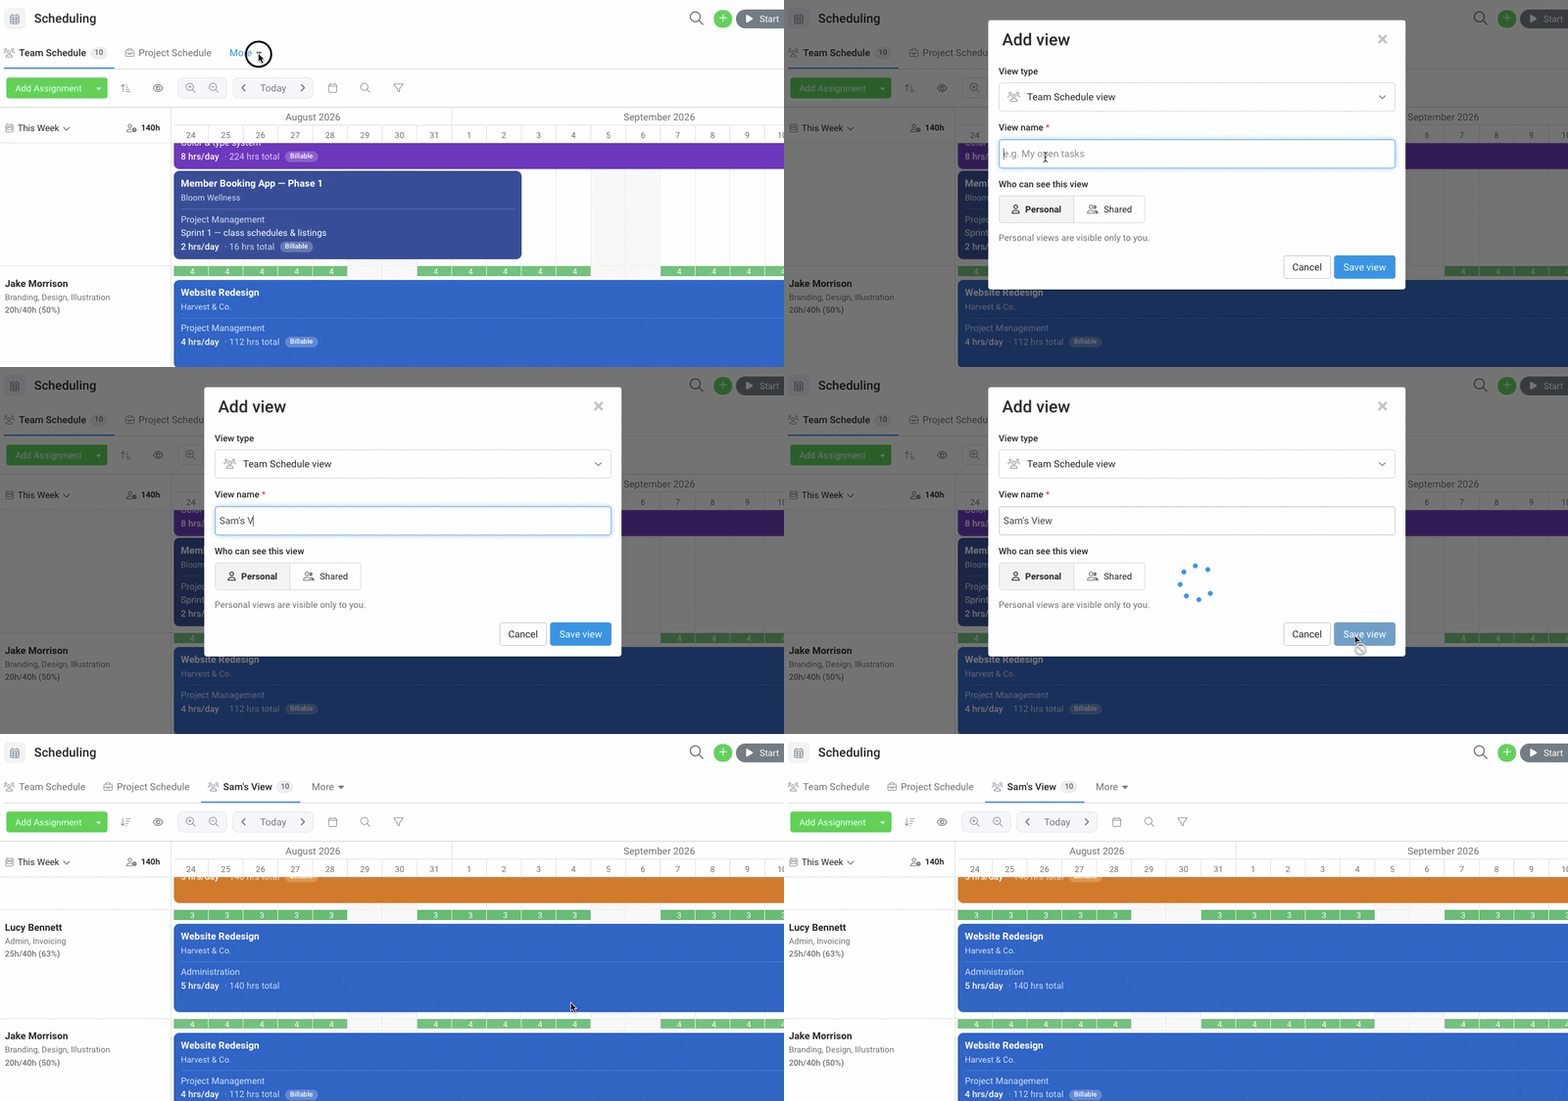
Custom views
Team Schedule and Project Schedule work just like Custom Views elsewhere in Avaza. You can:
Copy, rename, reorder and delete views from each tab’s menu. At least one view always remains on the page.
Create your own views using the “+” button in the tabs row — choose a Team or Project view type, then set it up with your own sort, date range, filters, bar size and zoom level.
Save every setting with the view. When you change any setting, an unsaved-changes indicator appears on the tab — click Update to save it to the view, or use Save as new view to keep the original untouched.
Share views with your team or keep them personal. Shared views look the same for everyone who opens them.
For a full guide to how custom views work, see Custom Views: Save and share your favourite ways of working.
Sort, date range and team availability
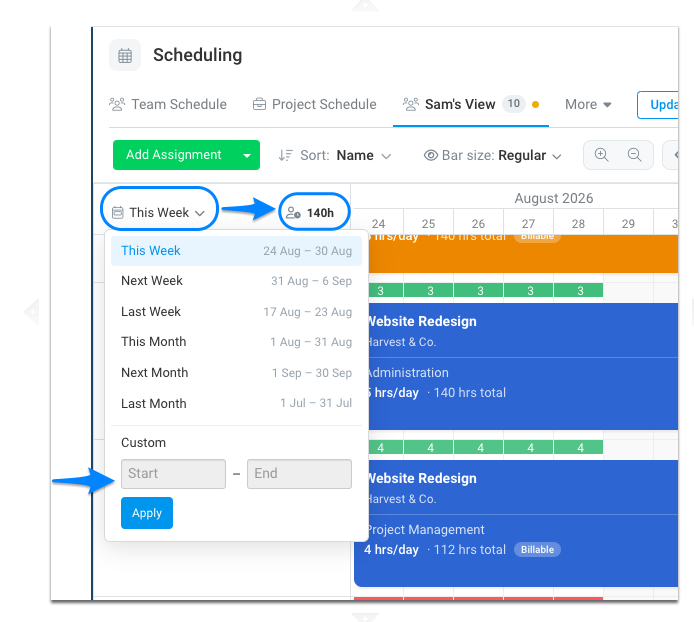
Total Available — on the Team view, the total available hours across all visible team members for the selected date range is displayed right next to the Date Range selector, so you can see spare capacity at a glance.
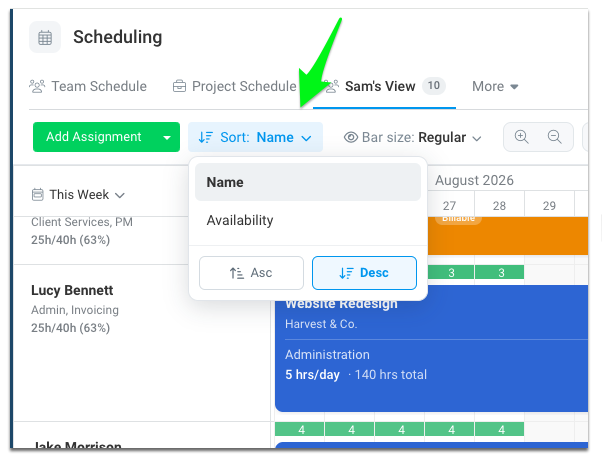
Sort — the sort icon in the toolbar orders the rows. On the Team view, choose Name or Availability, then pick Asc or Desc. On the Project view, sort by Name, Customer or Date Created.
Date Range — the Date Range selector sits just above the team member list. Choose This Week, Next Week, Last Week, This Month, Next Month or Last Month (each shows its resolved dates), or enter a Custom start and end date (up to 3 months) and click Apply. The selected range sets the first visible date on the calendar and drives each team member’s scheduled/utilisation numbers.
Bar size and zoom
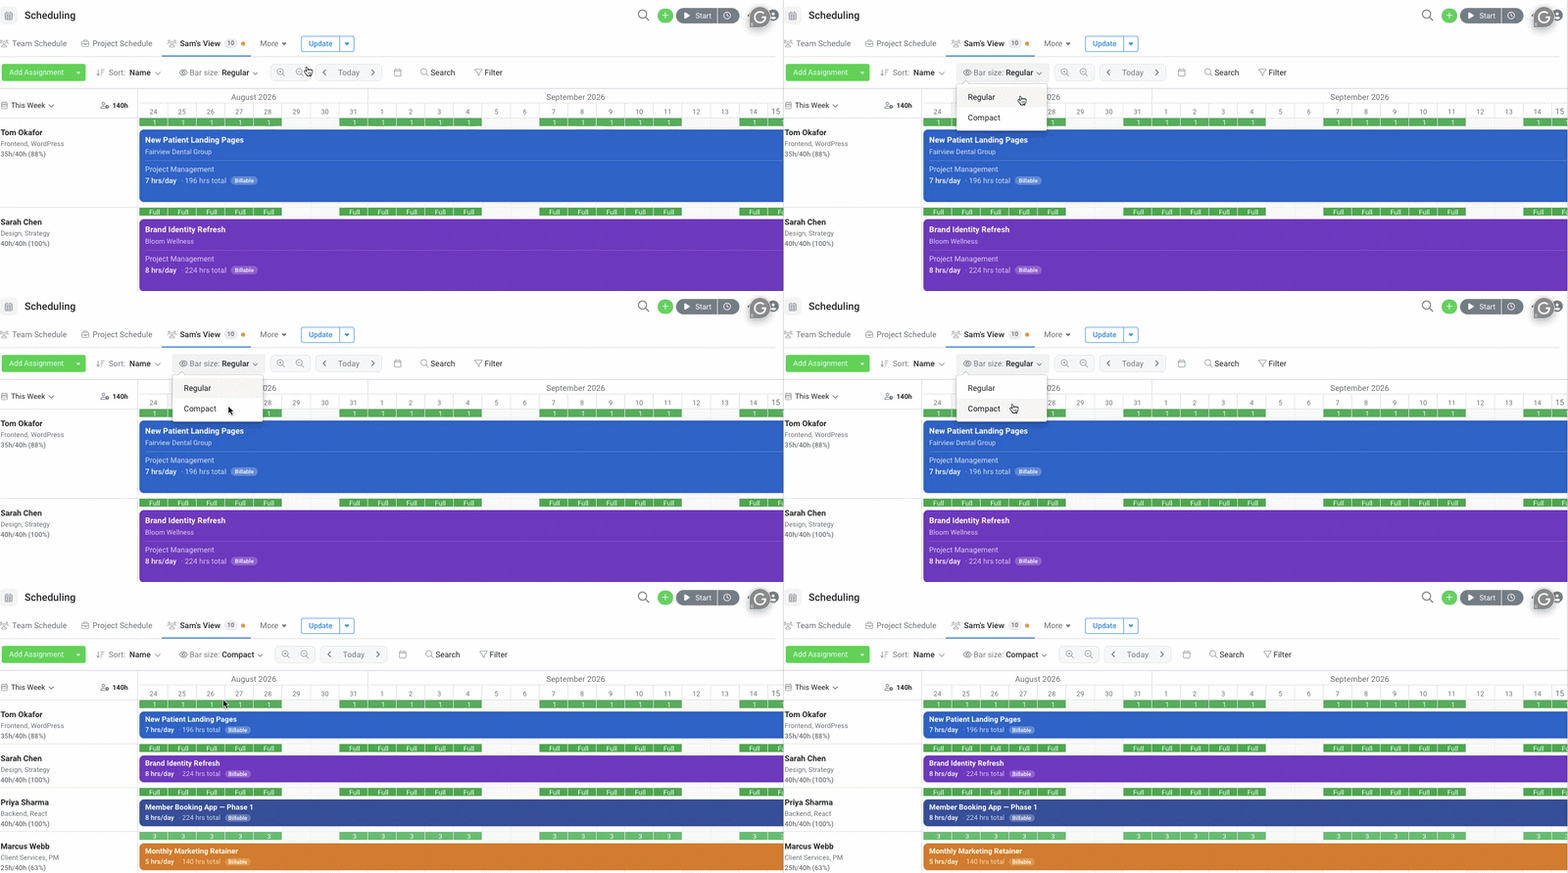
Use the Bar Size control in the toolbar (the eye icon) to switch between Regular (full booking details on each bar) and Compact (condensed two-line bars, fitting more of your team on screen).
You can also change the zoom level based on how much visibility you need — from a detailed day view to a full-month overview. Every day column shows its date at every zoom level, and when you zoom in or out, the calendar keeps the same first date anchored so you never lose your place. A calendar icon in the toolbar lets you jump straight to any date.
Search and filters
Search for users, projects, user tags, customers or project tags and view only relevant resources and projects as needed — for example, finding all the people tagged with relevant skills/location to take on a new project.
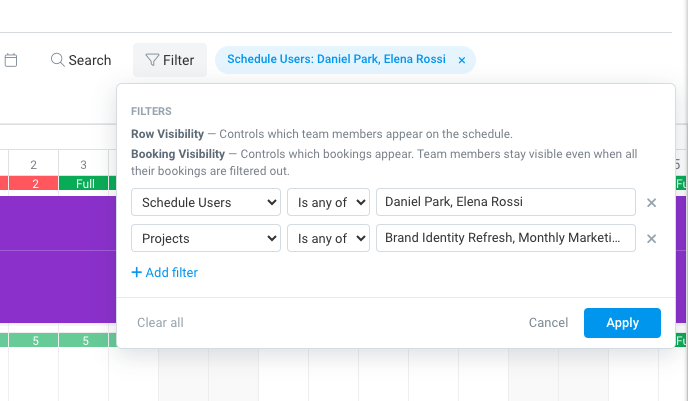
Applied filters appear as chips in the toolbar. When adding a filter, the fields are grouped by what they affect:
- Row Visibility filters control which rows appear — on the Team view, that’s Schedule Users and User Tags.
- Booking Visibility filters control which bookings appear on those rows — Customers, Projects, Project Categories and Project Tags. Filtering by a customer, for instance, shows only that customer’s bookings, while every team member stays visible so you can see who has capacity for that work.
Team members’ scheduled hours, utilisation and the Total Available figure always reflect their complete schedule, so your capacity numbers stay accurate even while booking filters are applied.
Add Bookings & Leave
Schedule users to a project or book leave for them by using the Add Assignment/Add Leave button.
While adding user assignments, you will be required to select a User, Project, Timesheet Category, Daily Hours for a Start and End Date range, and you can also specify the Start and End times.
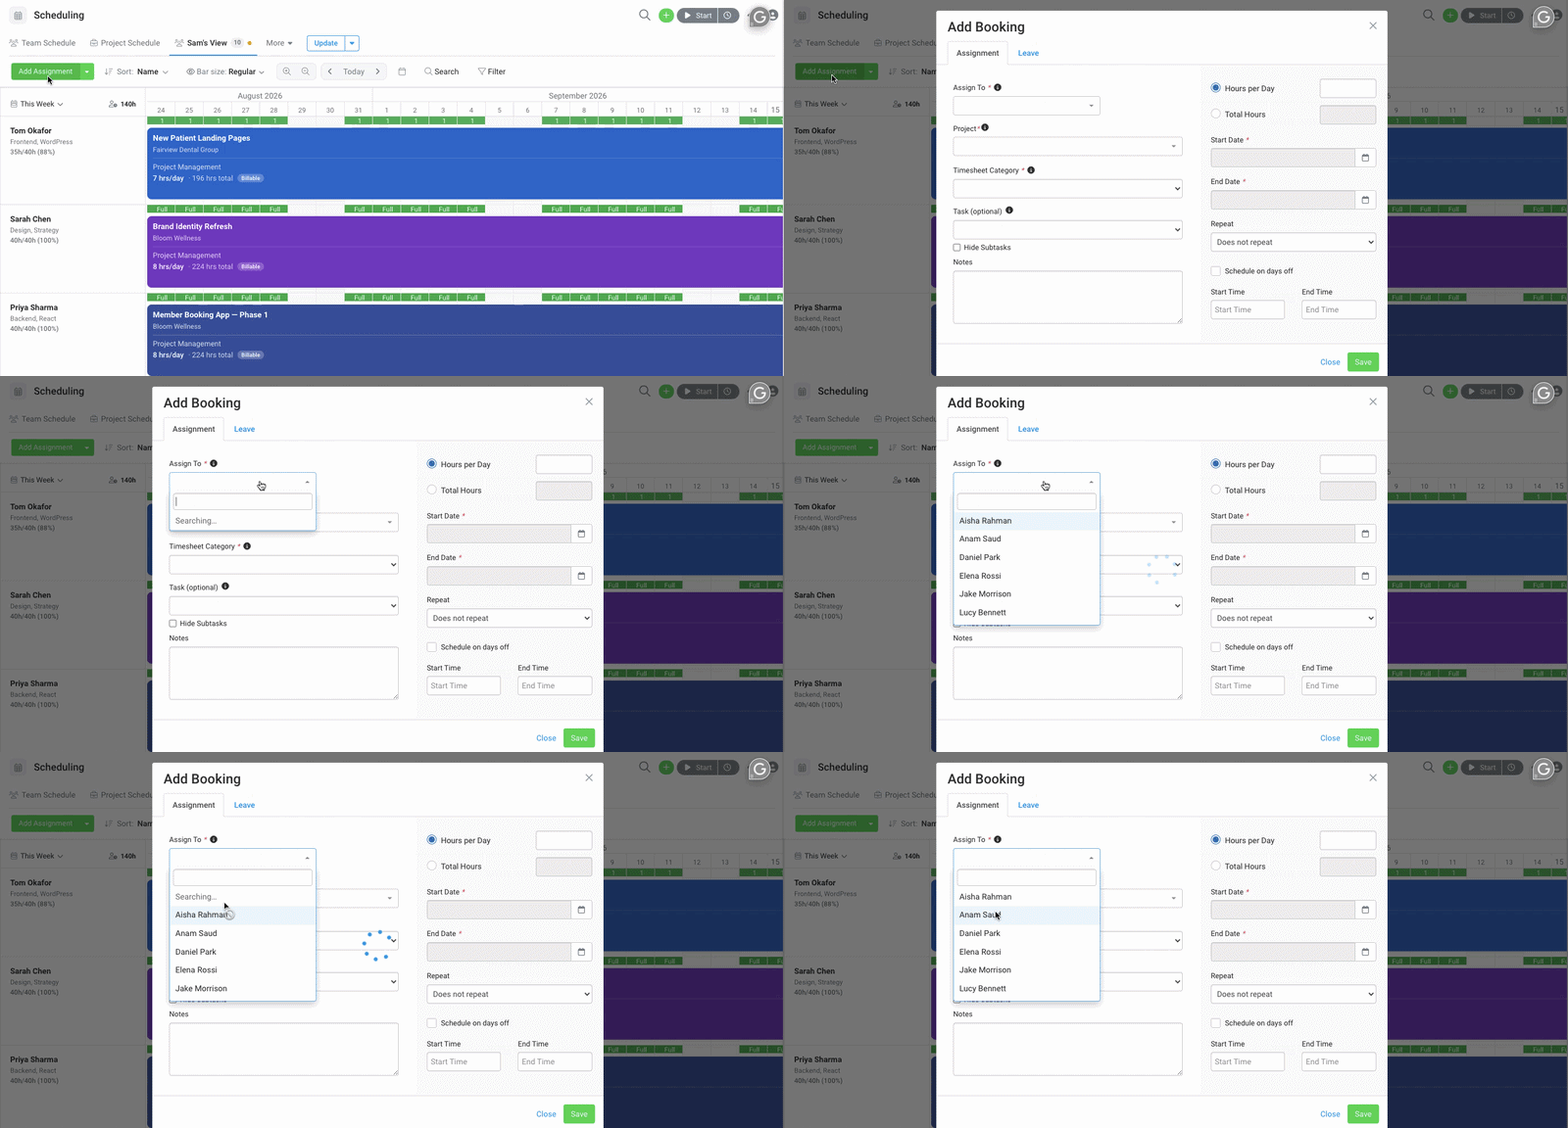
You can choose to optionally include a Task, Notes and select if the schedule should also apply to days off. Notice the scheduling user’s default weekly availability is also displayed for reference.
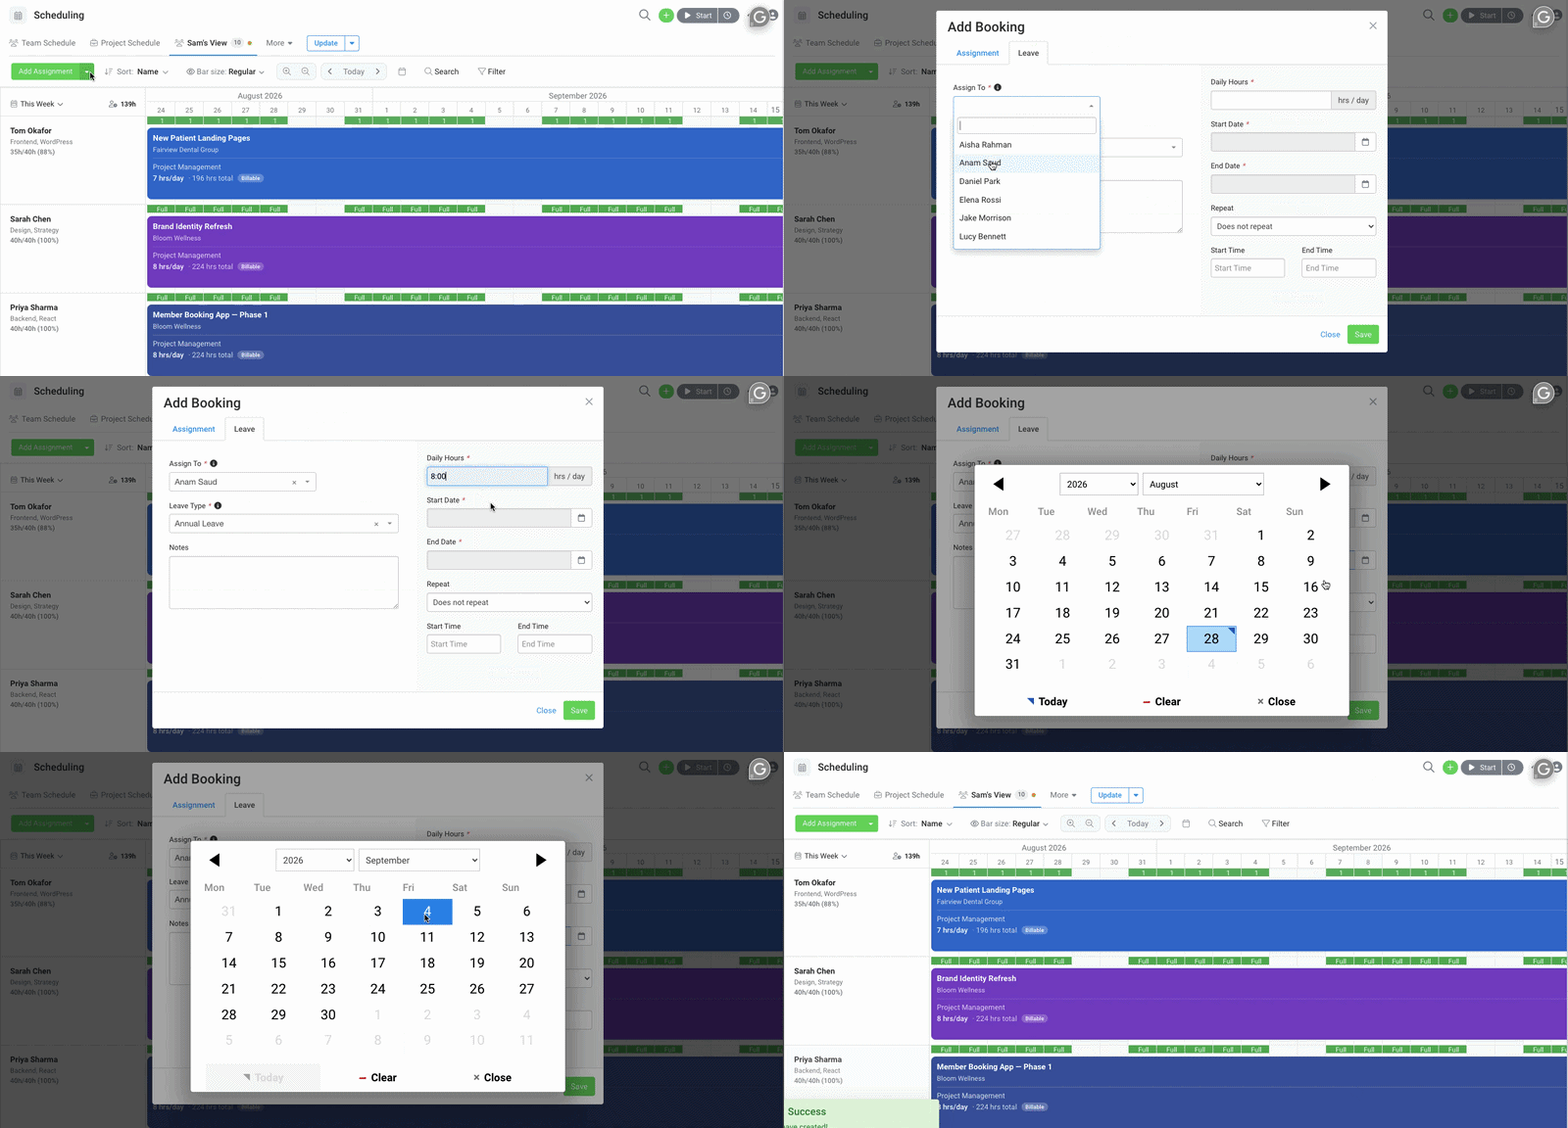
Adding Leave for team members updates their daily availability for those days, allowing you to accurately plan your human resources based on each team member’s availability. When adding a Leave, select the user’s name, Leave Type, Daily Hours, Start & End date range, and you can also specify Start and End times. You can also optionally enter Notes.
My Schedule
The My Schedule view, visible to Schedule Users, shows their project and leave assignments. This view is available on all devices.
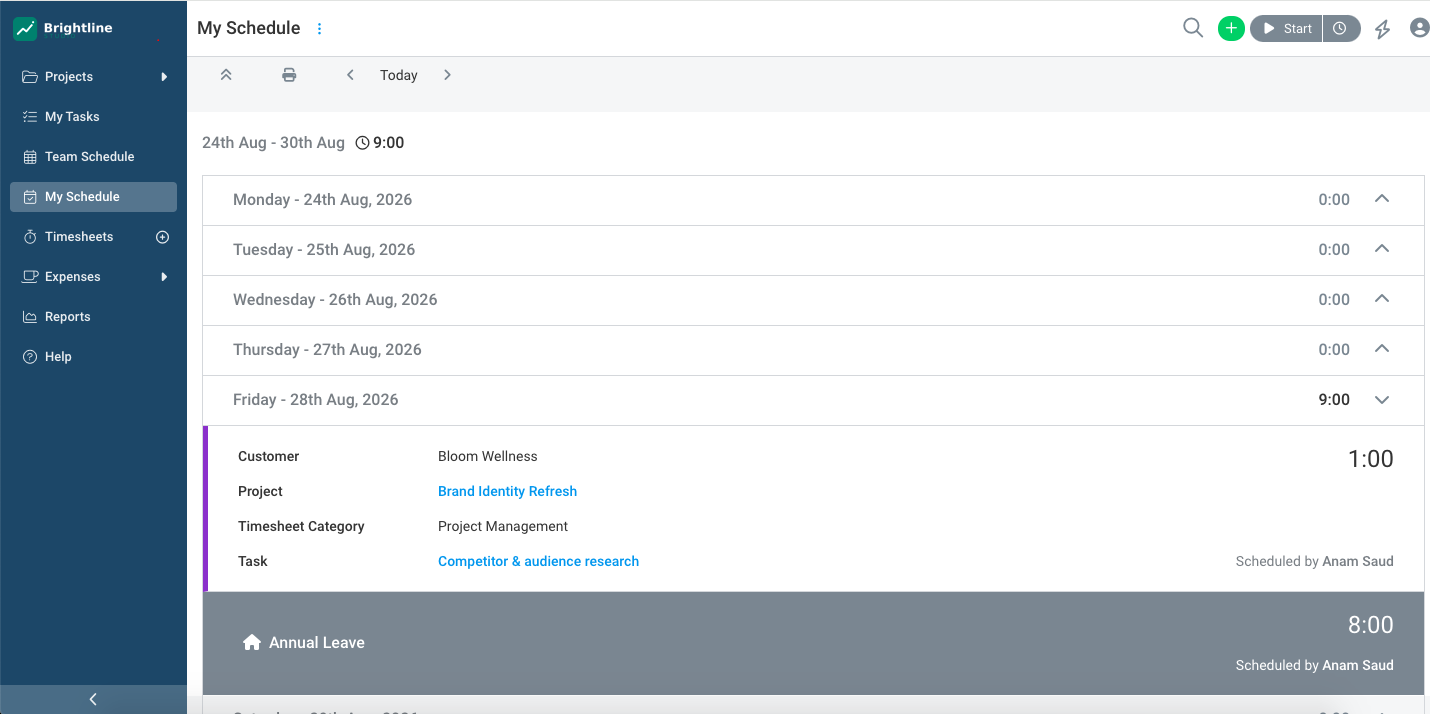
The My Schedule page displays Assignments and Leave by week, and you can expand/collapse each day to view assignments in context, as well as see who last updated the booking.