Avaza makes it easy to set up a Recurring Invoice profile for when you want to invoice on a predefined schedule.
The following steps contain everything you need to know about the process of customizing and scheduling recurring invoices.
Getting Started
With Recurring Invoices, you have the option to set what time the invoices are generated by updating the Recurring Invoice Send Time field. By default this value is set to 10:00 am local time of your account’s time zone.
For further changes in the invoice settings, including Invoice/Estimate Templates, uploading a logo, default notes, etc., refer to the Getting Started with Invoices guide.
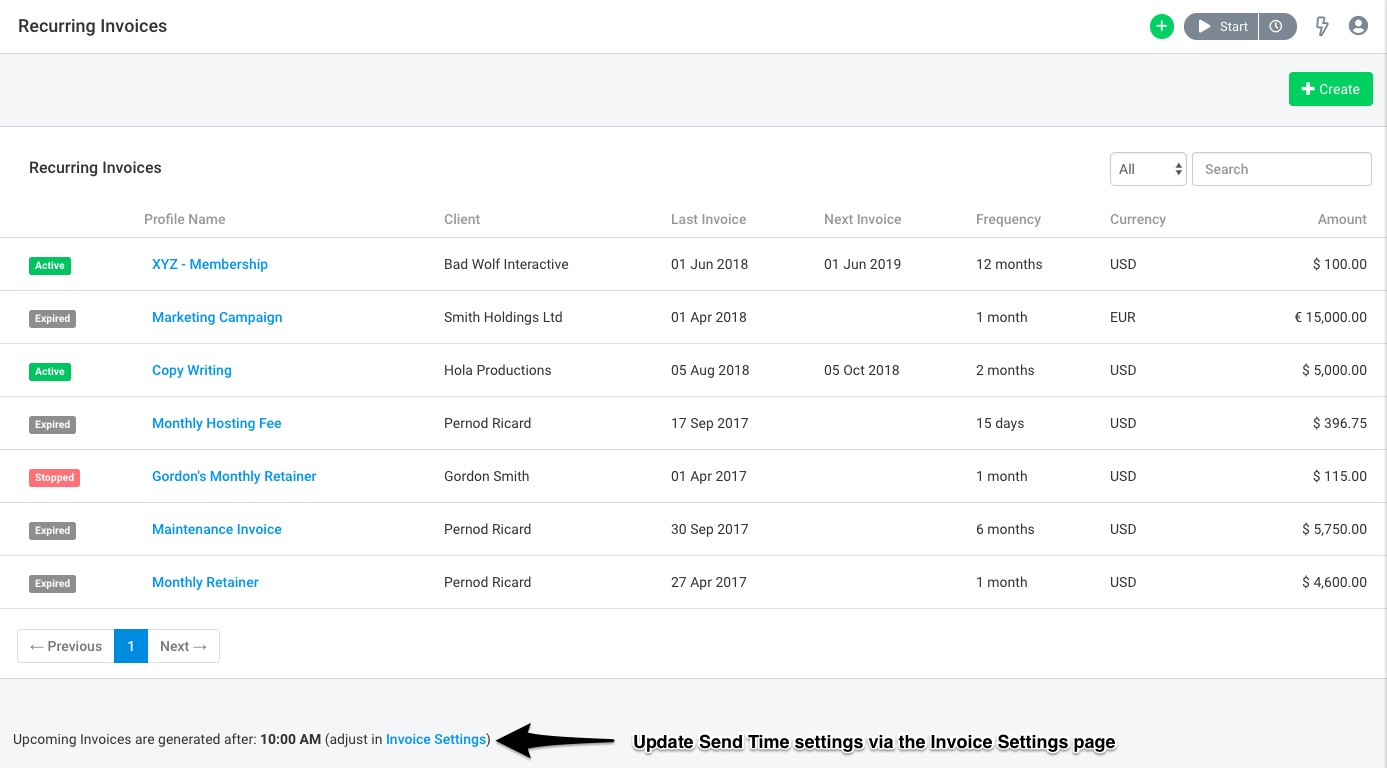 Figure: View Current Recurring Invoice Profile and Send Time Settings
Setting up a Recurring Invoice Profile
To schedule a Recurring Invoice for one of your clients, navigate to Invoices > Recurring Invoices, and click the Create button.
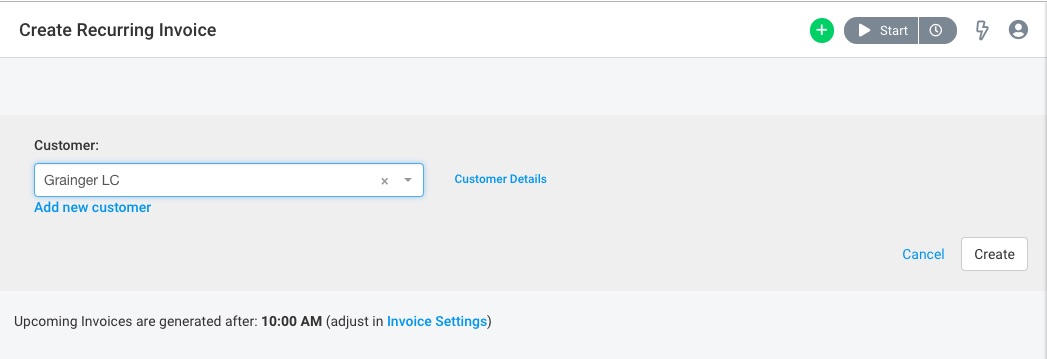 Figure: Adding a New Recurring Invoice Profile
Select the customer name or add a new one, and then click Create. Adding a new customer at this stage automatically adds them to your External Contacts list. You can always edit customer details later. For more information on managing the External contacts, refer to the Contacts guide.
You can also filter the customer drop-down to show only those customers that have uninvoiced Time and Expense Amounts.
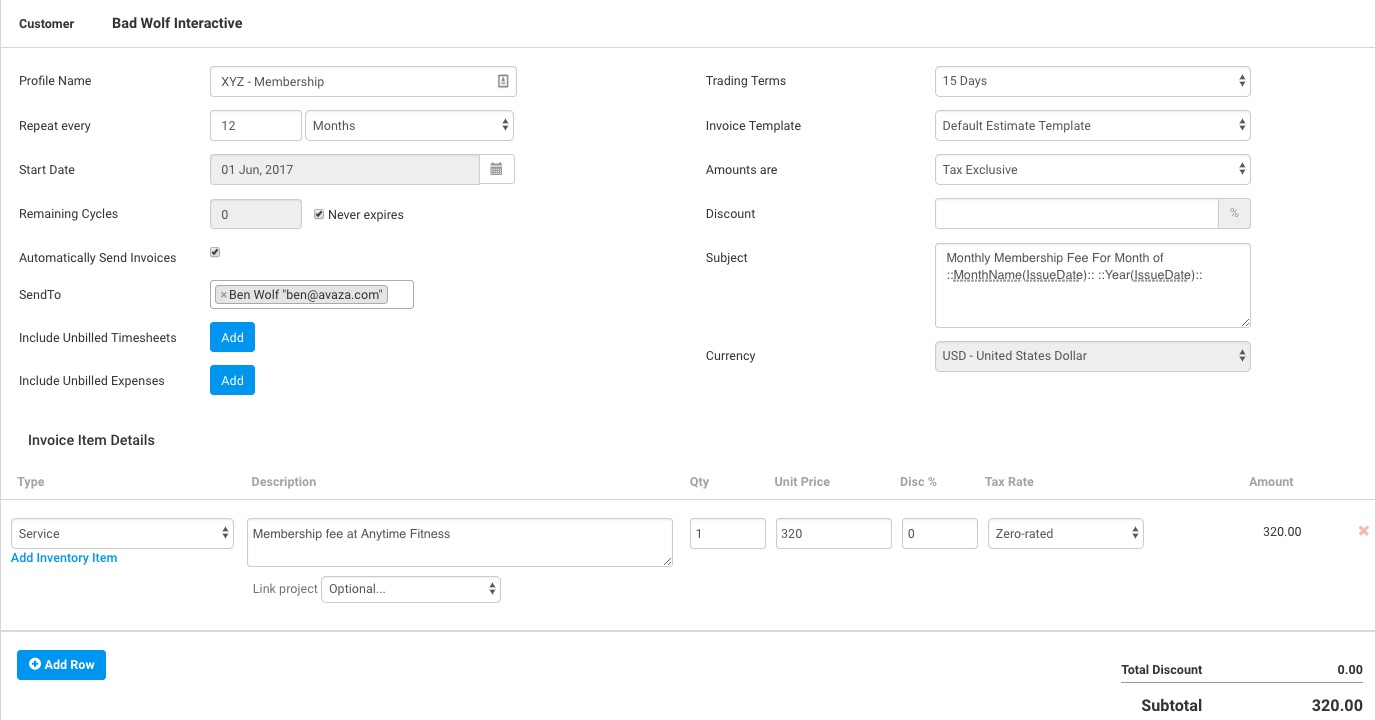 Figure: Creating a New Recurring Invoice
See an explanation of the fields specific to setting up a recurring invoice profile below.
- Profile Name – Add a name that explains what the Invoice refers to.
- Repeat Every – Select at what frequency the invoice should be generated. You have the option of setting the frequency based on the number of days or months. For example, for an invoice to be generated every 2 weeks, you need to select 14 days. Alternatively, for a quarterly invoice, you need to select 3 and Months from the drop-down.
- Start Date – Select the date when the first invoice will be generated, either today or in the future.
- Number of Invoices – Enter the number of invoices that you want created in total by this profile. If you have 1-year contract, for instance, you need to enter 12. If the contract has no fixed term, you can select the ‘Never expires’ checkbox.
- Automatically Send Invoices – If you prefer sending your invoices to the customer contact automatically, select this checkbox along with the relevant customer contact. Alternatively, if you prefer to create a draft invoice that you can review and send later, leave this checkbox unticked.
- Include Unbilled Timesheets – Click this button if you wish to automatically add unbilled time for all your projects, or a specific one when generating an invoice. The timesheet will be automatically picked up and added to the invoice. You can either the group timesheet entries by Project, Project & Category, or Project & Timesheet User. If you select the No Grouping option, you can decide what fields are added to the invoice item description (See screenshot below).
 Figure: Add Unbilled Time to the Invoice
- Include Unbilled Expenses – Same goes for expenses. If you have any hard costs like materials that need to be passed on to the customer, then you can configure this option accordingly. You can also decide what fields from the expense entry should be added to the invoice description field.
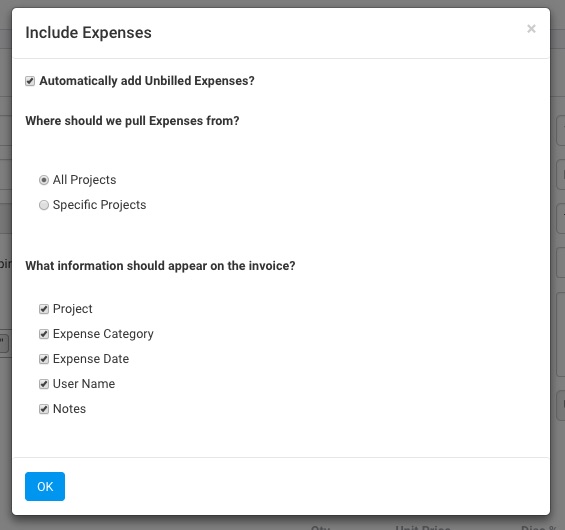 Figure: Add Unbilled Expenses to the Invoice
- Other fields like Trading Terms, Invoice Template, Amounts are, Discount, Subject and Currency are standard fields that are also present when creating a general invoice.
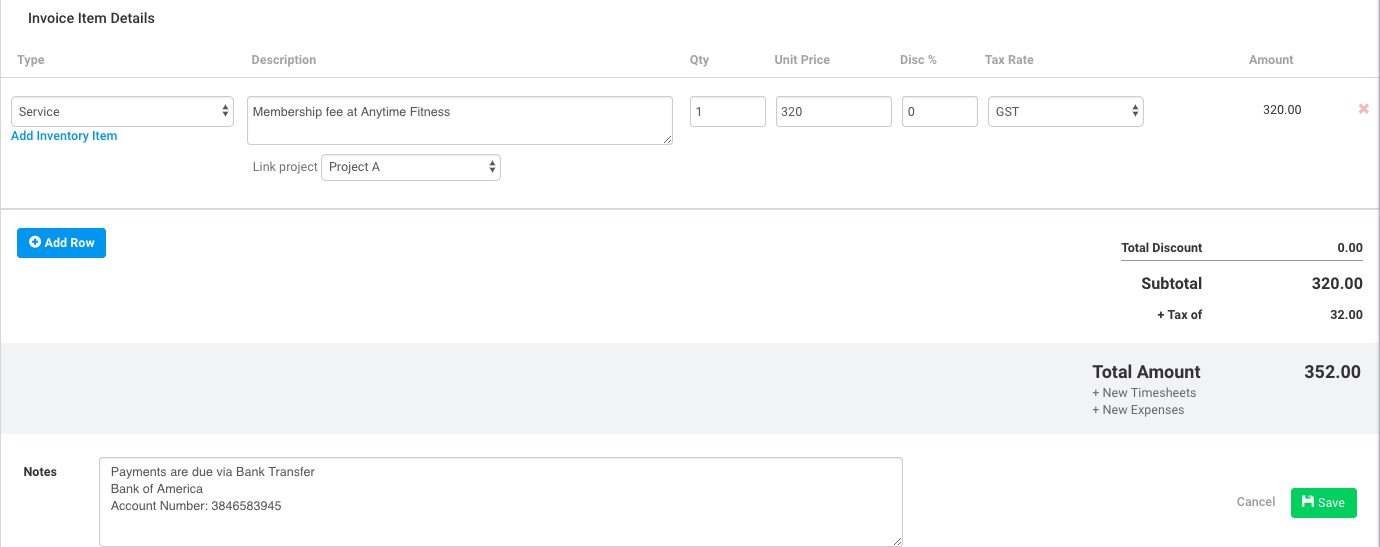 Figure: Adding Individual Invoice Item Details
- Invoice Item Details: Enter the details for the line items you want to invoice your customer on a regular basis. You can also apply the Tax Rate and Discounts similar to the general invoices.
- Notes: Enter any notes you wish to add and click Save Invoice.
Tip: Another special feature to help with changing dates associated with the invoices is the use of smart tags, also known as dynamic variables. The smart tags show the actual date when the invoice is generated and can be used in Subject, Line Item Description, and Notes.
For example, if you wish to generate a recurring invoice with a subject line containing a specific month and year, you need to add the ::MonthName(IssueDate):: ::Year(IssueDate):: tag. So for the invoice issued on 01 March 2017, the tag will automatically generate the result ‘March 2017’ in the subject line.
For the complete list of dynamic variables and some examples of how they can be used, refer to the detailed blog.
Once you’ve saved the invoice, you’ll be redirected to the recurring invoice detail page.
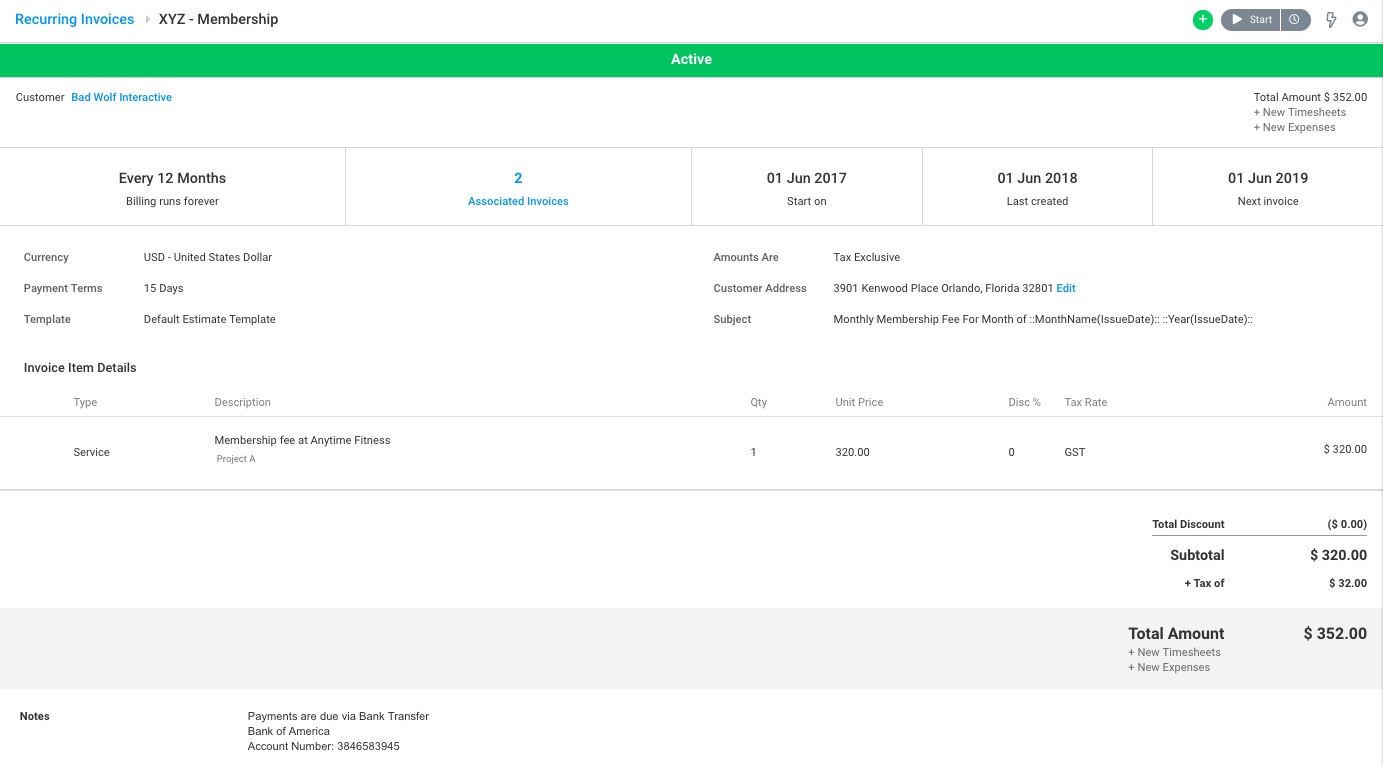 Figure: Preview of a Newly Created Recurring Invoice Profile
Navigation
To view all recurring invoice profiles, navigate to Invoices > Recurring Invoices. The recurring invoice detail page also allows you to make changes to or delete the profile. Depending on the status of the profile it can be stopped or resumed as well.
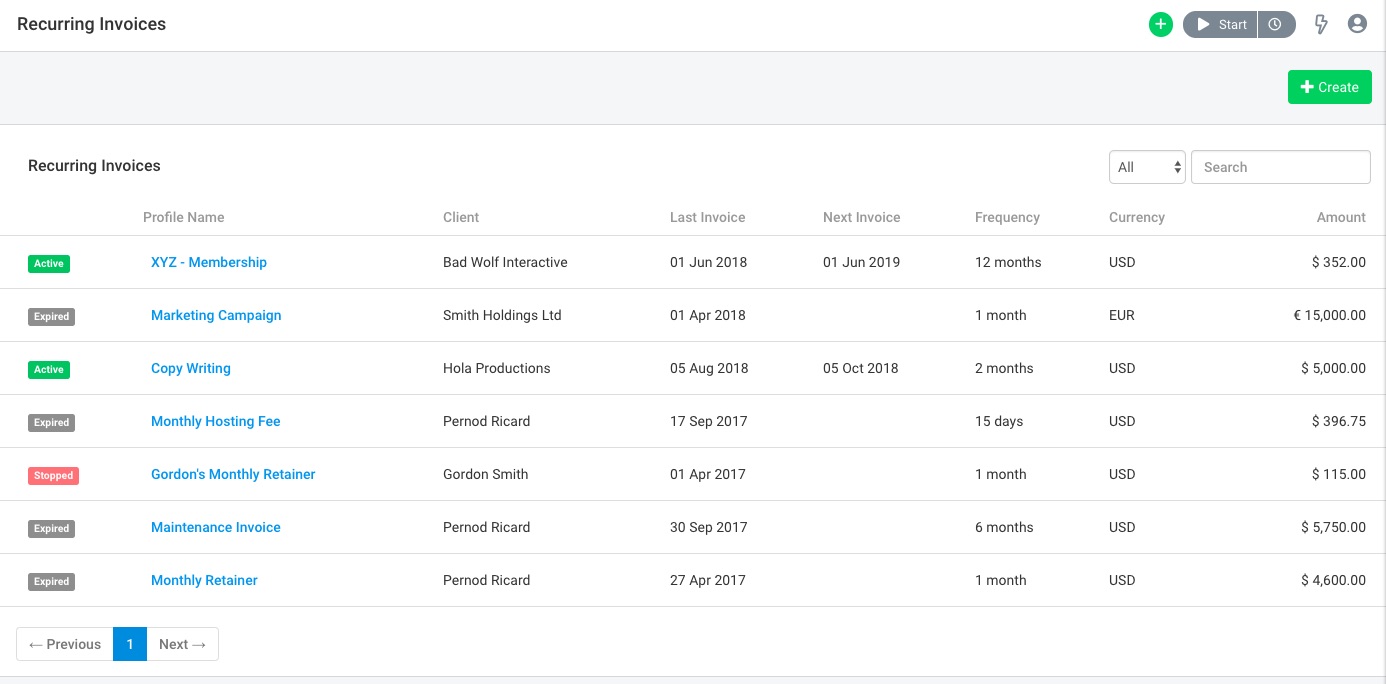 Figure: Summary of All Generated Invoice Profiles
If you have configured to automatically add time and expenses, then you will see the + New Timesheets and + New Expenses labels under the Total Amount, indicating that un-invoiced time and expenses will be added on top of the recurring invoice line items.
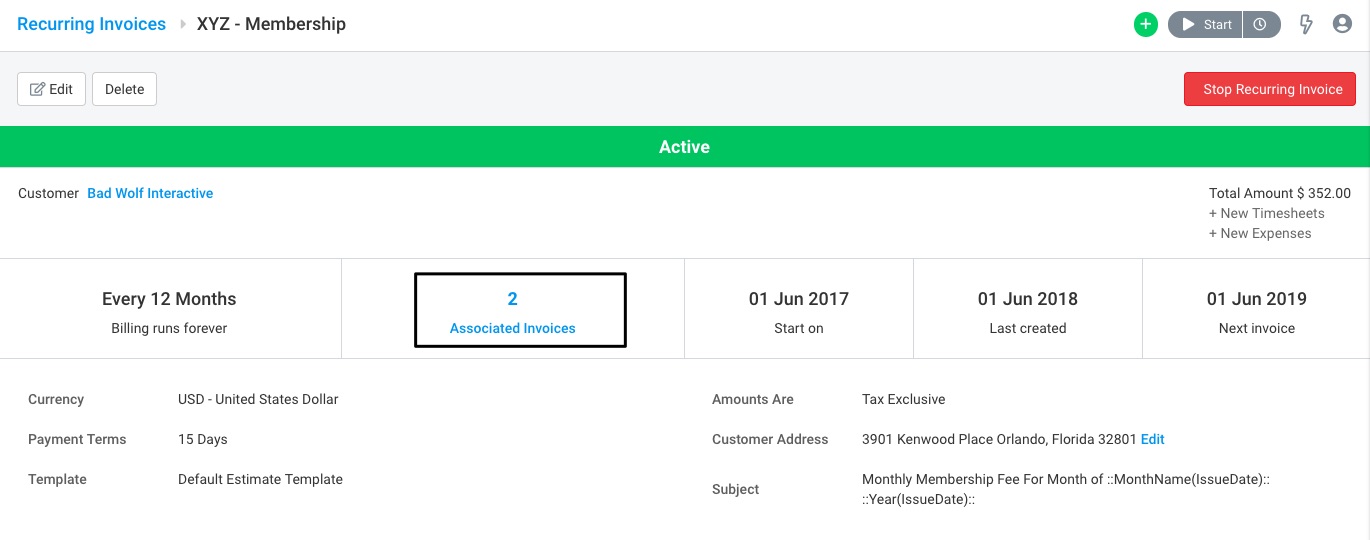 Figure: View Associated Invoices Linked to a Specific Recurring Invoice Profile
You can click the Associated Invoices box to view all the related invoices that have been generated by a particular recurring invoice. This is particularly handy if you want to quickly get to a specific invoice generated by a profile.
Invoice Status
A profile can exist in one of the following statuses, and you can filter the recurring invoice list accordingly:
- Active – The profile is scheduled to generate at least one or more invoices.
- Stopped – The profile has been stopped. It will not generate any further invoices until resumed.
- Expired – The profile has zero remaining invoices. No further invoices will be generated.
Editing a Recurring Invoice
To edit a recurring invoice, navigate to Invoices > Recurring Invoices and open the profile you’d like to edit.
 Figure: Edit a Recurring Invoice Profile
Changing an Email Address the Recurring Invoice is Sent From
By default, recurring invoices are sent from clientinvoices@avaza.com to prevent invoices from being sent to spam folders. The email beside it belongs to the last user that edited the Recurring Invoice.
In order to change the email address the invoice is sent from, the user whose name is required on that invoice needs to go in and edit the recurring invoice profile. It is sufficient to open the recurring invoice profile and hit save without any changes.
Need more help? Our support team is just a click away! Contact them via chat or email. 🙂