Avaza timers allow you to accurately record time without having to remember the start and end times.
1. Global Timer
To start tracking time instantly, click the Global Time Tracker button from any page in Avaza. The Timer will immediately start tracking time.
 Figure: Click the Play Button on the Global Time Tracker on the Navigation Bar to Start Tracking Time
You can also click on the Global Timesheet View button (the clock icon next to the Play button), and start or continue tracking time on specific tasks using the pop-up.
 Figure: Use the Global Timesheet View Pop-Up to Start Tracking Time
2. Timesheets Tab
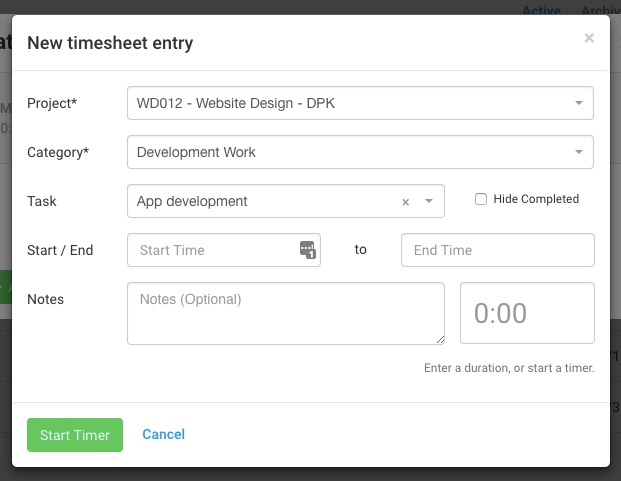
You can start a new timer by navigating to the Timesheets screen from the Side Navigation. Click the ‘Add Entry’ button and then press the ‘Start Timer’ button without filling in the duration.
 Figure: Track Time Using the New Timesheet Entry Popup
3. Task Time Tab
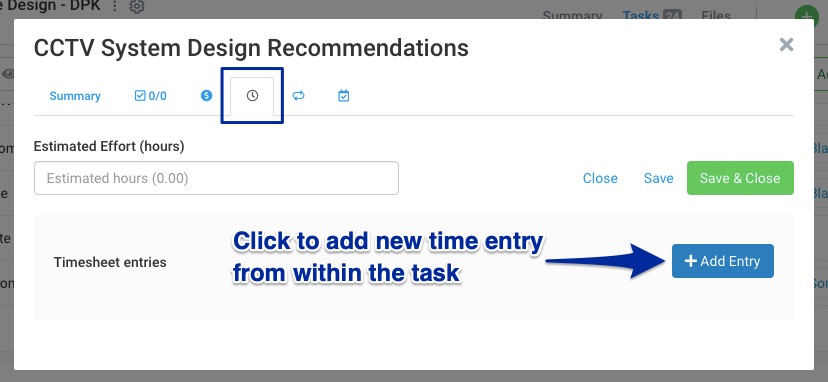
Another way of starting a timer is by heading over to the project and opening the task. Navigate to the sub-tab with the timer icon and click on ‘Add Entry’. You will then see the same ‘New timesheet entry’ popup pre-filled with the project and task details.
 Figure: Add New Timesheet Entry Directly from the Task
The timer runs in the cloud and doesn’t require you to keep your browser or app open. You will be able to see the timer running in the top navigation bar, and can click on Stop at any time to stop tracking time.
You can also access the Timer using your mobile device (app or browser version), as long as you have the Timesheet/Expense or Admin role assigned to you via the Contacts page.
Need any more help? Feel free to contact our support team via chat or email.
