Let’s say, you have recently been invited by Minto as an external contact, a company that uses Avaza. In this guide, you’ll learn the different ways you can communicate with Minto contacts using Avaza chat.
Avaza Chat module can be accessed via multiple methods depending on your preference.
- Web Browser – it can be accessed via all modern web browsers
- Android App – a native app with mobile push notification support
- IOS App – a native app with mobile push notification support
- Windows App – dedicated windows desktop app
- Mac OS App – dedicated Mac OS app
For the purpose of this guide, we are going to assume you are accessing Avaza on your desktop via the Web Browser.
Navigation
You can access the chat module by clicking the chat menu item in the left menu. The red dot on the chat menu item indicates that new messages have arrived since you last visited the chat module.

Figure: Desktop Navigation
The chat module has an intuitive design with popular conventions that are easy to follow.
- Chats are separated between Direct and Channel chats. The simple tab design allows you to quickly switch between the two types with ease.
- Search allows you to quickly find an existing chat. No need to scroll through a long list.
- Existing Direct and Channel chats are displayed in a list. This list is ordered based on the most recent chat messages to ensure you don’t miss out on new messages.
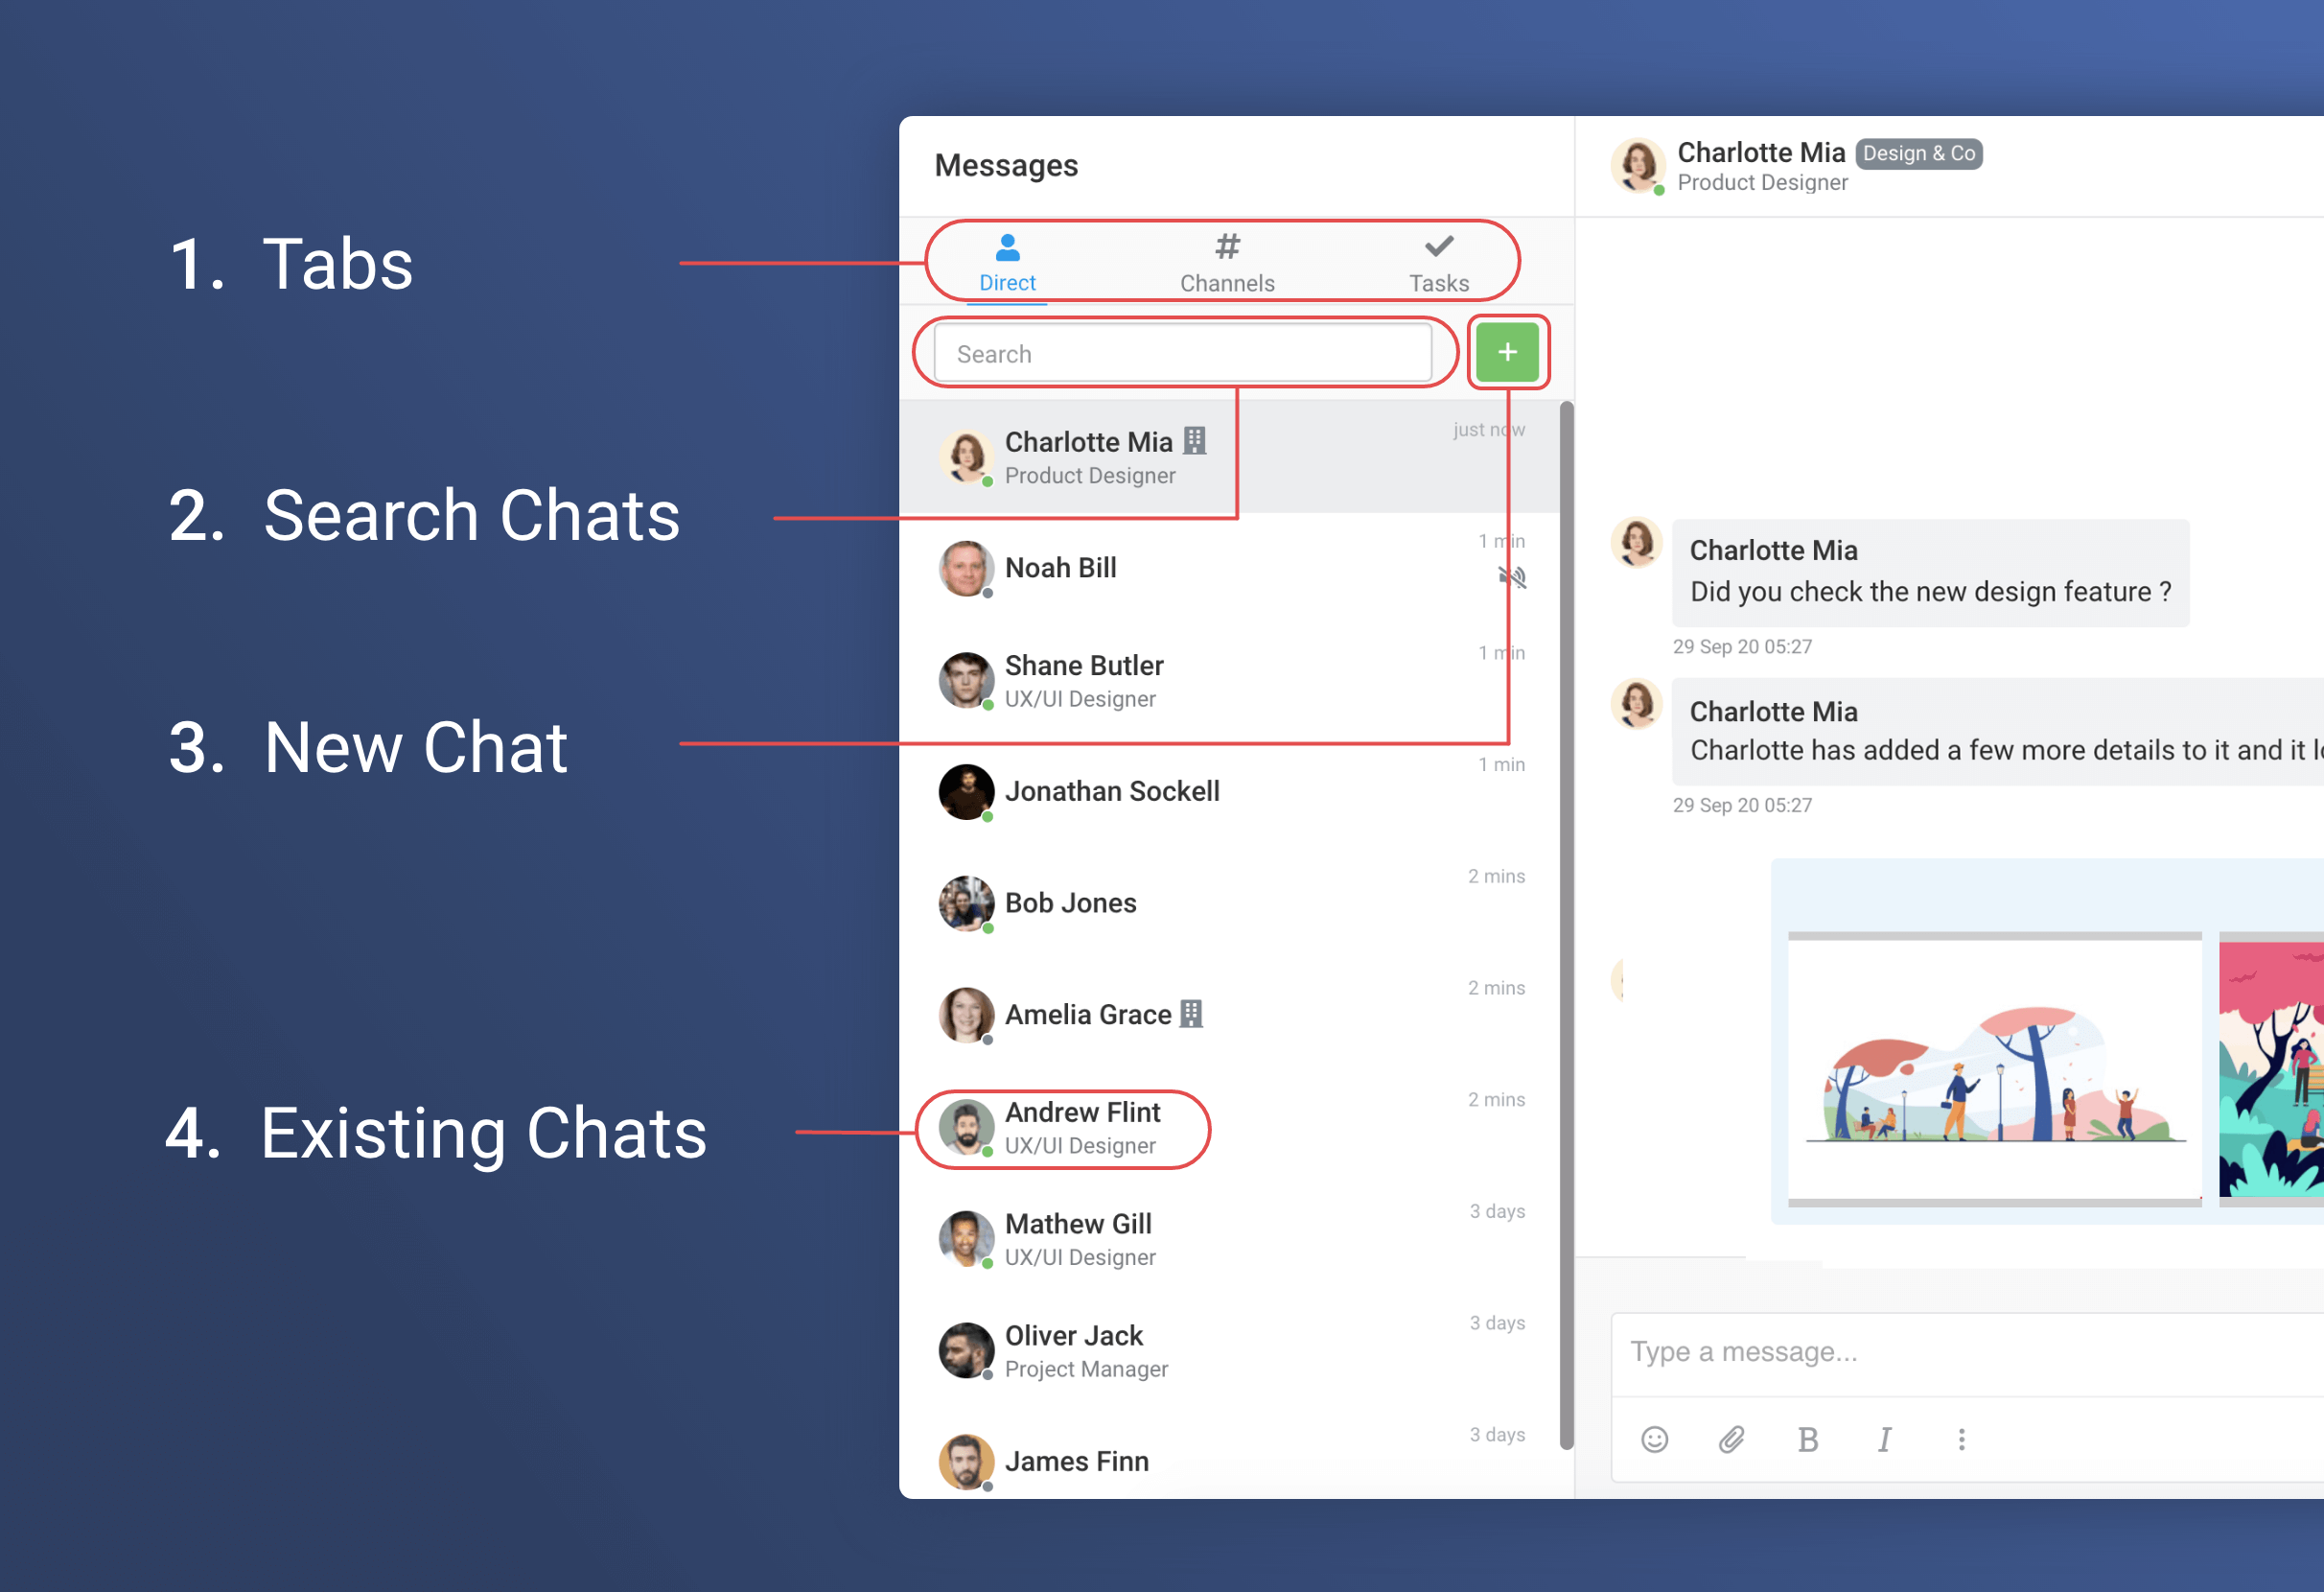
Figure: Chat List
To view the chat message feed, click one of the chats from the chat list. Chat details are displayed to the right of the chat list.
- Chat header displays the chat name and other details along with 3 dot control with additional options.
- Chat message feed, displays the most recent messages. Scroll up the feed to view earlier messages.
- At the bottom of the right-hand panel is the message input area. The user can type the message, use the formatting controls to apply styling to the text and upload attachments.
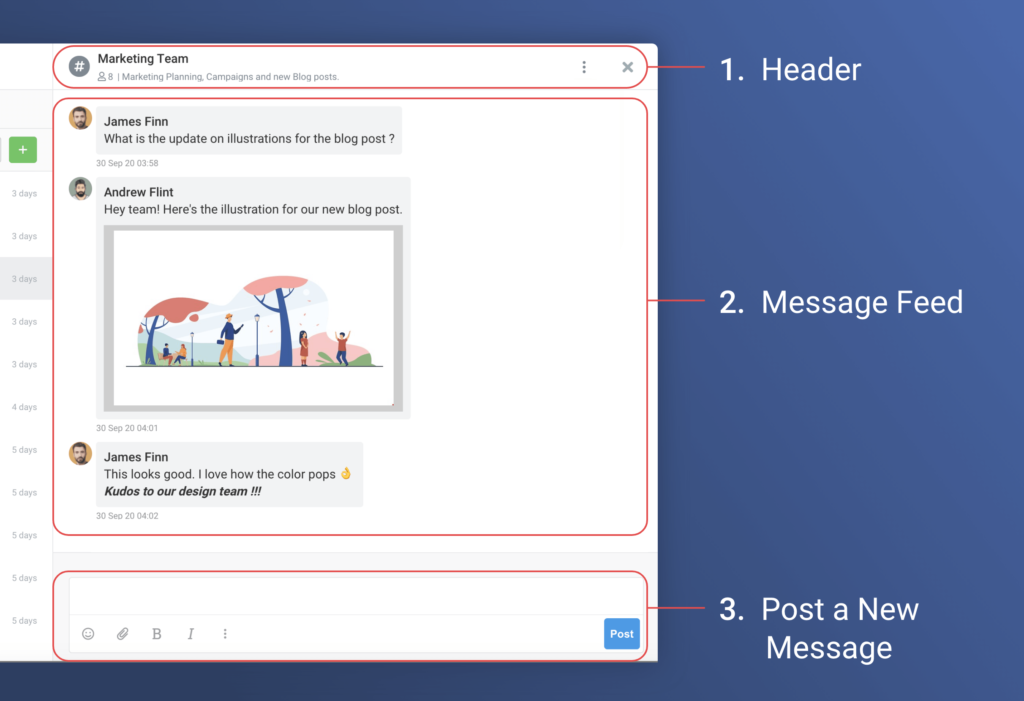
Figure: Channel Details
Direct Chat
All your one-on-one and direct group conversations will be listed here. As an external contact, you can’t initiate a new conversation but any direct conversations initiated with you will be displayed here.
Click any direct chat to view the chat details and send new messages.
Channel Chat
Channels are dedicated spaces where a select group of users come together to discuss a topic. There are Public and Private channels. Public channels can be joined by any of the staff members of Minto however given you are an external contact at Minto, you can only view the public channels you are added as a member. Private channels can only be joined by invitation.
Click the channel name to view the channel details and send new messages.
Chat Header
Both Direct and Channel chat details have a header section with some minor variations.
Direct Chat Header
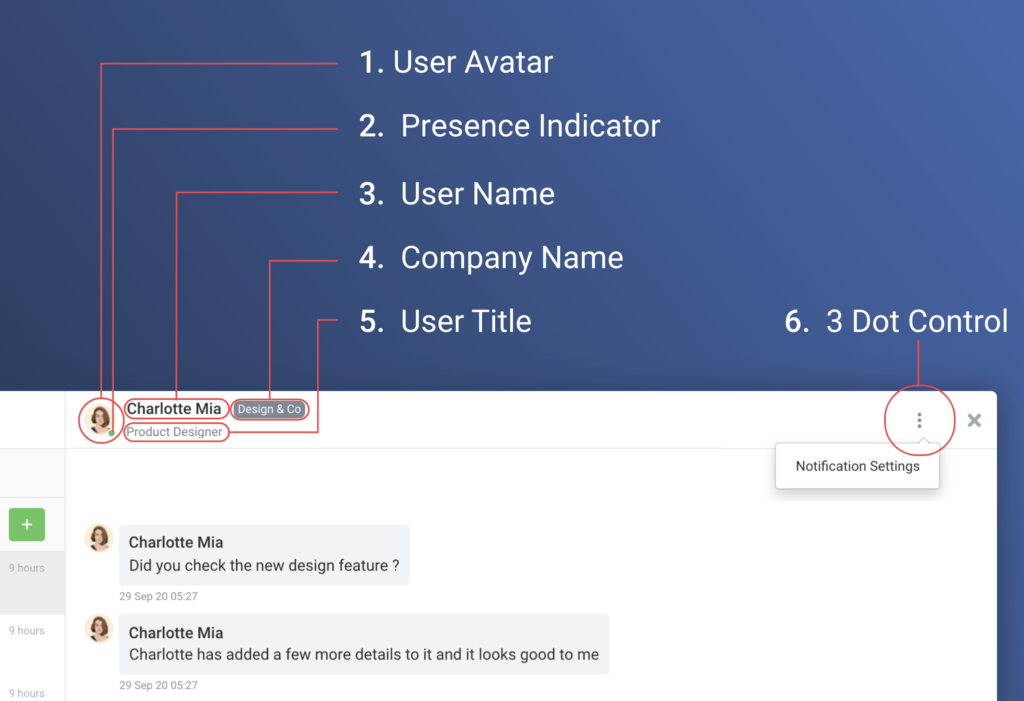
Figure: Direct Channel Header
- One on One Direct Chat Header displays the name of the other contact. It also displays the presence indicator. A green dot indicates that the other user is online.
- For Direct Group chats, it displays the comma-separated names of the other contacts. It also displays the count of other members in the direct group chat.
- 3 dot control provides the option to configure the Notification Settings. From here you can mute or unmute the notifications from a specific chat for the predefined period.
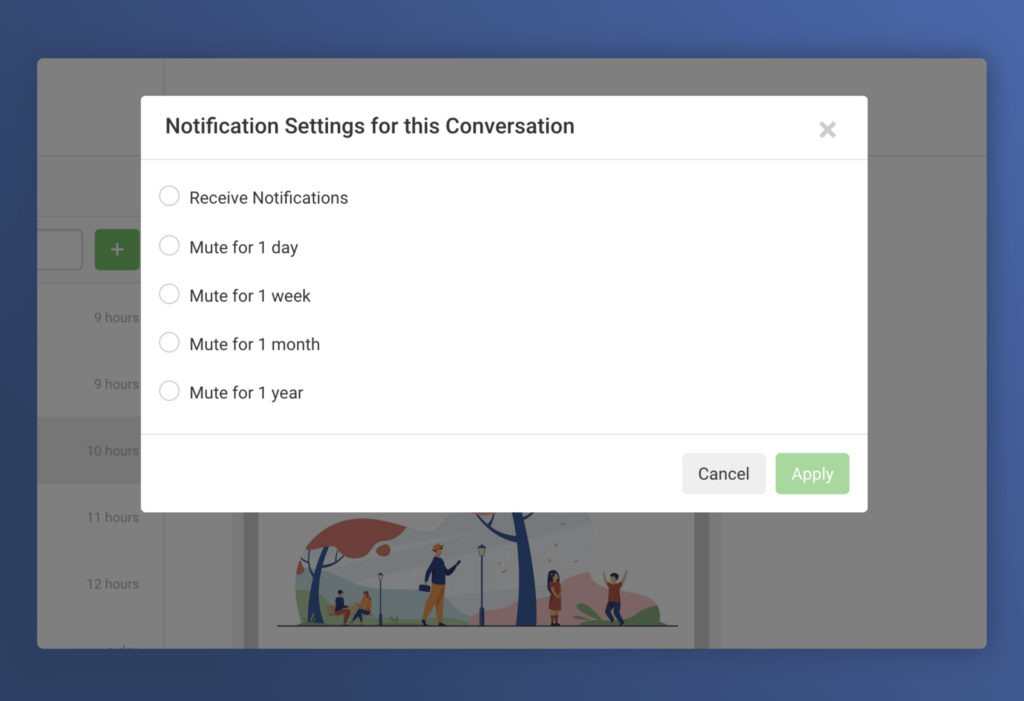
Figure: Mute Setting for a Chat
Channel Chat Header
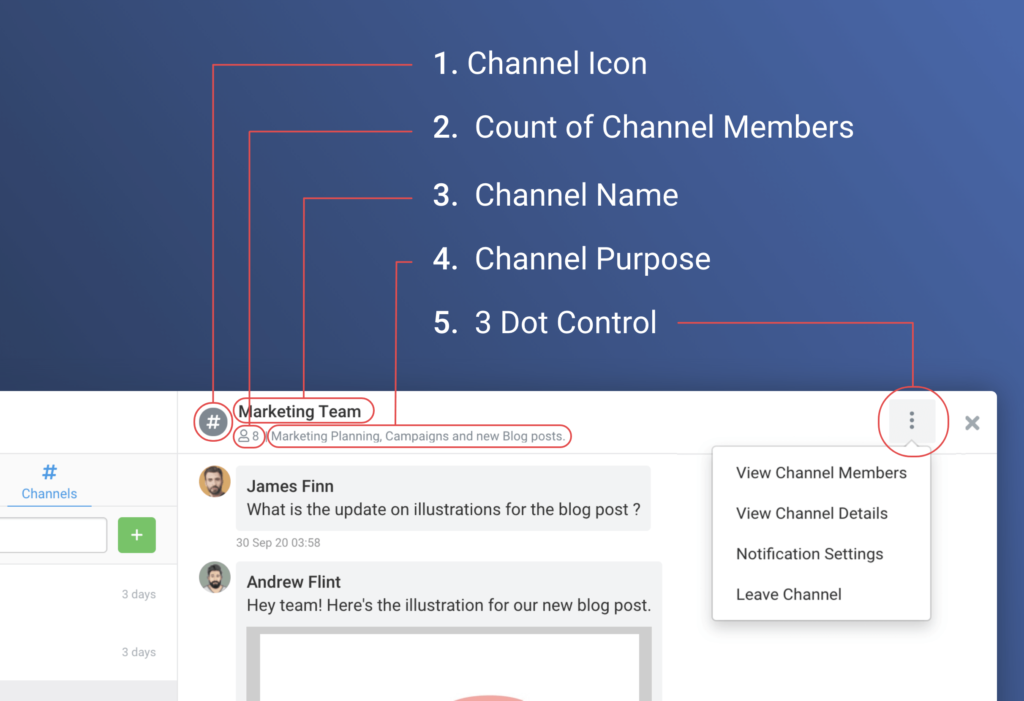
Figure: Channel Header
The channel header displays the following
- Channel Icon (Public or Private)
- Count of Channel Members
- Channel Name
- Channel Purpose
- 3 dot control includes the following options
- View Channel Members
- View Channel Details
- Notification Settings
- Leave Channel
View Channel Members
Click the View Channel Members option to see a list of users that are members of a specific channel. Use the search option to quickly search through a long list if required.
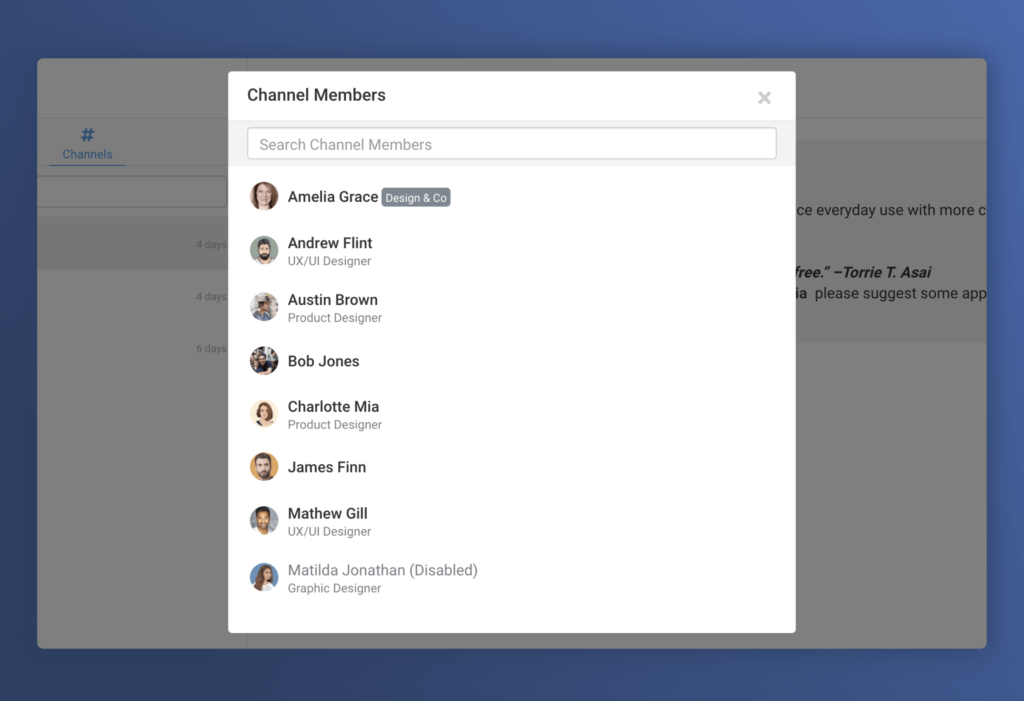
Figure: View Channel Members
View Channel Details
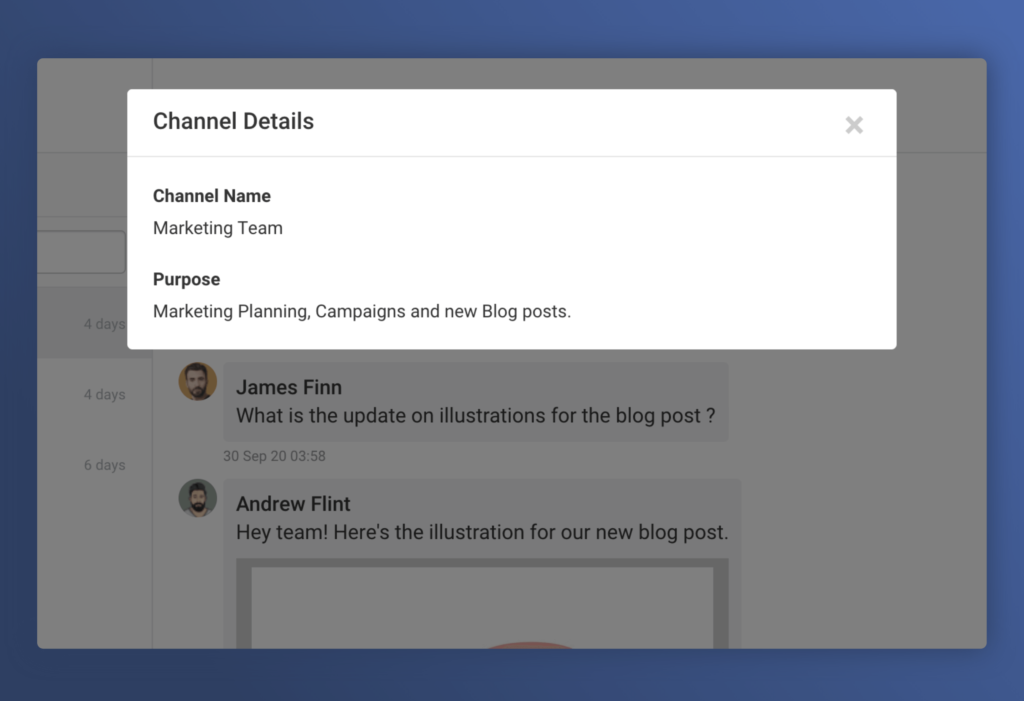
Figure: Channel Details
Click the View Channel Details option to see the Channel Name and Purpose in full.
Leave Channel
If you wish to leave a channel, then click this option. A system message will be posted in the channel letting all the members know that you have left the channel.
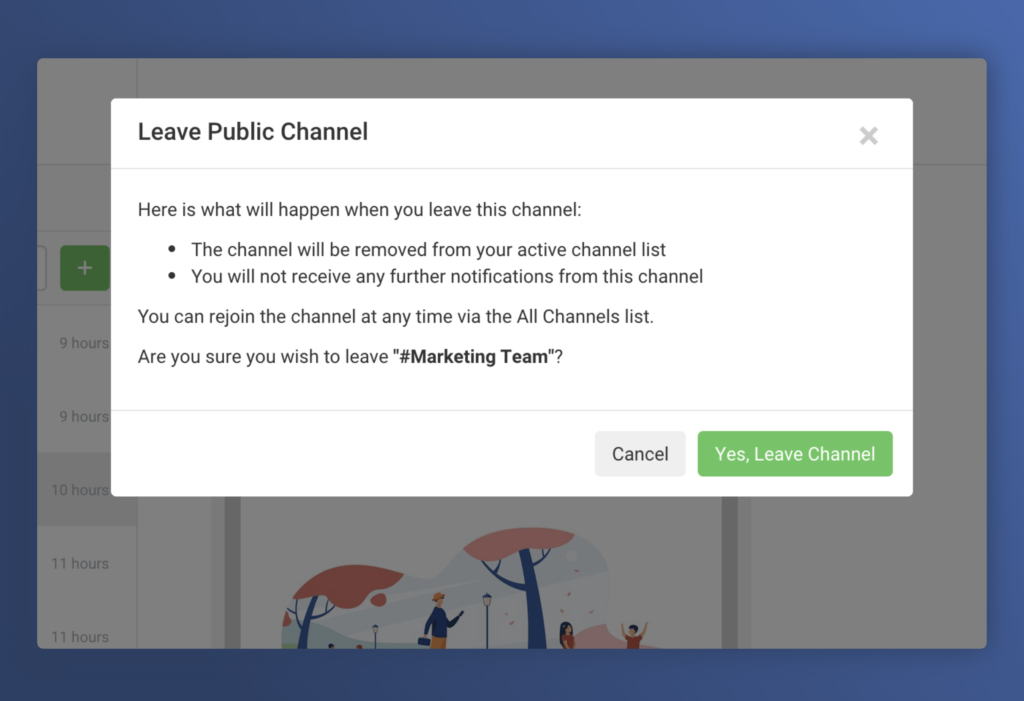
Figure: Leave Channel
Message Input
You can contribute to the conversation by writing messages, sharing files, and mentioning members. Thanks to a variety of options, messaging is flexible and helps keep everyone up-to-date.
New message can be sent by clicking the blue “Post” button or by pressing Ctrl + Enter on Windows and Cmd + Enter on Mac.
Format Messages
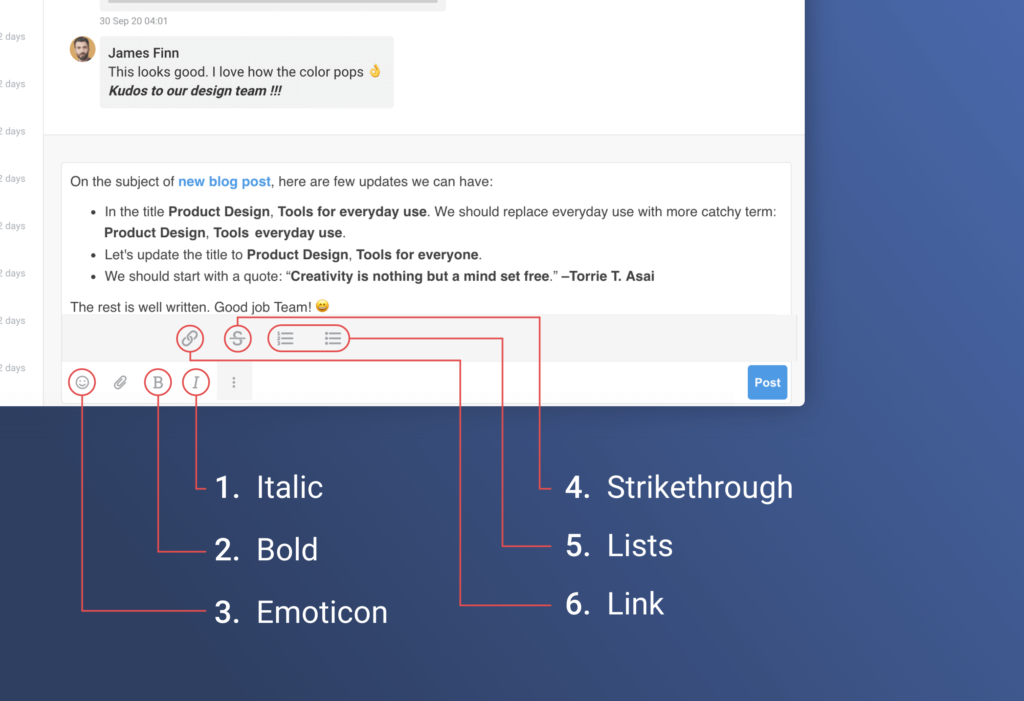
Figure: Message Input
Use the messaging formatting options to add a bit more clarity to your message.
- Italic: Select text, then click I italic icon in the formatting toolbar. Alternatively select text, then press Ctrl I on Windows or Command I on Mac.
- Bold: Select text, then click the B bold icon in the formatting toolbar. Alternatively select text, then press Ctrl B on Windows or Command B on Mac.
- To add an Emoticon to the message click the Emoticon icon and select from the list of available emoticons.
- Strikethrough: Select text, then click
strikethrough icon in the formatting toolbar.
- Lists:
- Ordered List: Select text, then click the ordered list icon in the formatting toolbar.
- Bulleted List: Select text, then click the bulleted list icon in the formatting toolbar.
- For both lists, press Enter to create a new pre-formatted line
- Link: Select text, then click the link icon in the formatting toolbar. Copy the link you’d like to share and paste it in the URL field and click Insert.
Attach Files
Video: Attaching Files
- Click the attachment icon from the formatting toolbar, select the files from your computer you would like to attach and click open.
- The Upload Files modal will open. You can optionally type any text that should accompany the files and click Upload.
- You can also copy the files to your clipboard by copying them first and then press Ctrl V on Windows or Command V on Mac to trigger the Upload Files modal.
Mention People
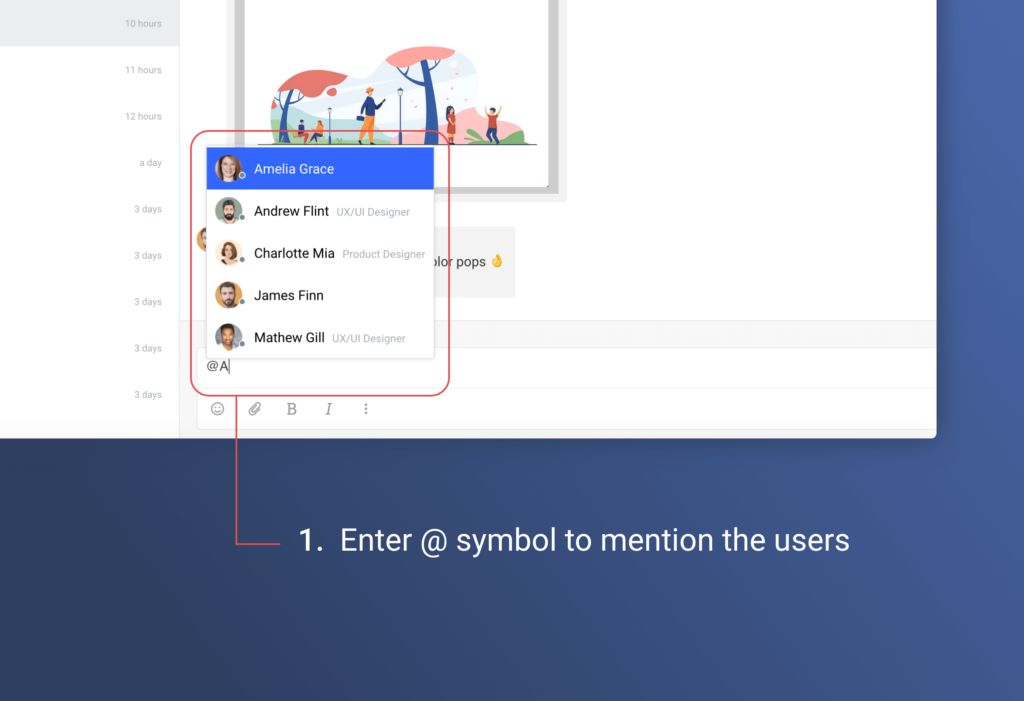
Figure: Mention People
Enter @ symbol to mention the users you want to get the attention of. Mentions are great to ask for feedback or bring someone’s attention to a specific action item.
Notifications

Figure: Chat Notification Settings
When you are granted access to the chat module by default you will be notified about the following notification events via Browser InApp, Web Push and Mobile Push (if you have installed the Avaza Chat App)
- Direct Message (message in a direct chat you are a member of)
- Direct Message Mention (when another member of the direct chat mentions you)
- Channel Message (message in a channel chat you are a member of)
- Channel Message Mention (when another member of the channel chat mentions you)
You can disable notifications for certain events, configure particular sound and more by visiting the notification settings page.